


4
I. REMOVAL OF O.E.M. EQUIPMENT.
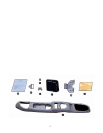
1. Remove and retain OEM overhead console assembly by removing one (1) OEM screw in front pocket. Pull
console down and disconnect wiring. Set aside in a safe place for later re-installation.
2. Remove and retain rear A/C control assembly. Assembly housing is secured with two (2) spring loaded
fasteners on front of housing. Pull down to disengage, then slide forward to clear bracket. Disconnect
wiring. Set assembly aside in a safe place for re-use later.
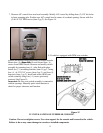
3. Remove center A/C vent in headliner using two scribe points in indicator holes on vent and twist.
II. PREPARATION OF VEHICLE.
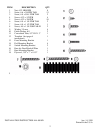
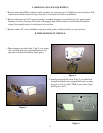
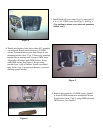
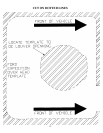
1. Place template provided (item 12 pg 2) over center
A/C vent hole with arrow pointing forward. Cut
and remove indicated headliner. See Figure 1.
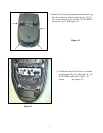
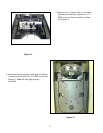
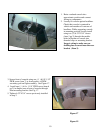
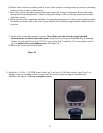
2. Install plywood block (item 18 pg 2) provided in kit
through modified louver opening and secure in place
using two (2) # 8 x 9/16" PWH screws (item 3 pg2).
See Figure 2 and 3.
Figure 1
Figure 2
Figure 3