Getting Started Getting Started
5
ENGLISH
ENGLISH
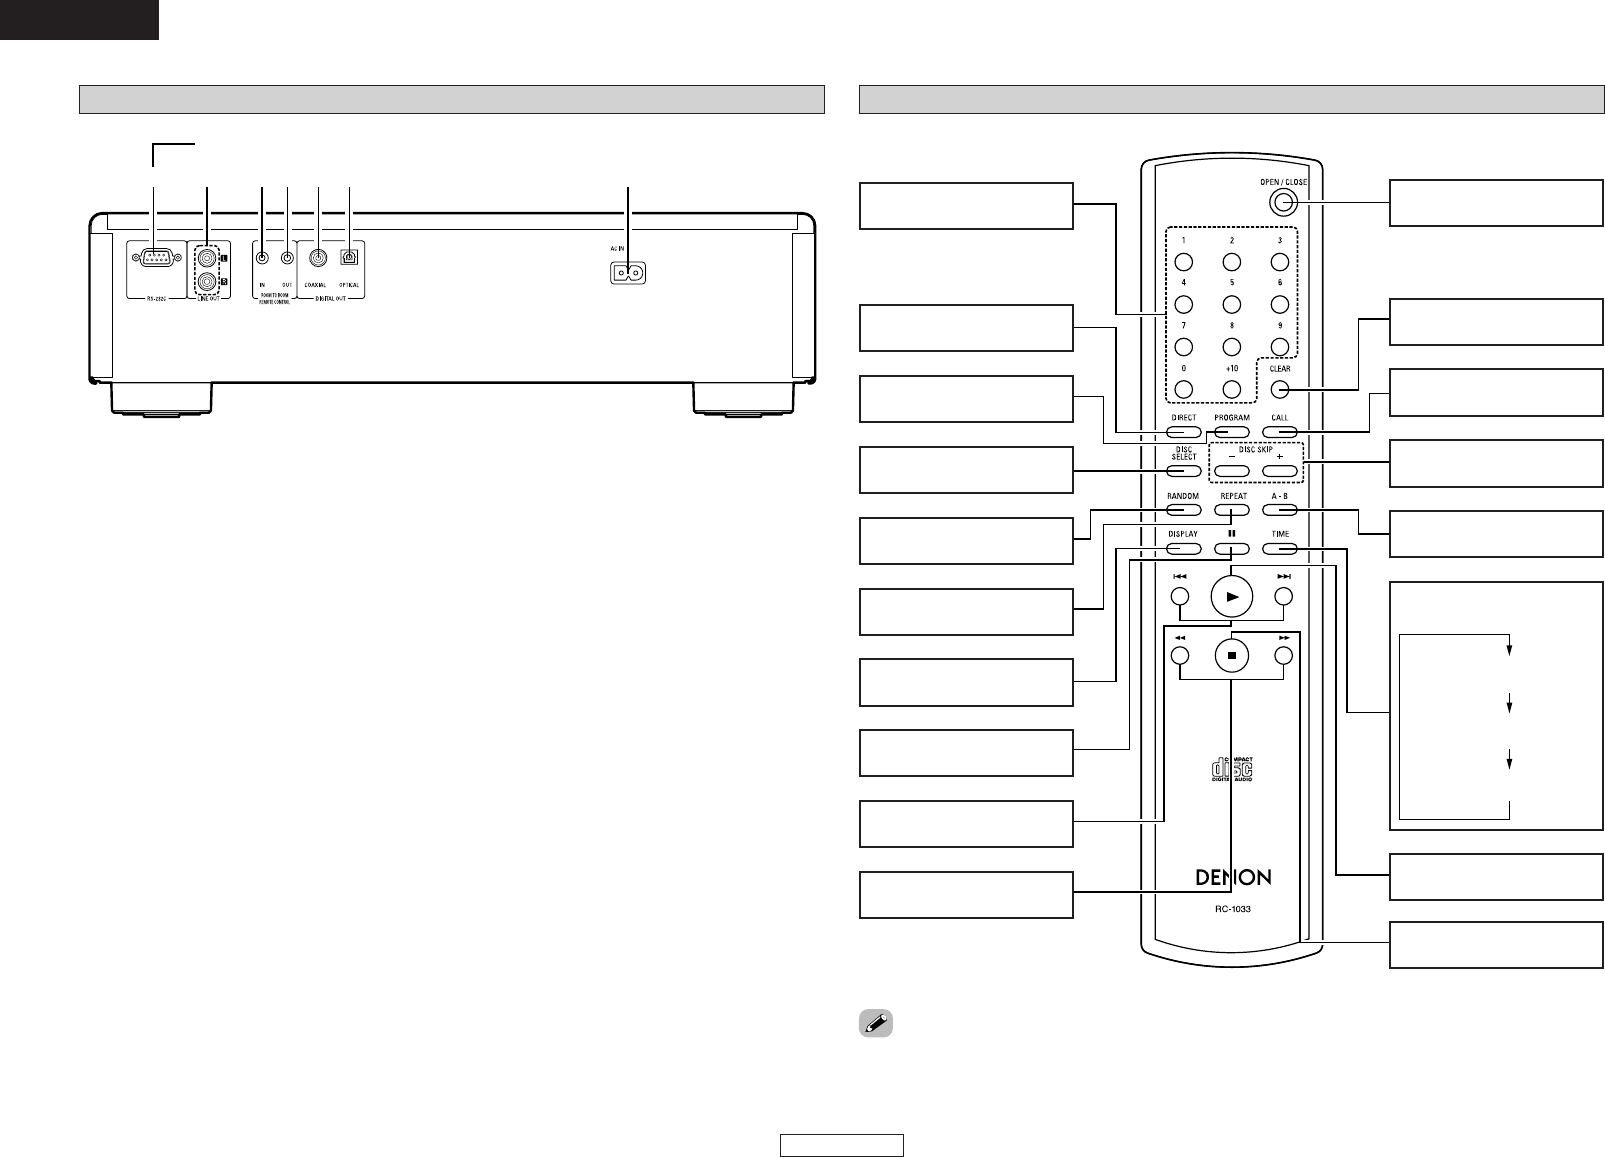
Remote control unit
Number buttons
(0 ~ 9, +10)
····················
(8, 9)
DIRECT button
···············································
(9)
PROGRAM button
···············································
(9)
DISC SELECT button
···············································
(8)
RANDOM button
············································
(10)
REPEAT button
············································
(10)
DISPLAY button
············································
(10)
Pause button (3)
···············································
(8)
Skip buttons
(8, 9)
························
(8)
Search buttons
(6, 7)
··························
(9)
CLEAR button
···············································
(9)
CALL button
···············································
(9)
A-B button
············································
(10)
DISC SKIP (+/–) buttons
··········································
(7, 8)
TIME button
·················
(2, 5)
Switches the time display
Play button (1)
···································
(8, 9, 10)
Stop button (2)
··········································
(7, 8)
OPEN/CLOSE button
··········································
(7, 8)
•If the automatic search forward button (9), automatic search reverse button (8) or +10 button are
held in, the function of these button will be repeated.
Rear panel
q er t
u
yw
q RS-232C terminal (DCM-390 only)
This is a terminal for future system expansion.
w LINE OUT terminal
Connect these to the amplifier’s input terminal.
e REMOTE CONTROL jack
(ROOM TO ROOM IN)
This is the input connector for wired remote
control.
Consult your DENON dealer if you wish to use
this connector.
r REMOTE CONTROL jack
(ROOM TO ROOM OUT)
This is the output connector for wired remote
control.
Consult your DENON dealer if you wish to use
this connector.
t COAXIAL terminal
This terminal outputs digital data.
Connect using a 75 Ω/ohms coaxial cable
(commercially available) intended for digital
audio connections.
y OPTICAL terminal
Digital data is output in optical form from this
terminal.
Connect using an optical fiber cable
(commercially available).
u AC inlet
Connect to an AC power supply using the
included power supply cord.
DCM-390 only
Elapsed time of currently
playing track
Remaining time of
currently playing track
Remaining time of all
remaining tracks


