61
Before Installation
Before Installation
Notes
Be sure to disconnect the battery negative terminal before
installing the receiver.
Components
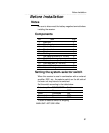
No. Item Q'ty
1 Main unit 1
2 Mounting sleeve 1
3 Side bracket 2
4 Rear bracket 1
5 Bezel 1
6 Bushing 1
7 Self-tapping screw (6 x 16 mm) 2
8 Stud bolt 1
9 Flat head screw (5 x 8 mm) 4
10 Hex-head bolt (5 x 20 mm) 2
11 Hex nut (5 mm) 2
12 Interconnecting cable 1
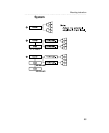
Setting the system-selector switch
When this receiver is used in combination with an external
amplifier, DSP, etc., the selector switch on the left side of
the main unit may have to be switched.
Set the switch according to the table below:
External amplifier DSP/EQ/XOVER
Switch
None None OFF*
None Connected ON
Connected Connected OFF*
Connected None OFF*
:Pattern of selector switch at shipping
MAIN UNIT LEFT SIDE VIEW


