2
11
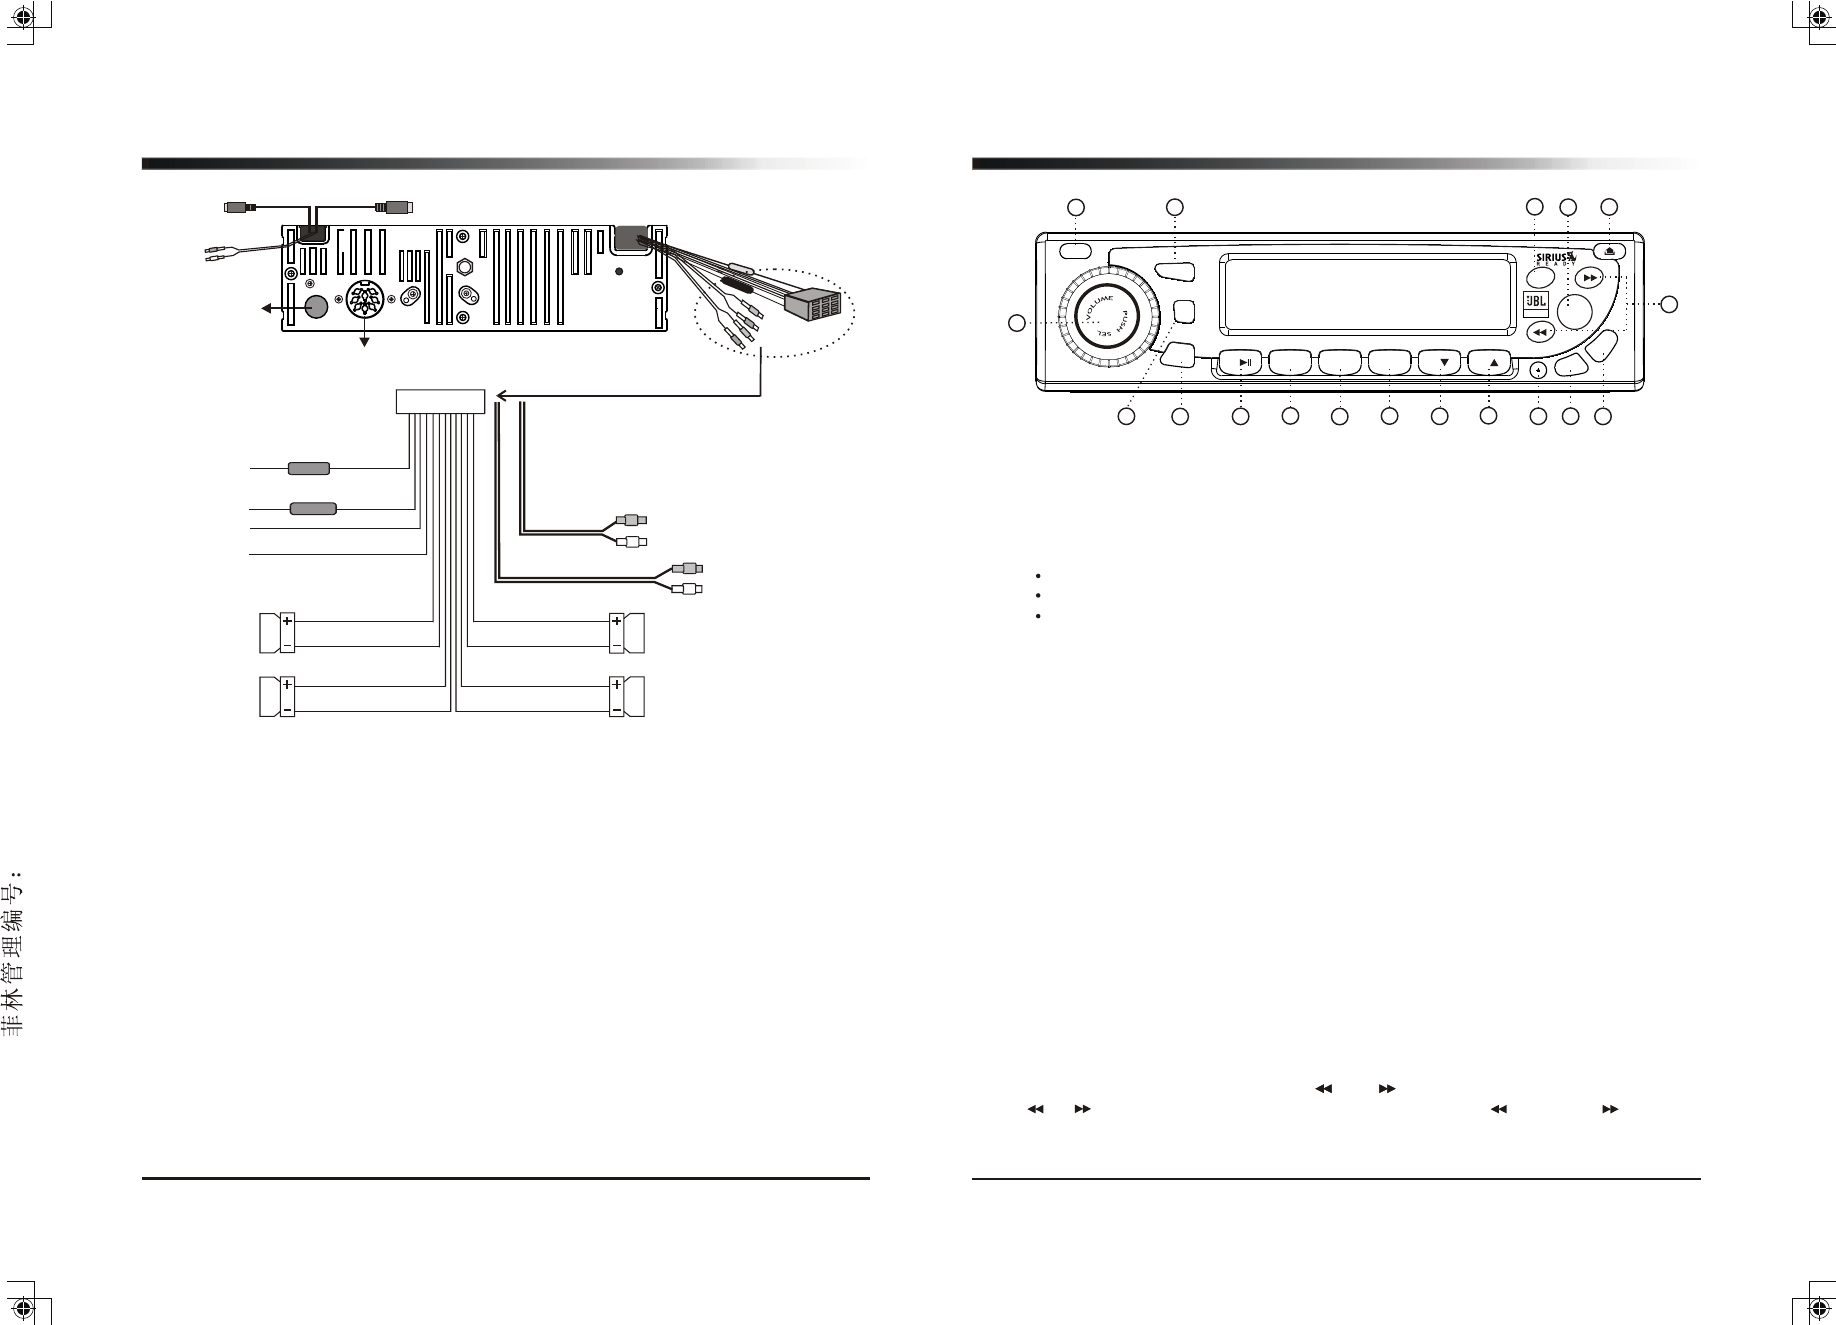
Installation Notes
Applicable to both 2 and 4-speaker connection:
A. Connections
B. Din cable connection for remote control
C. Din cable connection for SIRIUS control
D. AUX-IN
E. CD changer socket
F. Antenna socket
This radio contains four separate power amplifiers. To prevent possible damage to
these amplifiers please ensure the following:
i) The boat chassis is not used as a loudspeaker ground(-).
ii) Front and rear loudspeaker connecting wires are not joined together.
iii) Any wires not used when completing a two speaker installation are fully insulated.
iv) The memory wire (yellow) is connected to a permanent + 12V supply.
v) The power wire (red) is connected via the ignition switch of the boat.
Wiring identification
CONNECTOR
(AUTO ANT)
( BACK-UP B+ )
FUSE
1A
( GROUND )
FUSE
( IGNITION B+ )
Blue
Yellow
Black
Red
Gray
Gray/Black
Violet
Violet/Black
( Front Right )
( Rear Right )
Green
Green/Black
White
White/Black
( Front Left )
( Rear Left )
10A
Red
White
Black
White
A
Red
Gray
Rear Line out
Front Line out
Operating the CD & CD changer
1. Loading a CD
Open the door by pushing button (14).
Insert a CD label side up into the slot opening, then close the door.
The CD will begin playing automatically after it is loaded.
2. Select the CD->CDC by pressing the "MODE" button (3) .
3. Press preset button (10) or (11) to choose the DISC that you would like to play.
(This button works when you install the CD changer to the radio unit. CDC is optional.)
4. Play / Pause (6)
Push to pause and push again to resume play.
5. Intro Scan (7)
Press this button to hear the first 10 seconds of each track on the disc.
Press this button again to restore the player to its normal play mode.
6. Repeat play button (8)
While playing a desired track, press RPT button to play the track repeatedly.
Press RPT button again to return to normal play mode.
7. Random play button (9)
Press RDM button to play all tracks on a CD in random sequence.
Press RDM button again to return the player to normal mode.
8. Track Tuning (15)
Search the tracks on the DISC with the and buttons. If you press and hold
the or button continuously, the track goes fast - forward or rewinds .
Notes:
NEVER insert foreign objects into the CD slot opening.
If a CD is difficult to insert, there may already be a CD loaded in the unit.
Some recorded CD-Rs or CD-RWs may not be usable with this CD player.
4
2
5
13
3
6
1
7
8
9
10
11
12
14
15
17
18
16
8
.D
IS
9.
A
.
P
S
PWR
2 INT
3 RPT
4 RDM
1
5
MODE
7.SCN
FLIP DOWN / COMPACT DISC PLAYER HI - POWER 4x45Watts
MR-17
0. LD
MUT
6
SH.
SR
BD/FN
MARINE
F
(ANT. socket)
E
(CD changer socket)
D
(AUX-IN)
C
(SIRIUS control)
B
(Remote control)
EST.JBL(MR-17)-061205-I/M


