


Continued on Next Page
SB-SMRT-4-2/8W3V3 INSTR_SKU# 011288
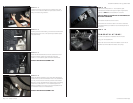
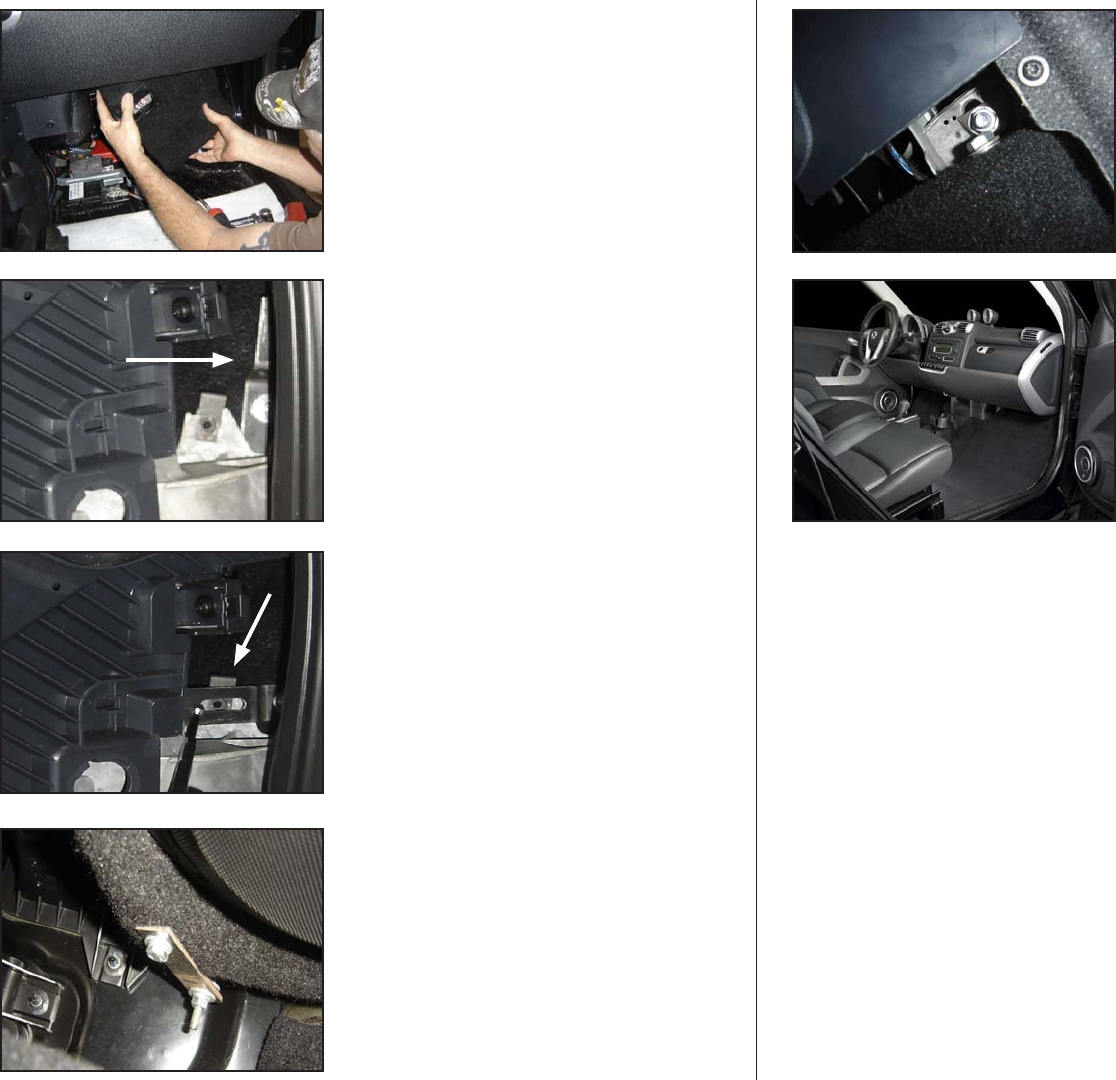
S T E P 1 4
Rotate the Bottom Bracket on the 1/4-20 All Threaded Rod
so that it lines up with the threaded insert in the Stealthbox®,
you may need to raise or lower the position of the Bottom
Bracket on the All Threaded Rod in order to align everything.
Install the included 3/8-16 x 1” Hex Head Bolt, Split Lock
Washer and Washer as shown, securing the Stealthbox® via
it’s Threaded insert to the Threaded Rod.
DO NOT TIGHTEN THIS ASSEMBLY YET!
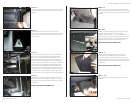
S T E P 1 3
Rotate the Elevated Bracket so that the slotted end is over
the Speed Clip (as shown) and, install the included
1/4-20 x 1” Hex Head Bolt, Split Lockwasher and Washer.
DO NOT TIGHTEN THIS ASSEMBLY YET!
S T E P 1 2
Looking at the end of the dash, you should see the Elevated
Bracket pointing up next to the previously installed Speed
Clip. (See Arrow)
S T E P 1 1
Slide the enclosure up into place, it’s a tight fit and, you’ll
need to move it around a little but if you start as shown, it
will go in without any problems.
Page 3 • JL Audio, Inc 2009
S T E P 1 6
C O N G R A T U L A T I O N S !
You have completed the installation for this model!
Enjoy your new Stealthbox®!
Please refer to the Power Recommendation section for an
amplifier recommendation and basic set-up help.
S T E P 1 5
Install the included, 3/8-16 x 1” Hex Head Bolt, Split
Lockwasher and Washer through the Right Angle Bracket
installed in STEP 8 into the Stealthbox® as shown.
NOW YOU NEED TO TIGHTEN ALL OF THE PREVIOUSLY
INSTALLED HARDWARE!
Re-install the woofer into the enclosure.
Re-assemble the end of the dash in the reverse order that
it was disassembled, re-install the Foam Underlayment and
the Carpet.