


3
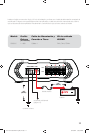
Wiring: Disconnect the vehicle’s battery to avoid an electrical short. Then, connect the ground wire to the
amplifi er. Make the ground wire short, 24” (60cm) or less, and connect it to a paint-and-corrosion-free, solid,
metal area of the vehicle’s chassis. Adding an additional ground wire of this same gauge (or larger) between the
battery’s negative post and the vehicle chassis is recommended.
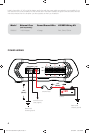
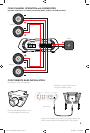
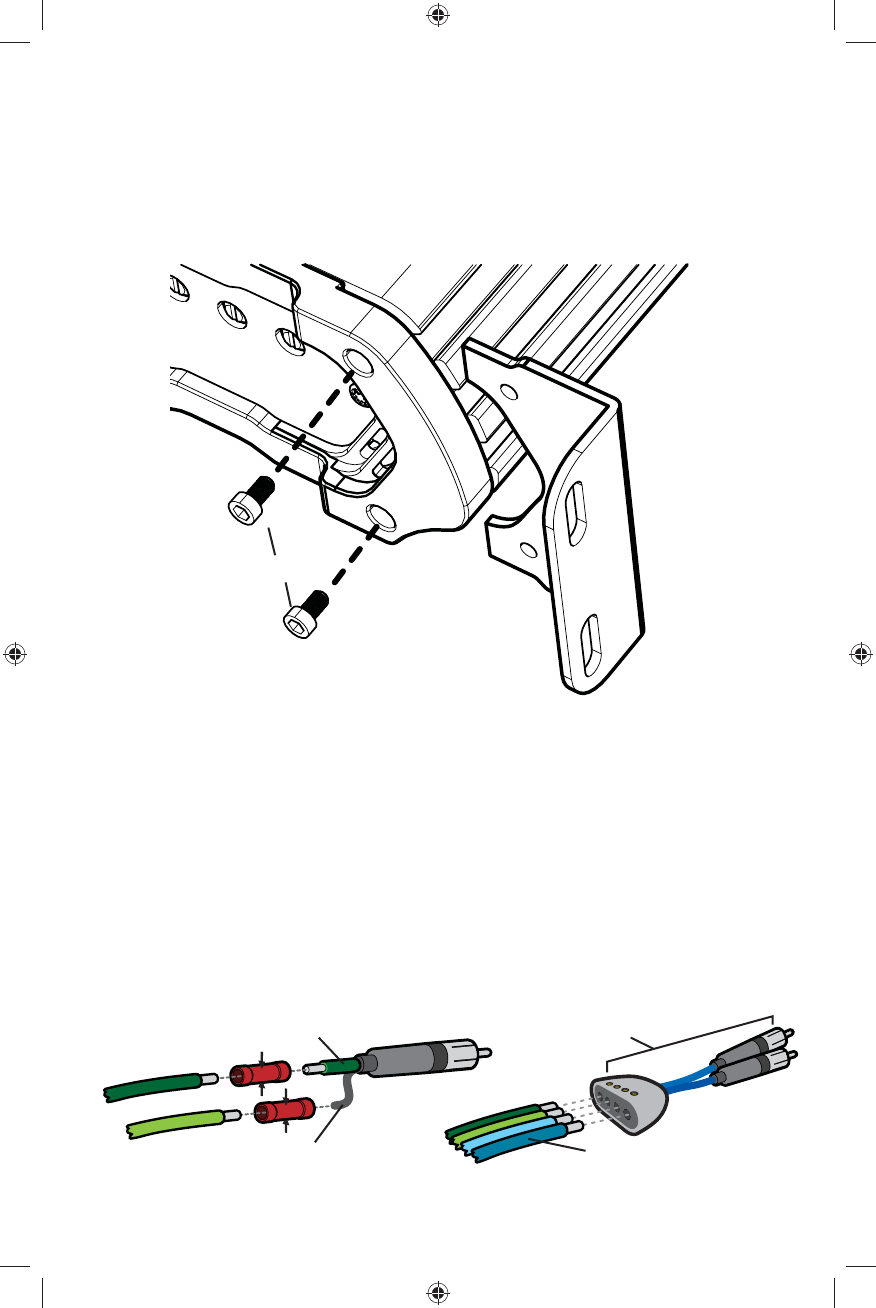
The CX amplifi er has dual input sensitivity differential RCA inputs which will receive either high or low level signals
from your car stereo’s source unit. A high-level signal can be run from the source unit’s speaker outputs to the
stereo RCA input on the end panel of the amplifi er using the KICKER ZISL as shown (make sure you set the CX
amplifi er’s input level switch to “HI”). Alternatively, the signal can be delivered to the amplifi er using the low-level
RCA outputs on the source unit. Set the input level switch on the end panel of the amplifi er to “LO”. Keep the
audio signal cable away from factory wiring harnesses and other power wiring. If you need to cross this wiring,
cross it at a 90 degree angle.
source unit
high-level speaker
outputs
to amplifi er
shield
+
–
core conductor
KICKER ZISL (optional)
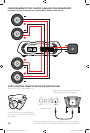
source unit high-level
speaker outputs
OR
to amplifi er
double-slotted
bracket
hex screws
amplifi er side panel
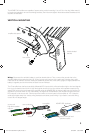
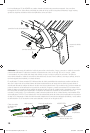
VERTICAL MOUNTING
The KICKER CX Amplifi ers are capable of space-saving vertical mounting. Use a 2.5mm hex key (Allen wrench)
to loosen the endpanel, remove the existing brackets, then insert and tighten the double-slotted brackets to the
amplifi er as illustrated.
+
+
–
–
2012 CX 5-Channel Amp Rev F.indd 32012 CX 5-Channel Amp Rev F.indd 3 6/22/2012 3:08:47 PM6/22/2012 3:08:47 PM