


13 -
First installation
Automatic programming
Automatic programming of the TV set is started the first time you switch it on. Follow
the menus.
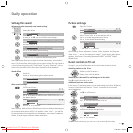
Settings can be selected by pressing one of the directions ...
... and confirm your settings by pressing OK. You then go to the
next menu.
Back to the previous menu.
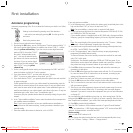
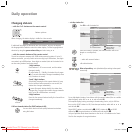
1. First you have to select the menu language.
2. By pressing the OK button, you can call the menu “Connect antenna cable(s)“. If
you want to receive digital stations via satellite, then choose “DVB-S“ - confirm
using the yellow coloured key. If you also want to receive digital terrestrial
stations (DVB-T), then select “DVB-T“.
Also select “Antenna/cable (analo-
gue)“ - this way the standard analo-
gue stations can also be searched for
and saved. If you can receive digital
stations from the cable network, then
select “DVB-C“ using the yellow
coloured key.
3. For the country-specific station sorting and for presettings for DVB-T and DVB-C,
enter the location at which the TV set is operated.
4. If you have selected “DVB-T“, you then reach the menu “Antenna
DVB-T“. If you use an active antenna, then select “yes (5V)“.
5. If you have selected “DVB-C“, you generally leave the symbol rates and modulati-
on types unchanged.
If other symbol rates are used in your cable network for broadcasting, enter the
values with the numeric buttons of the remote control. If only one symbol rate is
used, enter the same value for both symbol rates. If other modulation types are
used for broadcasting in your cable network, select them in the menu. If only one
modulation type is used, select “none“ for modulation type 2.
If necessary, ask your specialist dealer about the necessary settings for your cable
network.
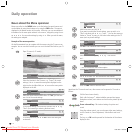
6. In the “Select satellite installation“ menu, make the selection that corresponds to
your satellite antenna installation.
Note: If you have any questions on how your satellite antenna installation is
configured and on the antenna settings, consult your antenna installer or your
specialist dealer.
7. Select the satellite the antenna is directed at, such as ASTRA1.
If you only receive one satellite...
8. In the following menu, specify whether the station search should take place in the
high and low band (“Yes“) or only in the low band (“No“).
Note: For most satellites, a station search is required in both bands.
9. For the low band and high band, the standard frequencies 9750 MHz (9.75 GHz)
and 10600 MHz (10.6 GHz) are preset.
If your satellite antenna is equipped with an LNC (LNB) with a divergent oscillator
frequency, specify the corresponding frequency for low and high band respective-
ly.
Note: The correct display of the received frequencies in the “TV menu – Settings
– Channels – Manual adjustment“ depends upon this setting.
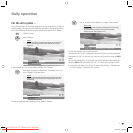
10. You should receive a picture with sound with the settings previously made (only
for ASTRA 1 and HOTBIRD). Then press OK.
11. In the “Pre-programming“ menu, select the factory-set pre-programming to
programme the satellite stations quickly.
To ensure all stations that can be currently received are searched for and saved,
select “No“ at this point.
Symbol rates: The standard symbol rates 22000 and 27500 are preset. If you
would like to receive stations with different symbol rates, specify the correspon-
ding values here using the numeric buttons on your remote control.
12. Press OK to obtain an overview of the settings with which the automatic pro-
gramming is to take place.
13. Press the OK button again and the station search will start. The TV set searches
for, sorts and saves all the TV stations that can be received, according to your
settings and the antennas connected.
14. When the TV stations are saved, you will receive a corresponding message.
15. Press the OK button and the set then searches for the radio stations.
16. The TV set searches for, saves and sorts all radio stations which can be received
with your antenna system.
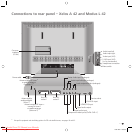
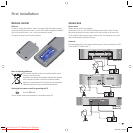
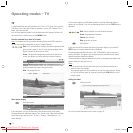
17. Then log on your video equipment, decoder and audio system using the connec-
tion wizard and connect these to the TV according to the connection diagram
displayed. If you want to connect other equipment later, you can find information
as of page 32.
You can repeat the initial installation at any time, e.g. after moving house. Call the
index using the INFO button (in the TV mode, if no menu is opened). Select the index
item “Repeat initial installation“ (you will find this listed separately before the letter
A). Press OK to start the initial installation.
Note: For DVB-T stations in UK the stations are tied to “Logical Channel Numbers”
– “LCN” and sorted from 1–799. Digital station without “LCN” are stored from 800
onwards. Analogue stations are stored from1001.
Station sorting
Note: not with DVB-T stations in UK.
You can change the station sorting that was carried out automatically later at any
time, see “TV menu – Settings – Stations – Change stations“.
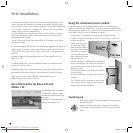
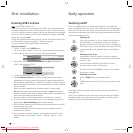
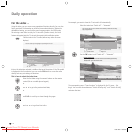
Initial installation
Connect antenna cable(s)
Proceed
Back
OK
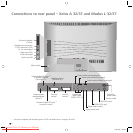
Connect/disconnect
Antenna cable(s) for: to antenna socket(s):
Antenna/cable (analogue) ANT TV
DVB-T ANT TV
DVB-C ANT TV
DVB-S ANT SAT
BA32789_021XelosModusRel_5_GB.in13 13BA32789_021XelosModusRel_5_GB.in13 13 15.01.2007 16:54:0415.01.2007 16:54:04
Downloaded From TV-Manual.com Manuals