


21
E
N
G
L
I
S
H
22
E
N
G
L
I
S
H
3332
CQ-C1200U/C1120U/C1110U/C1100U CQ-C1200U/C1120U/C1110U/C1100U
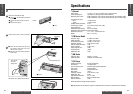
❐ General
Power supply: 12 V DC (11 V–16 V), test voltage 14.4 V, negative ground
Current consumption: Less than 2.2 A (CD play mode; 0.5 W×4 channels)
Maximum power output: 50 W×4 channels at 1 kHz, volume control maximum (CQ-C1200U/C1120U)
45 W×4 channels at 1 kHz, volume control maximum (CQ-C1110U/C1100U)
Tone adjustment range:
Bass: ±12 dB at 100 Hz
Treble: ±12 dB at 10 kHz
Suitable speaker impedance: 4–8 Ω
Preamp output voltage: 2.0 V (CD play mode; 1 kHz, 0 dB)
Output impedance: 200 Ω
Sub-Woofer output voltage: 2.0 V (CQ-C1200U)
Sub-Woofer output impedance: 200 Ω (CQ-C1200U)
Dimensions (W×H×D): 7"×1
15
/
16
"
×5
7
/
8
"
(178×50×155 mm)
Weight: 3 lbs. 1 oz (1.4 kg)
❐ FM Stereo Radio
Frequency range: 87.9 MHz–107.9 MHz
Usable sensitivity: 11.0 dBf. (1.25 µ
V,
75 Ω)
50 dB quieting sensitivity: 15.2 dBf. (1.6 µ
V,
75 Ω)
Frequency response: 30 Hz–15 kHz (±3 dB)
Alternate channel selectivity: 75 dB
Stereo separation: 42 dB (1 kHz)
Image response ratio: 75 dB
IF response ratio: 100 dB
Signal/noise ratio: 70 dB
❐ AM Radio
Frequency range: 530 kHz–1 710 kHz
Usable sensitivity: 28 dB/µV (25 µ
V,
S/N 20 dB)
❐ CD Player
Sampling frequency: 8 times oversampling
DA converter: 1 bit DAC system
Error correction system: Panasonic super decoding algorithm
Pick-up type: Astigma 3-beam
Light source: Semiconductor laser
Wave length: 780 nm
Frequency response: 20 Hz–20 kHz (±1 dB)
Signal/noise ratio: 96 dB
Total harmonic distortion: 0.01 % (1 kHz)
Wow and flutter: Below measurable limits
Channel separation: 75 dB
Above specifications comply with EIA standards.
Note: Specifications and the design are subject to modification without notice due to improvements in technology.
Specifications
1
2
1
2
3
4
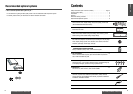
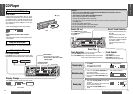
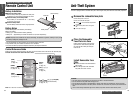
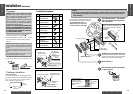
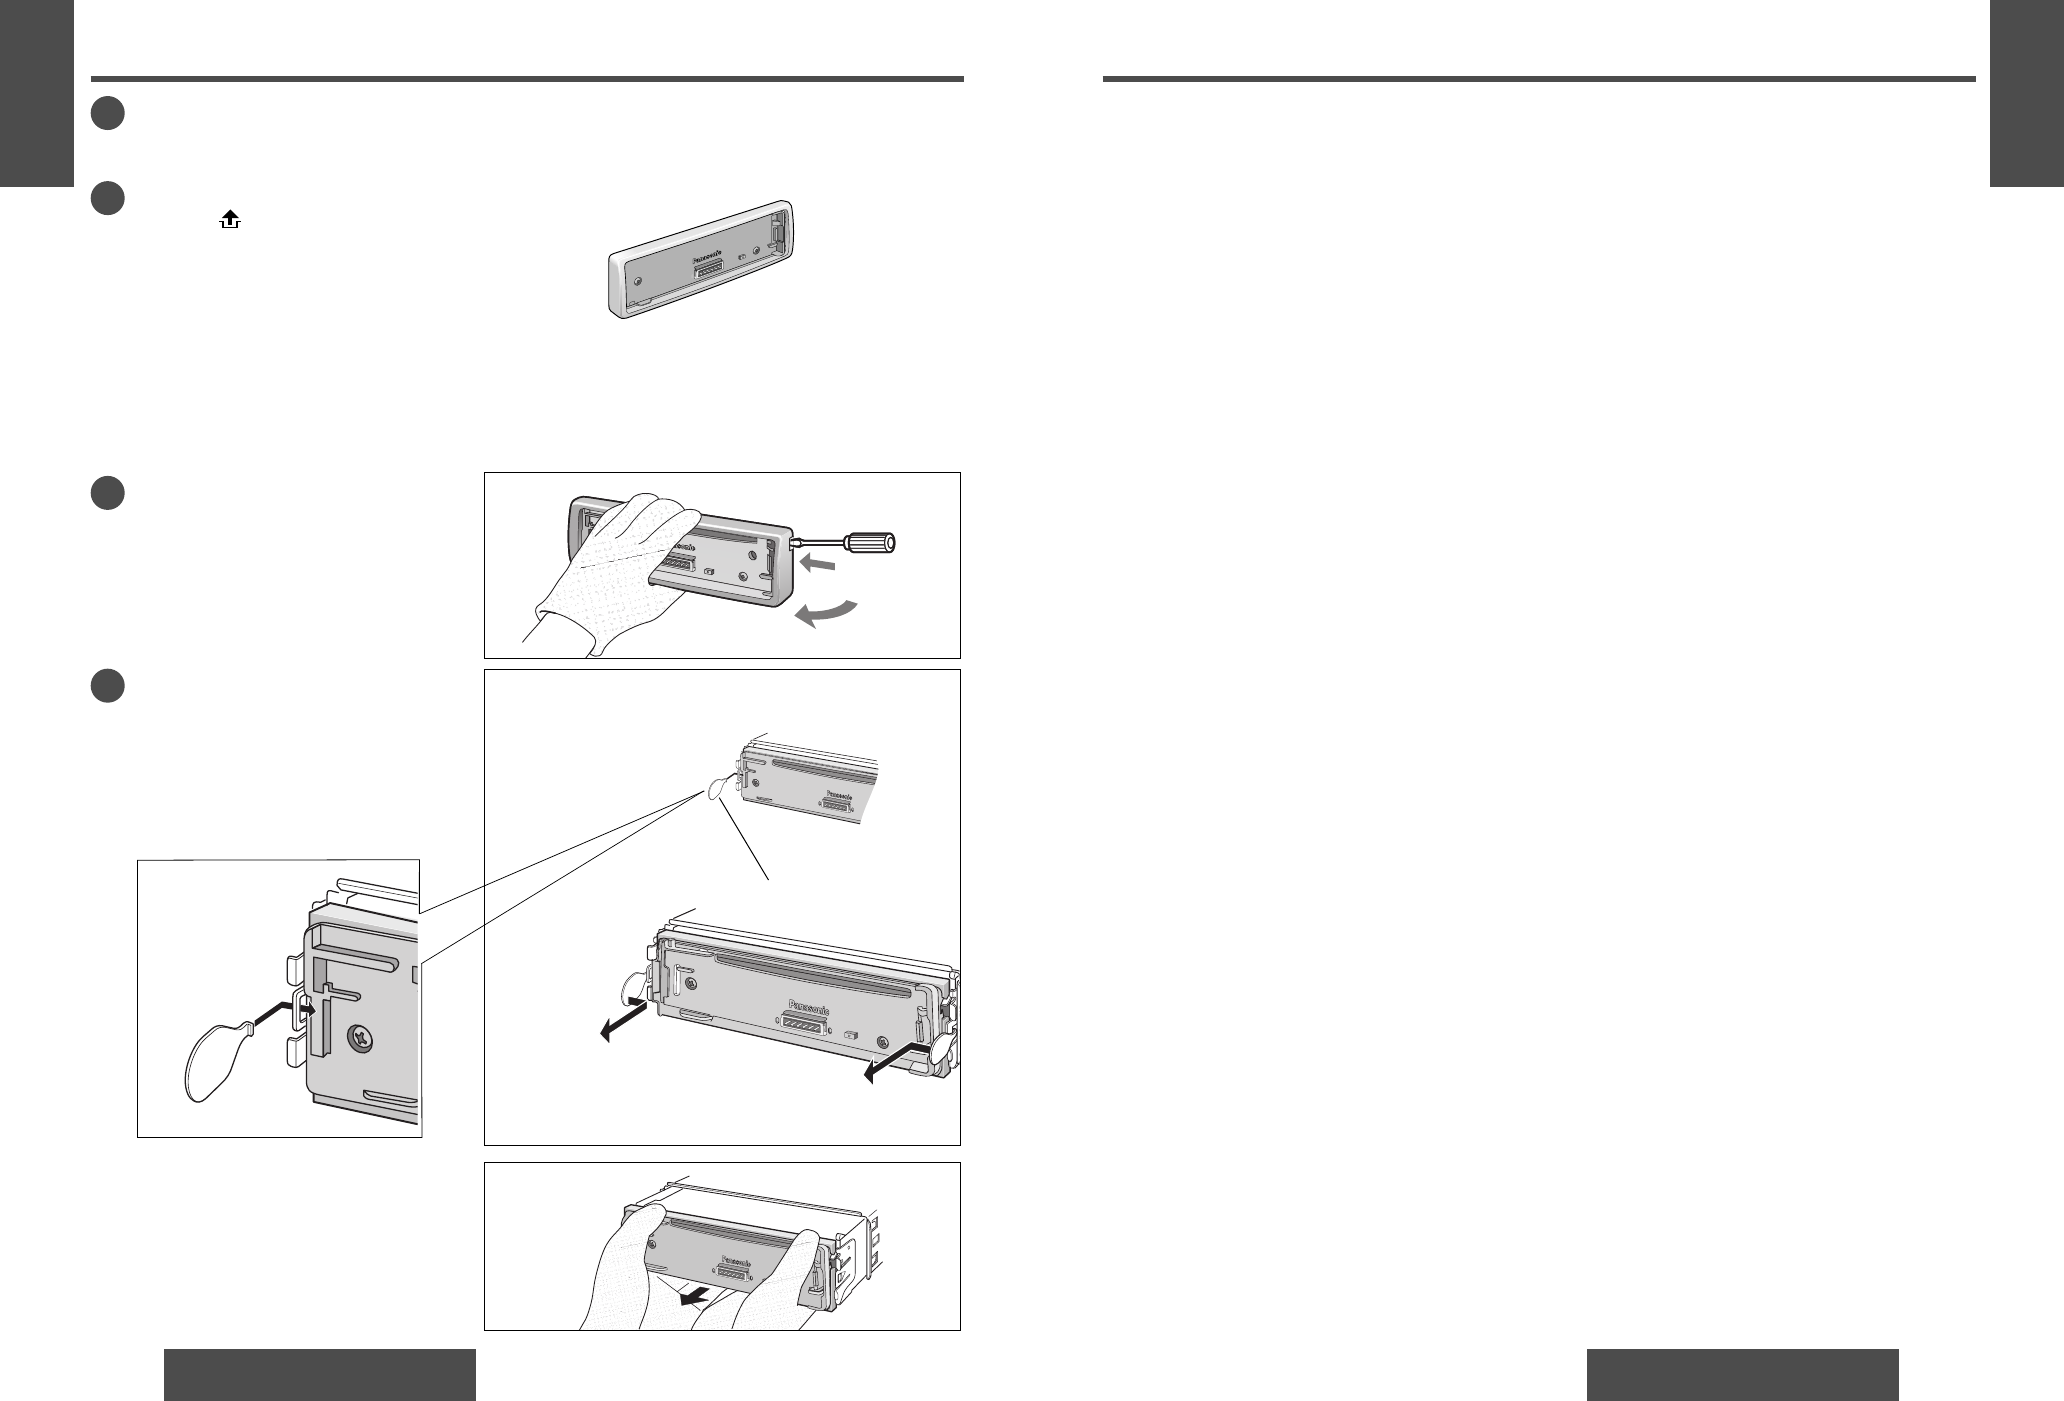
Switch off the power of the unit.
Remove the removable face plate.
q Press []. The removable face plate will
be opened.
w Push the face plate to either the right or
left.
e Pull it out towards you.
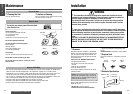
Remove the Trim Plate u with a screwdriver.
q Insert the Dismounting plate i along
the grooves on both sides of the main
unit until
“
click
”
is heard.
w Pull out the unit while pushing the plates
further inside.
Remove the unit by pulling with both hands.
Contact
q Press
u Trim Plate
Screwdriver
i Dismounting plate
Insert the tab
end in the
outer groove.
“
Click
”
q Insert
w Pull out
w