8
CQ-C1300U
E
N
G
L
I
S
H
CQ-C1300U
9
E
N
G
L
I
S
H
This can only be controlled through the
main unit.
This can only be controlled through the
remote control unit.
Operations with neither mark can be performed
either by the main unit or the remote control unit.
MP3/WMA Playback from CD-R/RW
You can play your MP3/WMA (Windows Media
Audio) fi les as well as regular CDs.
With up to 10 to 12 times* the capacity of a
conventional CD, a single MP3/WMA-encoded disc
can keep you entertained throughout your entire
journey.
*Depending on bit rate.
Large-sized Volume Control
An large-sized rotary volume control that looks like
one belonging to a Hi-Fi audio system is featured.
CD Changer Control
You can connect the optional CD changer unit. For
details, refer to the operating instructions on the CD
changer unit.
SQ (Sound Quality)
SQ is a function that can call up various sound
types at the touch of button in accordance with your
listening music type.
CQ-C1300U
CD changer
(CX-DP880U,
option)
Before Reading these Instructions
Features
System Upgrade
Note:
≥ This unit does not support Sirius satellite radio.
≥ You cannot connect 2 CD changers using the dual
CD changer selector (CA-CD55U, option).
Stereo power
amplifi er
(option)
Preparation
1
2
3
Battery Installation
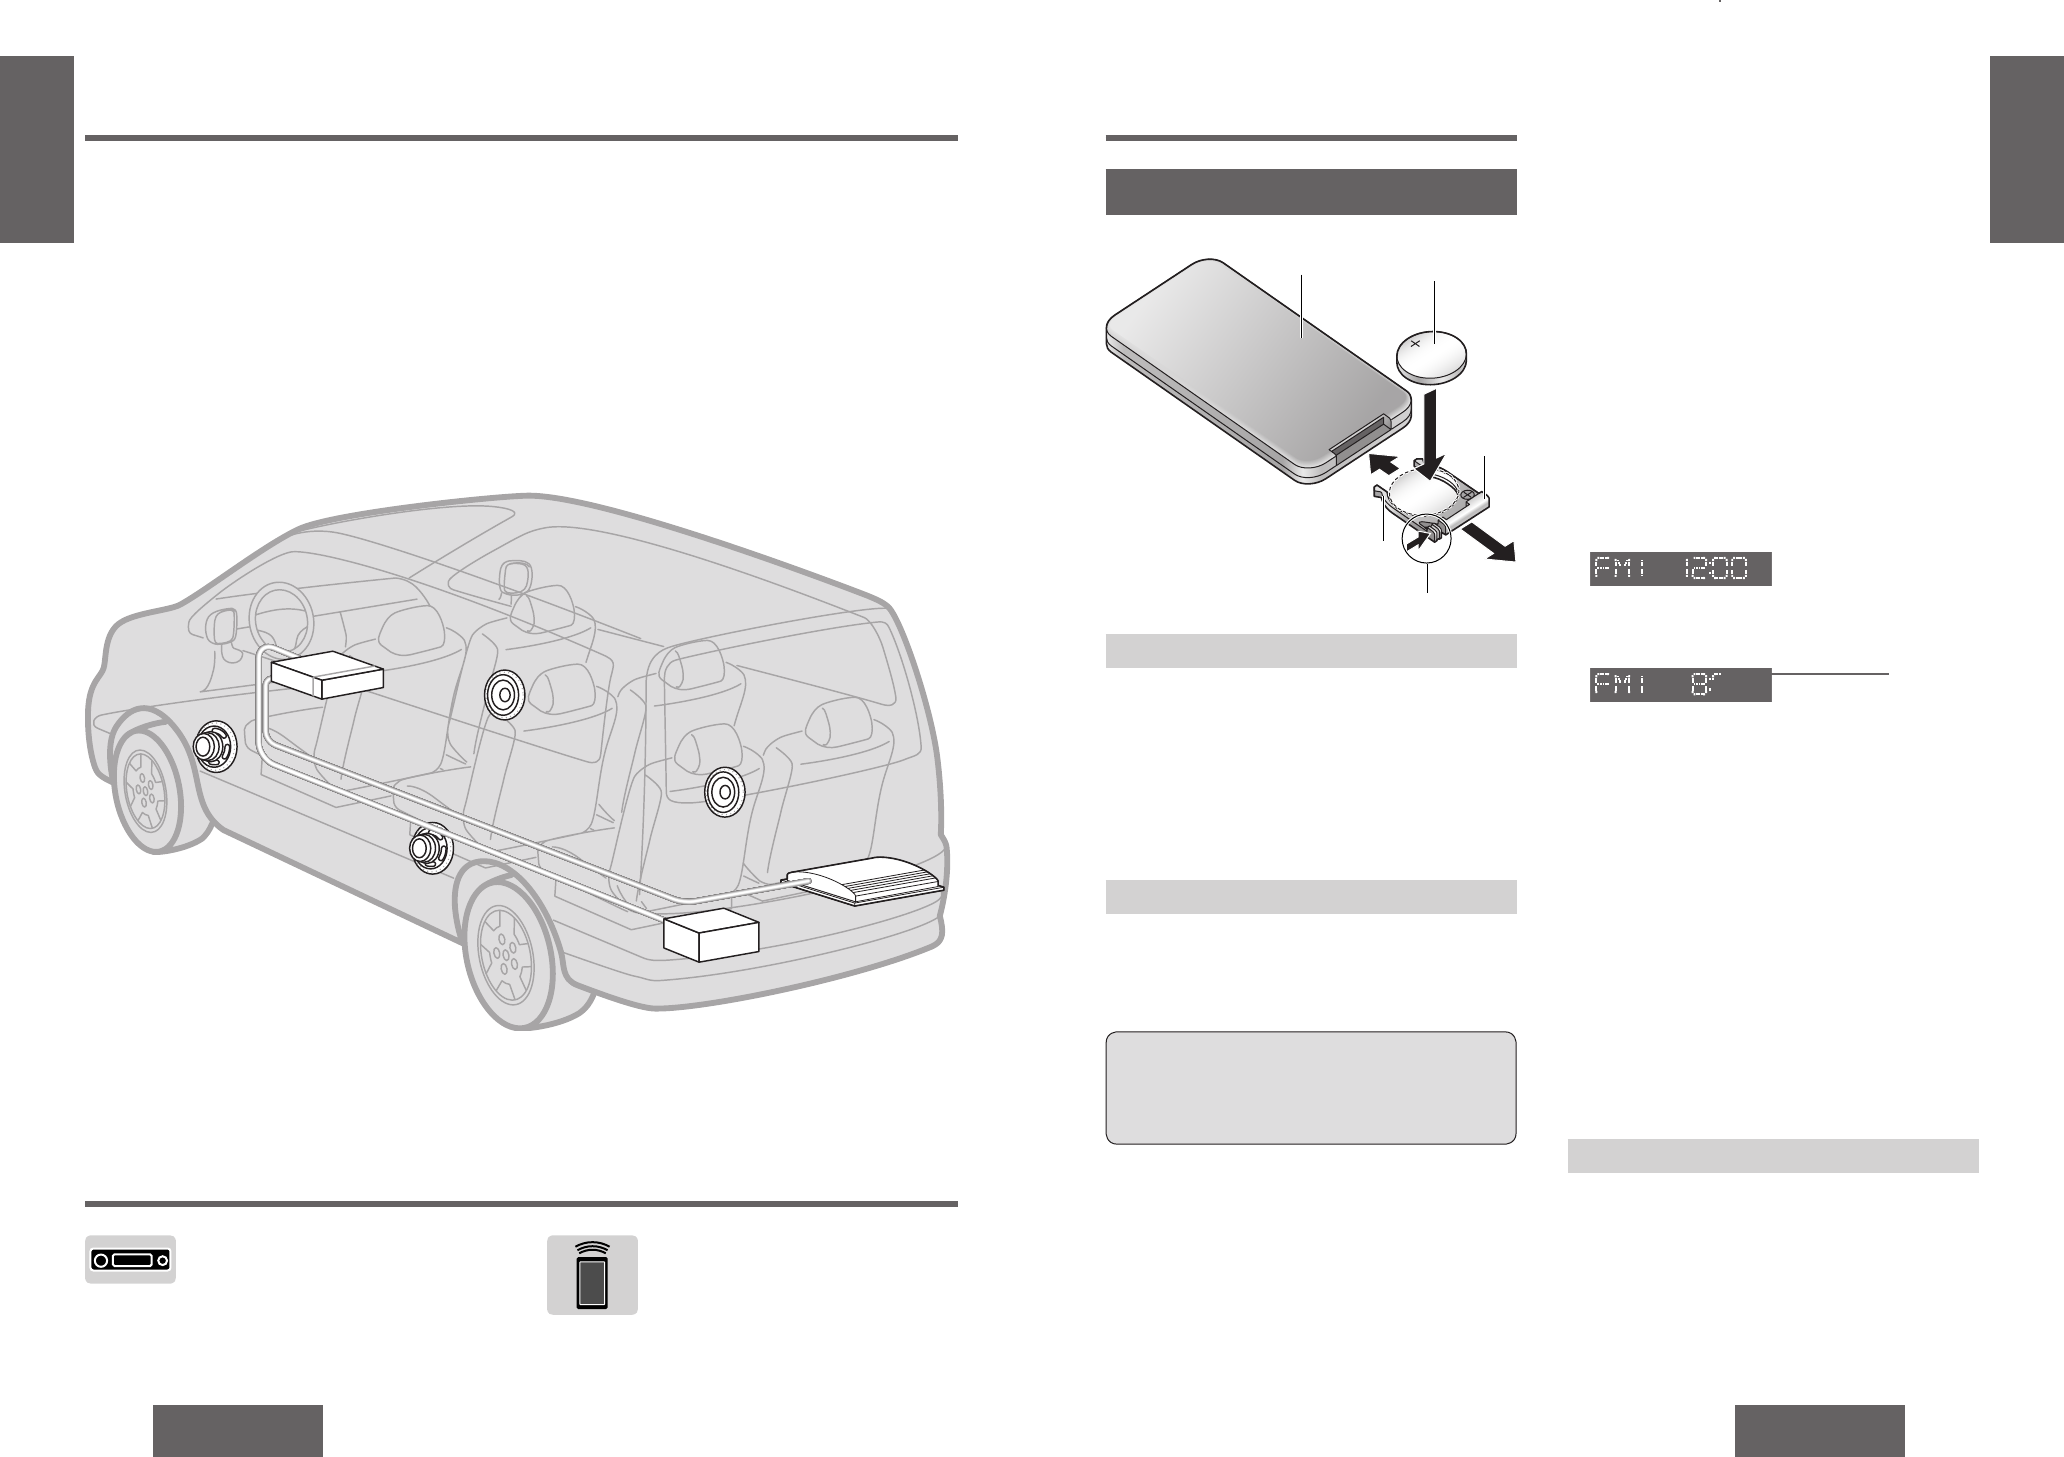
1 Remove the battery holder.
Pull the holder out at position B while pushing
position A as indicated.
2 Install the battery on the battery holder.
3 Insert the battery holder back into its original
position.
Battery Notes
≥ Battery type: Panasonic lithium battery (CR2025)
(included)
≥ Battery life: Approximately 6 months under
normal use (at room temperature)
≥ Remove and dispose of an old battery
immediately.
≥ Do not disassemble or short the battery. Do not
throw a battery into a fi re.
≥ Keep the battery away from children to avoid the
risk of accidents.
≥ Follow local regulations when disposing of the
battery.
Back side
Lithium battery
(included)
Battery holder
Position A
Position B
Remote Control Unit
Caution:
≥ Improper use of the battery may cause
overheating, an explosion or ignition, resulting
in injury or a fi re.
The 12-hour system is used for the clock.
≥ Turn your car’s ignition key to the ACC or ON
position.
≥ Press [SRC] (POWER).
≥ When the power is switched on for the fi rst time,
a demonstration appears on the display.
Press [DISP] (display) to change to regular
mode. (page 16)
1 Press [DISP] (display).
2 Press and hold [DISP] (display) again for more
than 2 seconds.
Hours:
3 Press [%] or [$].
4 Press [DISP] (display).
Minutes:
5 Press [%] or [$].
6 Press [DISP] (display).
Note:
≥ “ADJUST” is displayed before adjusting the clock.
≥ Press and hold [%] or [$] to change numbers
rapidly.
Display Change
Press [DISP] (display).
When the power is off:
Hours blink


