


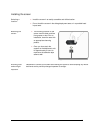


6
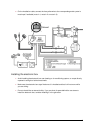
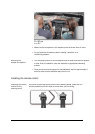
Installing the kit‟s power cable
Note : In order to check the wiring, connect the screen before placing it on the dashboard.
► Refer to the Checking the wiring section for more information.
Refer to your car stereo‟s wiring diagram.
The red wire of the kit‟s cable must correspond to the constant +12V supply, the orange wire
to the ignition +12V and the black wire to ground. Check that the orange wire is not
connected to the constant +12V supply, as you could run down the vehicle‟s battery.
Note : On some vehicles, there is no ignition +12V on the vehicle’s connectors. You must therefore
connect the orange power supply wire to the fuse box or another ignition power source.
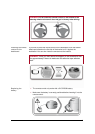
Checking the wiring
To perform the installation check, turn the ignition on then off once the Parrot MKi9100 is
installed: the message “Goodbye!” must be displayed.
If it is not the case, it is necessary to inverse the positions of the red and orange wires.
Indeed, the red wire of the power cable must be connected to the permanent 12V, the
orange wire to the 12V ignition and the black wire to the ground. This can be done simply by
reversing both fuse holders located on the Parrot wiring.
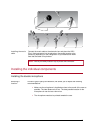
Installing the audio connectors
Installing the music
cable binding
system
The music cable binding system allows you to adjust the cable length
while reducing its wear.
1. Drill a 20 mm hole in your dashboard (glove compartment or parcel
tray).
2. Insert manually two flexible arms of the binding system.
3. Use a flat screwdriver in order to insert the last two arms.
> You can now connect your music cable to the bluebox.