


Parrot MKi9200 – User guide 7
Installing the
kit’s power
cable
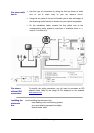
In order to check the wiring, connect the screen before placing it
on the dashboard.
► Refer to the Checking the wiring section for more information.
•
Refer to your car stereo’s wiring diagram.
•
The red wire of the kit’s cable must correspond to the constant +12V
supply, the orange wire to the ignition +12V and the black wire to
ground. Check that the orange wire is not connected to the constant
+12V supply, as you could run down the vehicle’s battery.
On some vehicles, there is no ignition +12V on the vehicle’s
connectors. You must therefore connect the orange power supply
wire to the fuse box or another ignition power source.
Checking the
wiring
•
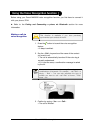
To perform the installation check, turn the ignition on then off once the
Parrot MKi9200 is installed: the message “Goodbye!” must be
displayed.
•
If it is not the case, it is necessary to inverse the positions of the red
and orange wires. Indeed, the red wire of the power cable must be
connected to the permanent 12V, the orange wire to the 12V ignition
and the black wire to the ground. This can be done simply by reversing
both fuse holders located on the Parrot wiring.
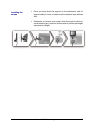
Installing the
audio
connectors
•
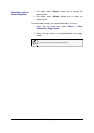
Connect the music cable to the electronic box and place the USB /
iPod / Jack connectors into the glove box, the central console or the
parcel tray depending on the configuration of your dashboard. Make
sure that the cable is not pinched.
•
Use the provided protection cap to protect the connectors.
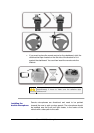
Installing the
remote control
•
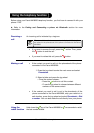
Choose the place for the remote control inside your vehicle. We would
advise you to fit it in the center of the dashboard or close to the
steering wheel.
•
If you want to place the remote control on the steering wheel, make
sure it is securely attached, so that it does not move when you are
driving. Do not install the remote control on the outside of the steering
wheel, so that it does not get in the way when driving.