


4
2. Setting up the monitor
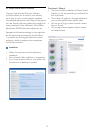
2.1 Installation
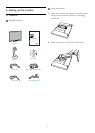
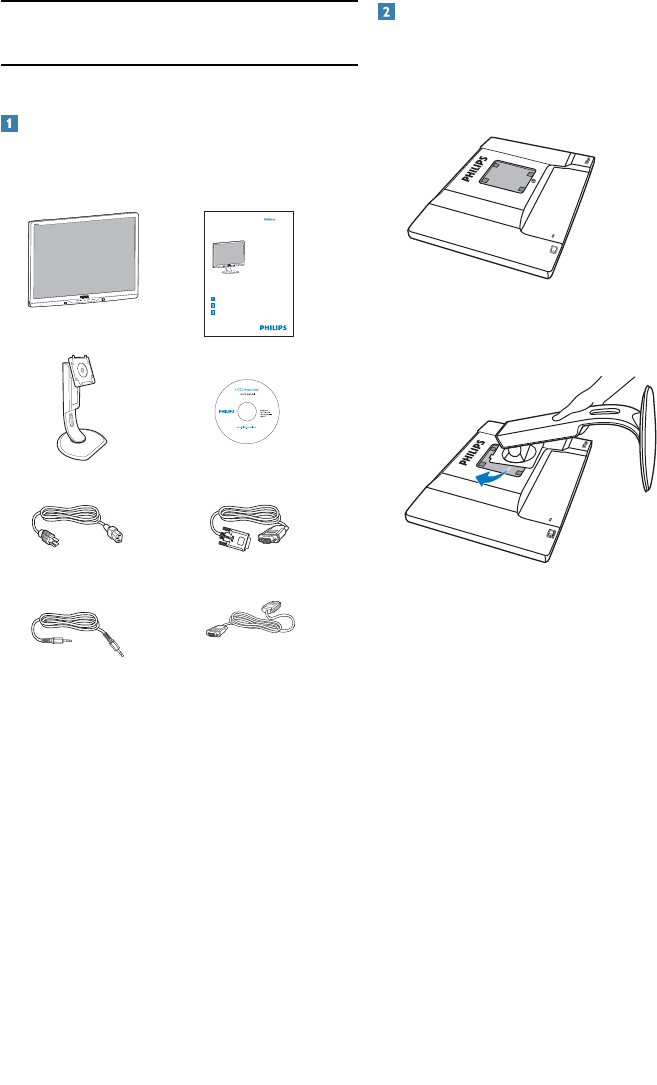
Package contents
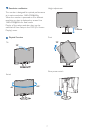
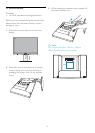
Install base stand
1. Place the monitor face down a smooth surface
taking care to avoid scratching or damaging
the screen.
2. Snap in the base in the VESA mount area.
Register your product and get support at
www.philips.com/welcome
225P2/225PL2
Quick start guide
Installation / Installation / Instalación / Installation / Installazione / ᅝ㺙 / ȱɧɫɬɚɥɹɰɿɹ / ɍɫɬɚɧɨɜɤɚ
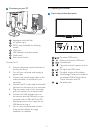
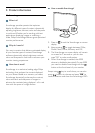
Connect / Connectivité / Conectividad / Verbindungsfähigkeit / Connettività /
䖲ᗻ / ɉɿɞɤɥɸɱɢɬɢɫɹ / ɉɨɞɤɥɸɱɢɬɶɫɹ
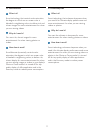
Adjust ergonomic / Réglages ergonomiques / Ajustes ergonómicos / Ergonomische /
Einstellmöglichkeiten / Regolazioni ergonomiche / ҎԧᎹᄺ䇗ᭈ /
Ɋɟɝɭɥɸɜɚɬɢ ɟɪɝɨɧɨɦɿɱɧɟ / ɇɚɫɬɪɨɣɤɚ ɷɪɝɨɧɨɦɢɤɢ
Guide de démarrage rapide / Guía rápida / Kurzanleitung / Guida rapida /
ᖿ䗳ܹ䮼ᣛफ / ɒɜɢɞɤɟ ɤɟɪɿɜɧɢɰɬɜɨ ɞɥɹ ɩɨɱɚɬɤɭ ɟɤɫɩɥɭɚɬɚɰɿʀ /
Ʉɪɚɬɤɨɟ ɪɭɤɨɜɨɞɫɬɜɨ ɩɨ ɡɚɩɭɫɤɭ
Monitor
Quick start guide
Audio cable
Base stand
EDFU CD
Power cord VGA signal cable (optional)
DVI cable (optional)
Philips and the Philips’ Shield Emblem are registered trademarks of
Koninklijke Philips Electronics N.V. and are used under license from
Koninklijke Philips Electronics N.V.
©
2
0
1
0
K
o
n
i
n
k
l
i
j
k
e
P
h
i
l
i
p
s
E
l
e
c
t
r
o
n
i
c
s
,
N
.
V
.
A
l
l
r
i
g
h
t
s
r
e
s
e
r
v
e
d
.
U
n
a
u
t
h
o
r
i
z
e
d
d
u
p
l
i
c
a
t
i
o
n
i
s
a
v
i
o
l
a
t
i
o
n
o
f
a
p
p
l
i
c
a
b
l
e
l
a
w
s
.
M
a
d
e
a
n
d
p
r
i
n
t
e
d
i
n
C
h
i
n
a
.
V
e
r
s
i
o
n
M
2
2
2
5
P