


15
Installation
DIN Rear-mount
Installation using the screw holes on
the side of the unit
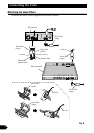
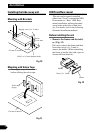
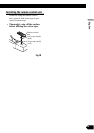
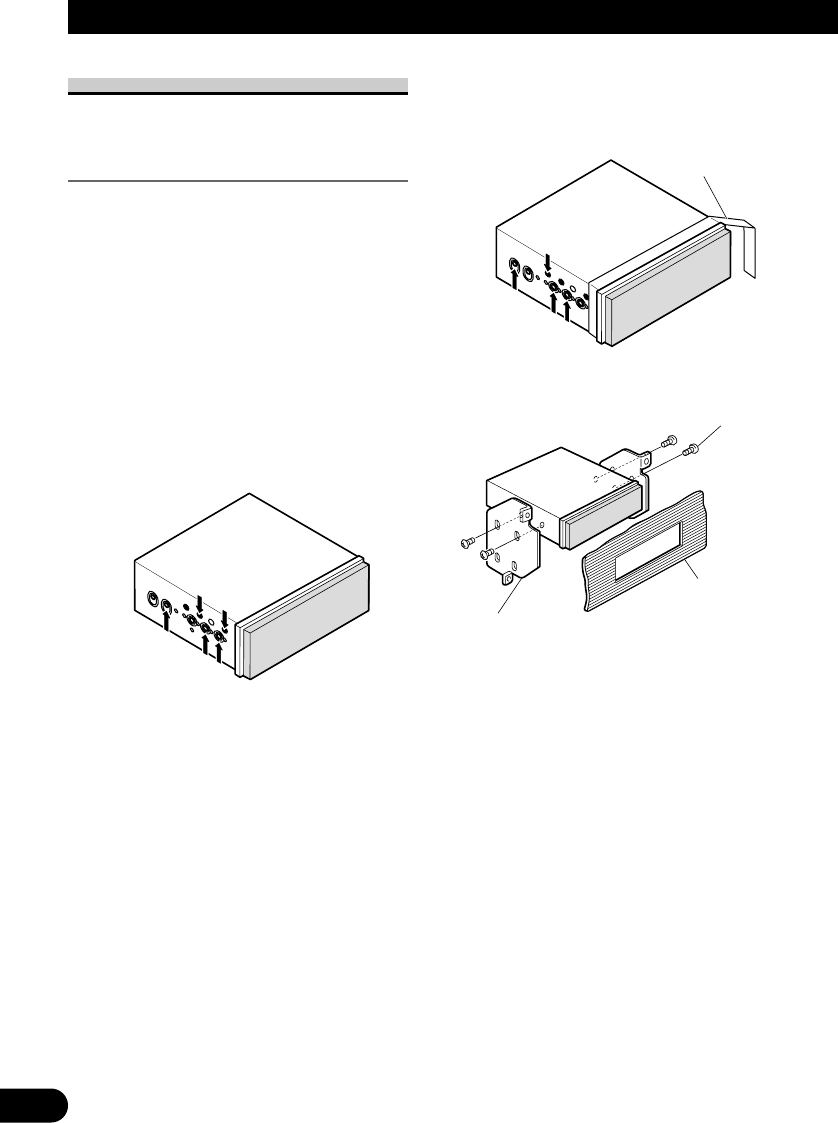
• Fastening the unit to the factory
radio mounting bracket. (Fig.
15) (Fig. 16) (Fig. 17)
Select a position where the screw holes
of the bracket and the screw holes of
this product become aligned (are fit-
ted), and tighten the screws at 2 places
on each side. Use any of binding
screws (4 × 3 mm), binding screws (5
× 6 mm) or flush surface screws (5 × 6
mm), depending on the shape of the
screw holes in the bracket.
*1 Use binding screws (4 × 3 mm) only.
Fig. 15
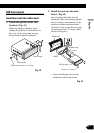
• When installing in a shallow space,
use the following screw holes. In
this case, stick conceal tape on parts
that protrude from the dashboard.
Fig. 16
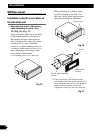
*2 If the screw holes of the bracket and the
screw holes of this unit are not aligned, use a
file to widen the screw holes of the bracket to
match up the screw holes on this unit.
Tighten the screws at 2 places on each side.
Fig. 17
Screw
Dashboard or
Console
Factory radio mounting
bracket
*2
*
1
Conceal tape
*
1
*
1