


6
SIR-ALP10T Installation Guide
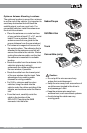
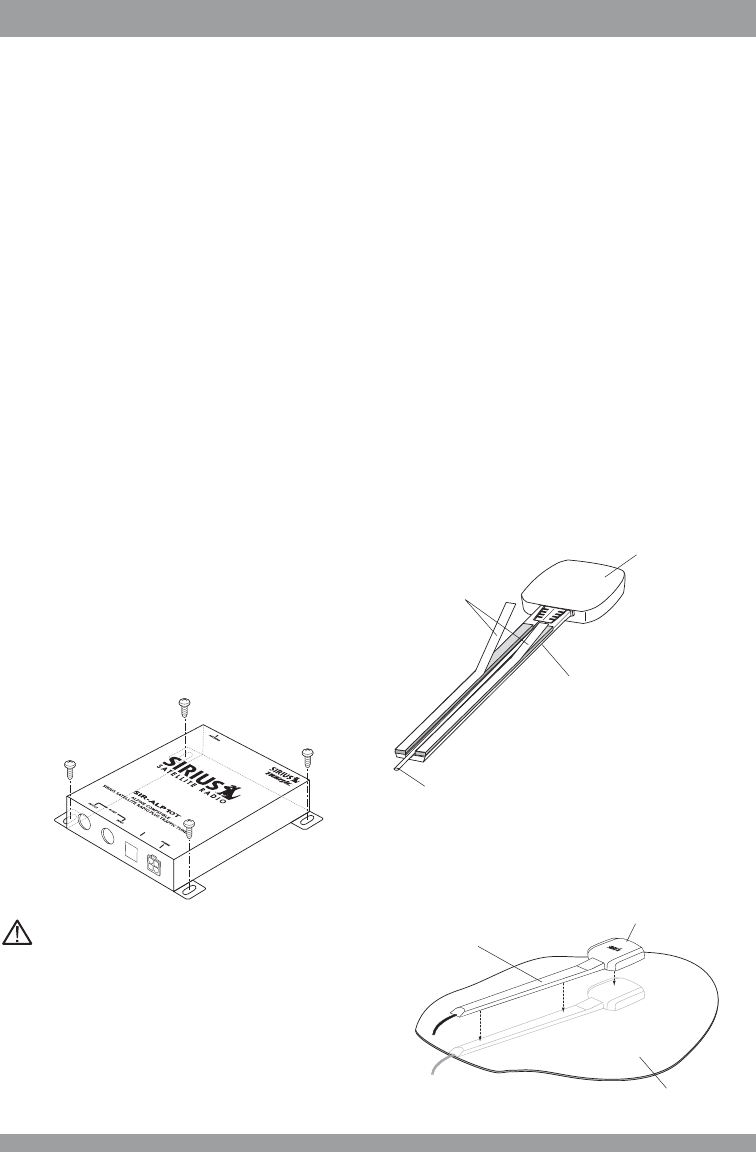
Installing the Antenna
The antenna includes a plastic cable cover/
tail which covers the exposed antenna
cable and keeps it attached securely to
vehicle roof. The tail also helps position the
antenna the proper distance from the rear
window, sunroof or rear hatch.
To attach the cover/tail:
1. Once you have determined the proper
mounting location (see the next
section), clean the area with the
supplied alcohol swab.
2. Connect the antenna cover/tail to the
antenna cable, making sure that the
strain-relief on the antenna seats into
the cover/tail groove. Route the cable
through the wire channel in the cover/
tail.
3. Remove the protective tape from the
adhesive and carefully position the
antenna with cover/tail and apply
pressure to secure it to the vehicle.
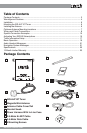
Cable Cover/Tail
Antenna
Vehicle
Cable
Cover/Tail
Antenna
(Underside)
Adhesive Strips
Antenna Cable
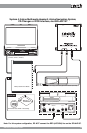
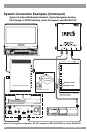
Installation
It is recommended that prior to starting the
installation, you read completely this
installation manual and follow the guidelines
listed below:
Consider the mounting location carefully.
You should make sure that you avoid the
following:
• Any location where the tuner is
exposed to moisture.
• Any location where the tuner is
exposed to extreme heat.
• Any location that would interfere with
moving parts on the vehicle or interfere
with driving.
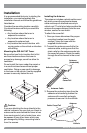
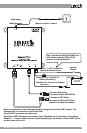
Mounting the SIR-ALP10T Tuner
Be sure that you find a location that is flat
and has clearance above the tuner to
prevent any damage, as well as allow for
ventilation.
Do not install the tuner under the carpet or
in a small enclosed area without proper
ventilation. Doing so can result in damage
to the tuner or the vehicle. Use the supplied
screws to securely fasten the unit.
Caution:
If you are attaching the tuner directly to the
vehicle’s chassis, be sure that you check to
make sure the area behind the tuner is free
from moving parts, fuel or brake lines, wire
harnesses or any other items which may
get damaged by drilling a mounting hole or
from the screws.
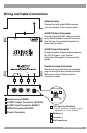
DATA