


17
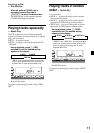
Storing the station names
— Station Memo
You can assign a name to each radio station
and store it in memory. The name of the
station currently tuned in appears in the
display. You can assign a name of up to eight
characters for a station.
Storing the station names
1 Tune in a station whose name you want
to store.
2 Press (MENU), then press either side of
(DISC/PRST) repeatedly until “NAME
EDIT” appears.
3 Press (ENTER).
4 Enter the characters.
1 Press the (+) side of (DISC/PRST)
repeatedly to select the desired
characters.
(A t B t C t ··· Z t 0 t 1 t 2 t
··· 9 t + t – t * t / t \ t > t <
t . t _ )
If you press the (–) side of (DISC/PRST)
repeatedly, the characters appear in the
reverse order.
If you want to put a blank space
between characters, select “_” (under-
bar).
2 Press the (+) side of (SEEK/AMS) after
locating the desired character.
The next character flashes.
If you press the (–) side of (SEEK/AMS),
the previous character flashes.
3 Repeat steps 1 and 2 to enter the
entire name.
5 To return to the normal radio reception,
press (ENTER).
Tips
• To erase or correct a name, enter “_” (under-bar)
for each character.
• There is another way to start storing station
names. Press (LIST) for two seconds instead of
steps 2 and 3. You can also complete the
operation by pressing (LIST) for two seconds
instead of step 5.
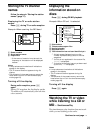
Displaying the station name
Press (DSPL) during radio reception.
Each time you press (DSPL), the item
changes as follows:
Station name* y Frequency
* If the station name of a station is not stored,
“NO NAME” appears in the display for one
second.
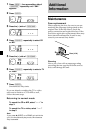
Erasing the station name
1 Tune in a station whose name you want
to erase.
2 Press (MENU), then press either side of
(DISC/PRST) repeatedly until “NAME
DEL” appears.
3 Press (ENTER).
4 Press (ENTER) for two seconds.
The name is erased.
Repeat steps 1 through 4 if you want to
erase other names.
5 Press (MENU) twice.
The unit returns to the normal radio
reception mode.
Note
When you erase all of the station names, “NO
NAME” appears in step 4.