


pg. 8 of 13 P1005089 Rev. C
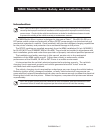
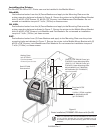
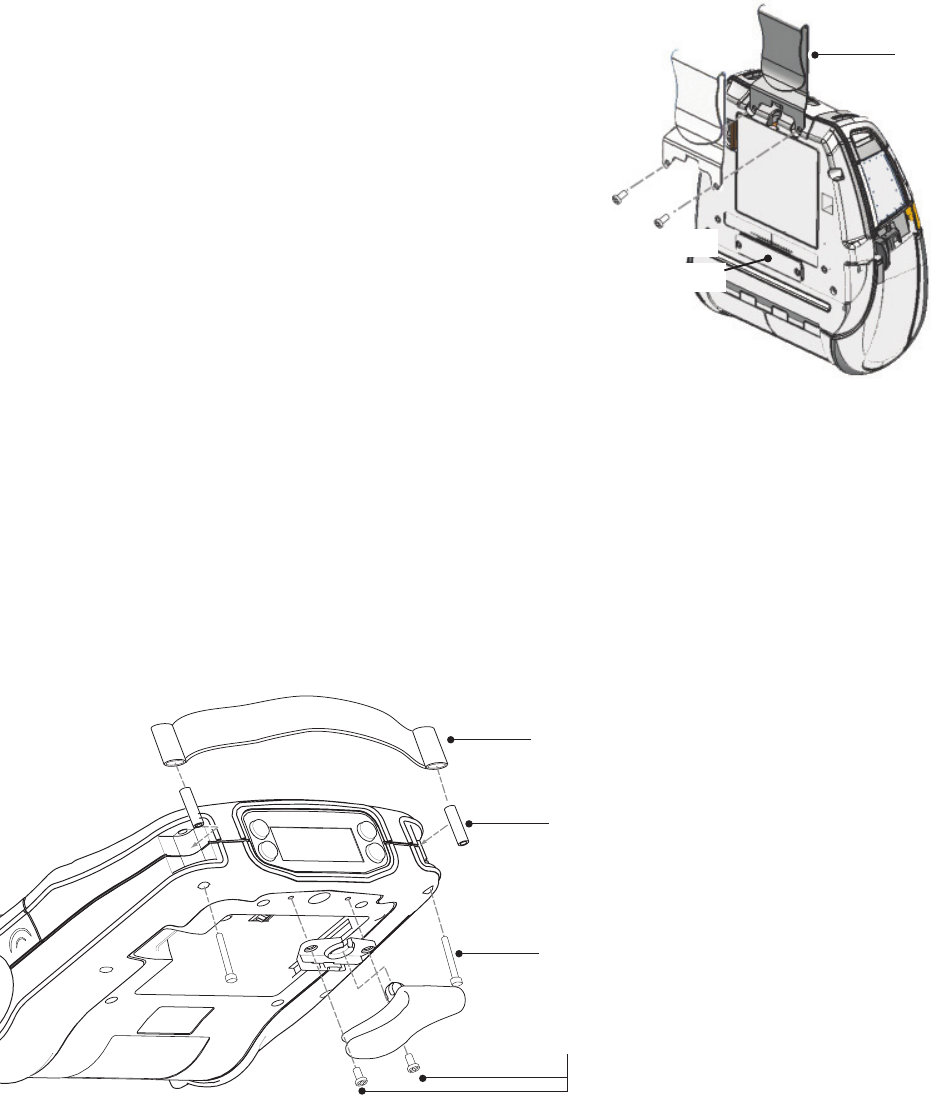
Remove Belt Clip by
removing (2) screws.
Remove Carrying Strap by unscrewing
corner screws
Replace bushings and screws after
removing carrying strap.
Remove Carrying strap.
Metal Belt Clip
Remove (2) screws
Figure 5:
QL 420 Printer Preparation
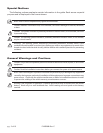
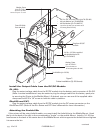
Figure 4:
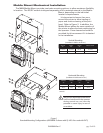
QLn420 Printer Preparation
Docking Contacts Plug
Printer Installation
Printer Preparation
Prepare the printer for installation by doing the following:
QL 420 only:
• If your printer has a carrying strap, you must remove it by the following procedure
(Refer to Figure 5).
1. Unscrew the (2) #4-40 x 1” screws holding the top corners of the printer together.
2. Remove the Carrying Strap and the (2) Bushings.
3. Replace the Bushings back in the top corners of the printer and re-install the two
#4-40 x 1” screws
• Remove the Belt Clip from the back of the Printer (Refer to Figure 5).
QLn420, QL420 and P4T Printers:
• If your printer is equipped with a shoulder strap, remove it by unclipping each end from
the printer.
• Ensure the battery pack is installed prior to mounting the printer in the Mobile Mount.
QLn420 only:
• Remove the carrying strap as shown in the
QLn Series User Guide and Quick Start Guide.
• Remove the plastic belt clip.
• Remove the metal belt clip (if applicable) by
unscrewing the two screws (SCR 6-32 X 1/4
PAN HD PHLLP NY) holding it to the printer.
• Remove the Docking Contacts Plug by
removing (2) screws.