14
4.13 Front Panel Removal
The Loctite® Bulk hot melt unit is designed for ease of use and reliability. Under normal circumstances, the front
panel should not need to be removed. If a new version of software is released, the following procedure can be used
to remove the front panel.
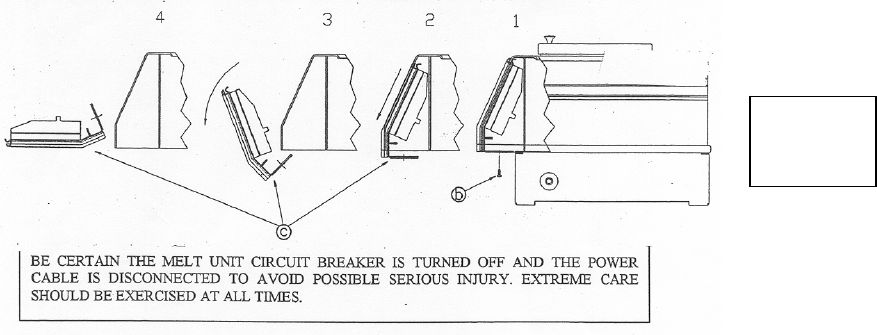
a) Slide the front end of the melt unit towards the edge of the worktable far enough to access the supply hose
electrical connectors being careful not to tilt it so far that adhesive spills from the melt tank. Never turn the
melt unit upside down.
b) Disconnect the supply hose electrical connector panel from the melt unit.
c) Remove the two hex head screws to the left and right of the hose electrical connectors using a 5/16” wrench,
supporting the panel in position to prevent its movement.
d) Slowly slide the control panel down and away from the melt unit taking care not to strain the cables
interconnecting the melt unit and the control panel. The control panel can be laid on a flat surface in front of the
melt unit or held in a horizontal position.
e) At this point, the front panel is accessible for replacement or updates.
f) To reinstall, rotate the control panel until it rests against the melt unit, with the top of the control panel
approximately 1/2” below the top of the melt unit opening. Make sure that no cables are obstructing the control
panel from seating properly.
g) Slide the control panel up so that it seats properly into the melt unit.
h) Insert and tighten the two hex head screws using a 5/16” wrench.
i) Reconnect the supply hose electrical connector(s) into the melt unit and reposition the melt unit to its proper
position.
Figure 7
Front Panel
Side view


