© Titan Tool Inc. All rights reserved. 9
Cleaning the Fluid Hose
Use the following procedure to clean the uid hose once the
spray gun has been removed pressure has been relieved as
described in the Cleanup procedure.
1. Remove the uid hose from the uid outlet tting on the
front panel of the sprayer.
2. Insert the cleaning cylinder into the uid outlet
tting. Refer to the Accessories section of this
manual for ordering information on the cleaning
cylinder.
3. Reattach the uid hose to the uid outlet tting.
4. Fill the hopper 1/4 full with clean water.
5. For the PowrTex 600
DD only, turn the uid pressure
regulator fully counterclockwise to its minimum pressure
position.
6. Plug in the sprayer.
7. Hold the open end of the uid hose over a waste container.
8. Turn on the sprayer
9. For the PowrTex 600DD only, turn the uid pressure
regulator clockwise until the pressure gauge reads 30 PSI.
10. Allow the pump to push the cleaning cylinder through the
uid hose and out into the waster container. Retrieve the
cleaning cylinder from the waster container for future use.
11. Continue to run the pump until the remaining water has
emptied from the hopper and uid hose.
12. Follow the “Pressure Relief Procedure” found in the
Operation section of this manual.
Cleaning the Fluid Inlet Assembly
The uid inlet assembly between the hopper and the double
diaphragm pump may need to be cleaned out periodically.
1. Perform the “Pressure Relief Procedure” outlined in the
Operation section of this manual.
2. Lift the hopper off of the uid inlet assembly and the cart.
Use the cart handles as guides while lifting the hopper.
NOTE: The hopper does not need to be empty before
removing it from the cart. The one-way valve
assembly inside the hopper prevents spray
material from leaking when the hopper is removed.
3. Remove any sediment from inside the uid inlet assembly.
4. Using a garden hose, ush the uid inlet assembly with
water.
5. Replace the hopper onto the cart and uid inlet assembly.
Use the cart handles as guides to position the hopper
down onto the uid inlet assembly.
Maintenance
Before proceeding, follow the Pressure Relief
Procedure outlined previously in this manual.
Additionally, follow all other warnings to reduce
the risk of an injection injury, injury from moving
parts or electric shock. Always unplug the sprayer
before servicing!
General Repair and Service Notes
The following tools are needed when repairing this sprayer:
Phillips Screwdriver Adjustable Wrenches
Needle-nosed pliers Channel Lock
7/16 Hex Wrench
1. Before repairing any part of the sprayer, read the
instructions carefully, including all warnings.
Never pull on a wire to disconnect it. Pulling on a
wire could loosen the connector from the wire and
can cause an electric shock.
2. Test your repair before regular operation of the sprayer
to be sure that the problem is corrected. If the sprayer
does not operate properly, review the repair procedure
to determine if everything was done correctly. Refer to
the Troubleshooting Charts to help identify other possible
problems.
3. If you have any further questions concerning your TITAN
Airless Sprayer, call TITAN:
Customer Service (U.S.) .....................1-800-526-5362
Fax .............................................1-800-528-4826
Customer Service (Canada) ...............1-800-565-8665
Fax ..............................................1-905-856-8496
Daily Maintenance
Perform the following maintenance procedures daily too keep the
sprayer operating in good condition.
1. Check hoses for damage.
2. Check all ttings to make sure they are tight.
3. Clean the air lter on the compressor.
4. Apply a light lm of multi-purpose grease to the outer
diameter of the pump inlet tube (see below).
Replacing the Diaphragms —
PowrTex 300
DD
Use the following procedure to replace the product diaphragms
and support diaphragms in the double diaphragm pump of the
PowrTex 300
DD.
1. Perform the Cleanup procedure outlined in this manual.
Do not add water to the hopper for storage purposes as
described at the end of the procedure.
2. Lift the hopper off of the uid inlet assembly and the cart.
Use the cart handles as guides while lifting the hopper.
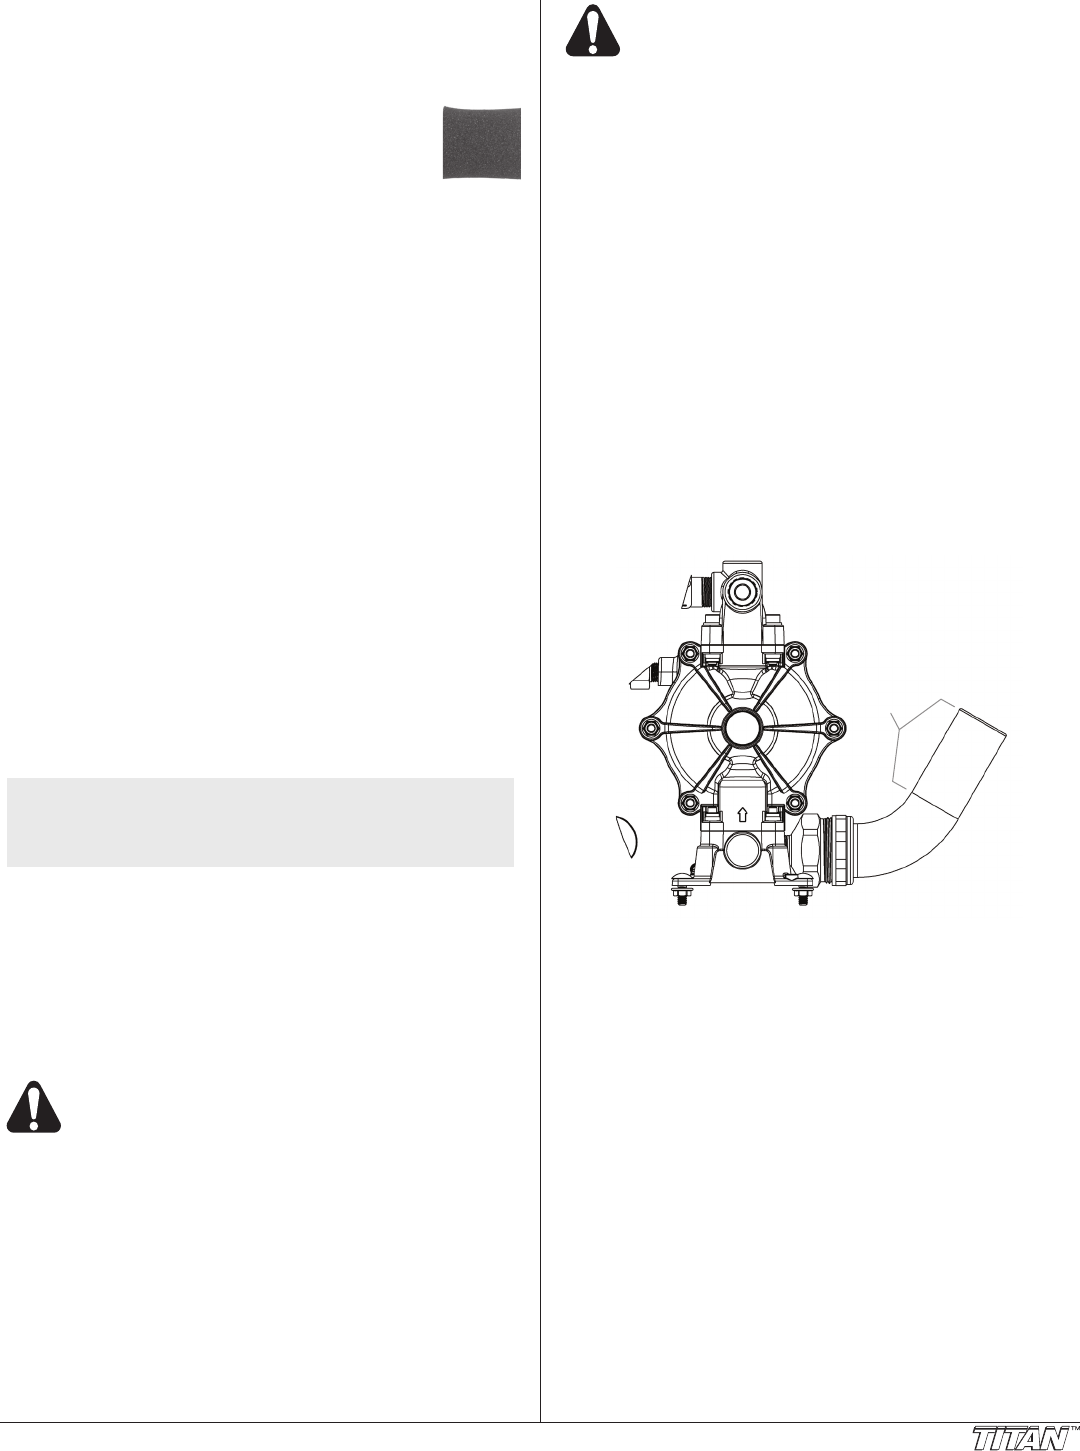
3. Remove the air line from the tting at the top of the pump.
4. Remove the four lock nuts and carriage screws that
secure the pump to the cart.
5. Remove the double diaphragm pump from the cart by
sliding it straight toward the back of the sprayer until the
uid pipe is free of the front panel.
6. Place the pump upside down on a waste container to
allow any remaining uid to drain.
7. Once the pump is empty, place it on a at surface.


