6
3.3 Browser
4.1 Local Console Login
3.4 AP Windows Client
4. Accessing the B064-Series KVM Switch
3. Network Setup - IP Address Determination
(
continued
)
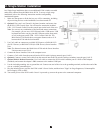
On a computer/server that is on the same network as your B064-Series KVM Switch, set the computer/server’s IP address to 1.
192.168.0.XXX, where XXX represents any number or numbers except 60. (192.168.0.60 is the default address of the B064-Series
KVM Switch)
Access the B064-Series KVM Switch using the URL 192.168.0.602.
Assign a fixed IP address for B064-Series KVM Switch using the same instructions as described in the 3. Local Console section of this
chapter.
After you log out, reset your computer’s IP address to its original value.4.
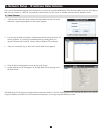
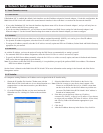
For computers running Windows, the B064-Series KVM Switch’s IP
address can be determined using the AP Windows Client that comes on
the B064-Series KVM Switch CD. When you run the program it
searches the network segment for B064-Series KVM Switch devices,
and displays the results in a dialog box similar to the one below:
You can use the network address found here to access the B064-Series KVM Switch. Once you login to the KVM switch, you can change
the IP Address using the instructions in the Local Server and Browser sections of this chapter.
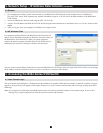
The local console login dialog box is displayed once the installation is complete. When the local console is attached, and there is no user
logged in, the login screen will appear on the display. Simply key in your Username and Password and click Login to bring up the OSD
Main Page.
Note: If you supply an invalid login, the authentication routine will return an Invalid Username or Password message. If you see this
message, log in again being careful to enter the correct Username and Password.