


13
7
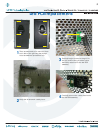
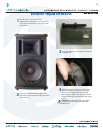
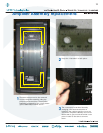
Place the new amplifi er assembly
(part #0013838-00) where the old one
was. Follow the same steps as above,
but backwards 6 to 1. Remove the
serial number from the faulty amplifi er
assembly (as shown in picture above)
and place on the new amplifi er
assembly. Power up the SA1521z and
relish in the fact that you just replaced
an amplifi er assembly. Hats off to you for
a job well done!
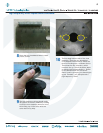
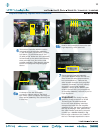
6
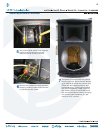
This is what it looks like with the cables
removed from the amplifi er assembly:
(1) led PCB cable, (2) solid blue, (3) blue
and black, (4) yellow and black, and
(5) solid yellow. Make sure the cables are
reconnected to the same terminals they
were removed from (but on the new
amplifi er assembly). See steps 6a and 6b
below for closeups of the photograph
above.
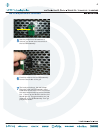
Amplifi er assembly replacement continued:
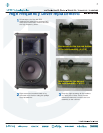
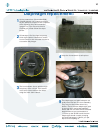
6a
A closeup of the led PCB cable
connector is shown above. The black
wire of the cable is closest to the edge of
the amplifi er assembly. The cable only fi ts
in one way.
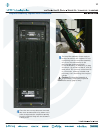
8
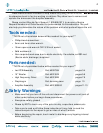
Important: The faulty amplifi er
assembly must be returned to LOUD
Technologies. The address should
be on the return shipping label that
was provided with the new amplifi er
assembly. If not, the return address is at
the top of this page. Also, please write
the order number and service request
number (ex: 1046256-1203935) in big,
black, bold numbers on the outside of
the box. This helps expedite the return.
1
2
3
4
5
6a
6b
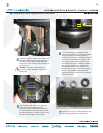
6b
Now for the closeups of the woofer and
high frequency driver terminals.
1
5
432