


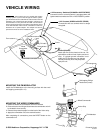

VEHICLE WIRING
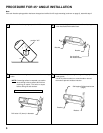
MOUNTING THE WIRED COMMANDER
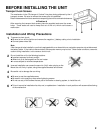
1. Determine where the commander unit will be located.
2. Be sure that the mounting surface where the commander unit will
be located is clean and dry.
3. Remove the protective paper from the back of the Velcro strip.
4. Apply the commander unit to the desired location.
After completing all connections, press the RESET button on the
commander unit.
MOUNTING THE FM MODULATOR
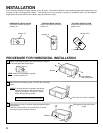
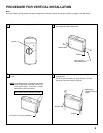
Install the FM Modulator to the mounting surface with the small
self-tapping screws (M3 x 12).
Self-tapping Phillips
head screw (small)
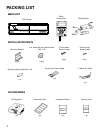
Wired Commander
FM Modulator
© 2000 Audiovox Corporation, Happauge, N.Y. 11788 Printed in Korea
128-5582A
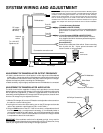
FM modulator
FM radio
+12V Constant (GREEN w/WHITE STRIPE)
Connect this wire to a terminal which is always
energized.
+12V Accessory / Switched (ORANGE w/WHITE STRIPE)
Connect this wire to a terminal which is energized when the
ignition switch is turned to the "ON" or "ACCESSORY" position.
From antenna
Commander connection cord
Wired
Commander
IMPORTANT IMPORTANT
IMPORTANT IMPORTANT
IMPORTANT - Some import cars use a special dual antenna
“Diversity" system. If your car has this type of antenna system,
you will find the antenna cable will not fit the socket on the FM
modulator. Use of the ACC-40 with “Diversity" systems is not
recommended. You may also find some GM cars and others
have an antenna plug that is too small to mate with the socket
on the FM modulator. If this is found, call Audiovox’s Toll-Free
Assistance for a special adaptor. This adaptor can also be
purchased at most car stereo installation center.
DIN cable
CD changer
To FM radio antenna
input
Ground (BLACK)
Attach this wire to the chassis of the car. Be
sure that the surface is free of paint, and is not
rusty. If a proper ground connection is not
made, the CD changer may not operate
correctly and stray noise may be picked
up by the unit.
Fuses
Velcro Strip