


-10-
128-6116
10 of 16
FM Radio Operation
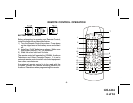
1. If using wired headphones, insert the headphone
set plug into the headphone jack on the right side
of the LCD pod labelled RADIO EAR. If using a
switch the channel A/B switch to channel B for
the FM radio. Channel A is used for video audio.
2. Press the Radio power on button. The LCD
window will display the FM station frequency and
memory channel number.
3. Press the tuning UP or DOWN button to select
the desired radio station.
4. If the radio station is broadcasting in stereo, then
LCD window will display STEREO.
5. Press the Memory button and select the preset
number you wish to assign. The number can be
selected from 1 to 6 sequentially. The selected
number will flash. Press and hold the memory
button until the display stops flashing. The preset
will be stored after 2 seconds. The number will
4. To ERASE a channel, press the ERASE/WRITE
button on the Remote Control Unit until “MANUAL
MEMORY XX ERASE” is displayed on screen.
To STORE a channel, press the button until the
MANUAL MEMORY XX ADD is displayed on
screen.
Note: Please refer to page 2 for more information on
TV reception.
then be displayed continuously. The number
will be displayed continuously. The desired
frequency is now. The unit can store 6 radio
station frequencies using the above procedure.
6. Pressing the Recall button will scroll through the
six presets.
7. Pressing the Volume UP or DOWN button in the
remote control unit will set the desired volume
level in the headphones.
8. Press the Mute button on the remote control unit
to mute the sound in headphone and press Mute
button again to restore the sound to the original
level.
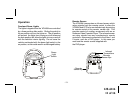
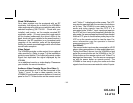
Turning the VOH684 On or Off
1. Sliding the screen release lock forward will unlock
the LCD screen and it will drop down slightly. Pivot
the screen downward until a comfortable viewing
angle is reached. The internal friction will hold the
screen in position while the system is in use.
2. Pressing the power button on the pod or the remote
will turn the system on or off alternately. When in
use the internal backlighting will illuminate the
controls.
3. After the unit has been turned on and is displaying
a picture, adjust the viewing angle, by pivoting the
screen to optimize the picture quality.
4. Remember to turn the unit off and pivot the LCD to
the locked position when not in use.