


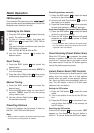


Basic Operation
When this unit is turned on, starting and stop-
ping the engine of a car with its volume raised
to the maximum level may harm your hearing.
Be careful about adjusting the volume.
1) Press the POWER button .
*
To turn the power off, press the POWER button for
at least 1 second.
2) Press the FNC button to select the oper-
ation mode. The mode switches as follows
each time the FUNC button is pressed:
Radio ➜ Tape ➜ CD changer ➜ MD changer
➜ Radio
*
If a component is not connected, that operation
mode cannot be selected.
*
“CASS” appears when no tape is loaded in the
ARX4570, and “DISC” appears when no disc is
loaded in the CD changer and MD changer.
3) Use the Up and Down buttons to adjust
the volume.
: Increases the volume.
: Decreases the volume.
Audio Mode Adjustments
1) Press the A-M button to select the adjust-
ment mode. The mode switches as follows
each time the A-M button is pressed:
BASS/TREB ➜ BAL/FAD ➜ Previous mode
2) Use the Left and Right and the Up and Down
buttons
,
to adjust the bass and treble.
<Adjusting the bass>
: Bass gets stronger.
: Bass gets weaker.
<Adjusting the treble>
: Treble gets stronger.
:
Treble gets weaker.
3) Use the Left and Right and the Up and Down
buttons
,
to adjust the balance and fader.
<Adjusting the balance>
: Sound from right speakers gets stronger.
: Sound from left speakers gets stronger.
<Adjusting the fader>
: Sound from front speakers gets stronger.
: Sound from rear speakers gets stronger.
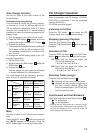
Setting the Z-enhancer
This unit comes with three types of sound tone
effects stored in memory. Select the one you prefer.
*
The factory default setting is “Z-EHCR OFF”.
Each time you press Z-EHCR button , the
tone effect changes in the following order.
“Z-ENHANCER 1” ➜ “Z-ENHANCER 2” ➜
“Z-ENHANCER 3” ➜ “Z-EHCR OFF” ➜
“Z-ENHANCER 1”...
• Z-ENHANCER 1: bass emphasized
• Z-ENHANCER 2: treble emphasized
• Z-ENHANCER 3: bass and treble emphasized
• Z-EHCR OFF: no sound effect
Loudness Function
Press the LD button for at least 2 seconds to
turn the loudness function on and off.
Switching the Display
While pressing the BND button , press the
DISP button to enter the clock display mode.
Operation mode display
➜ Clock display ➜
Operation mode display
Setting the Clock
1) While pressing the BND button , press the
DISP button to enter the
clock display mode.
2) While pressing the BND button , press the
DISP button for 2 seconds
or more. This enables clock editing.
*
The editable fields will be indicated by flash.
3) To move between the hour and minute fields,
use the Left (hour) and Right (minute) buttons
.
4) To confirm the clock setting, press the BND
button .
Notes:
•
If you select another operation mode before complet-
ing the above procedure, the clock setting operation
will be canceled.
•
Removing the battery for a check or repair causes the
clock to be reset. Set the clock again in such a case.
18
20
13
18
13
18
13
18
19
10
20
3
20
3
19
3
5
5
8
English
7. OPERATION
CAUTION
Note:
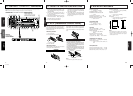
•
Be sure to read this chapter referring to the front diagrams of chapter 2. CONTROLS on page 3 (unfold).