


DXZ756MC 23
English
22 DXZ756MC
English
Common Operations
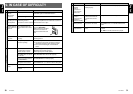
Setting the speed of the spectrum
analyzer display
∗ The factory default setting is “HIGH”.
1. Press and hold the [DISP] button for 1 second
or longer to switch to the display adjust mode.
2. Move the [a]/[d] lever to select “S/A
SPEED”.
3. Turn the [ROTARY] knob to select from
“LOW”, “MID” or “HIGH”.
4. Press the [DISP] button to return to the previ-
ous mode.
Turning the screen saver function
on or off
This unit features various screen saver patterns
that are exhibited across the display. If the
screen savers are not desired, they can be
turned off.
If the button operation is performed with the
screen saver function on, the operation display
corresponding to the button operation is shown
for about 30 seconds and the display returns to
the screen saver display.
∗ The factory default setting is “RANDOM”.
1. Press and hold the [DISP] button for 1 second
or longer to switch to the display adjust mode.
2. Move the [a]/[d] lever to select “SCREEN
SVR”.
3. Press the [
] button.
4. Turn the [ROTARY] knob to select the set-
ting. Each time you turn the [ROTARY] knob,
the setting changes in the following order:
OFF ➜ SS1 ➜ SS2 ➜ SS3 ➜ MESSAGE ➜
RANDOM
5. Press the [DISP] button to return to the previ-
ous mode.
Entering MESSAGE INFORMATION
When “MESSAGE” is selected for the screen
saver setting, you can change the contents of
the message.
∗ Up to 30 characters can be entered.
∗ The factory default setting is “Welcome to
Clarion”.
1. Press and hold the [DISP] button for 1 second
or longer to switch to the display adjust mode.
2. Move the [a]/[d] lever to select
“MSG INPUT”.
3. Press the [
] button.
4. Move the lever to move the cursor.
5. Press the [BND] button to select a character.
Each time you press the [BND] button, the
character changes in the following orders:
Capital letters ➜ Small letters ➜ Numbers
and Symbols ➜ Umlaut ➜ Capital letters…
6. Turn the [ROTARY] knob to select the de-
sired character.
7. Repeat steps 4 to 6 to enter up to 30 charac-
ters for message.
8. Press and hold the [
] button for 2 seconds
or longer to store the message in memory and
return to the display adjust mode.
∗ Press and hold the [BND] button for 1 second
or longer to delete the message. Then press
and hold the [
] button for 2 seconds or
longer to return the message to the default
setting.
9. Press the [DISP] button to return to the previ-
ous mode.
Setting the method for title scroll
Set how to scroll in CD-TEXT, MP3/WMA TITLE.
∗ The factory default setting is “ON”.
1. Press and hold the [DISP] button for 1 second
or longer to switch to the display adjust mode.
2. Move the [a]/[d] lever to select “AUTO
SCROLL”.
3. Turn the [ROTARY] knob to select “ON” or
“OFF”.
● ON:
Scrolls automatically.
● OFF:
Scrolls just 1 time when the title was
changed or you press and hold the [TITLE]
button for 1 second or longer.
4. Press the [DISP] button to return to the previ-
ous mode.
Setting the speed of title scroll
∗ The factory default setting is “SPEED3”. (Speed:1
to 6)
1. Press and hold the [DISP] button for 1 second
or longer to switch to the display adjust mode.
2. Move the [a]/[d] lever to select “SCRL
SPEED”.
3. Turn the [ROTARY] knob to select the setting.
4. Press the [DISP] button to return to the previ-
ous mode.
Dimmer control
You can set the dimmer control.
∗ The factory default setting is “3”. (Setting level: OFF,
1 to 5)
1. Press and hold the [DISP] button for 1 second
or longer to switch to the display adjust mode.
2. Move the [a]/[d] lever to select
“DIMMER LV”.
3. Turn the [ROTARY] knob to select the set-
ting.
4. Press the [DISP] button to return to the previ-
ous mode.
Adjusting the display contrast
You can adjust the display contrast to match the
angle of installation of the unit.
∗ The factory default setting is “8”. (Adjustment level:
1 to 16)
1. Press and hold the [DISP] button for 1 second
or longer to switch to the display adjust mode.
2. Move the [a]/[d] lever to select
“CONTRAST”.
3. Turn the [ROTARY] knob to adjust the con-
trast.
4. Press the [DISP] button to return to the previ-
ous mode.
Adjust Mode
Anti-theft indicator
The red Anti-theft indicator is a function for
detering theft. When the DCP is removed from
the unit, this indicator blinks.
∗ The factory default setting is “OFF”.
1. Press the [ADJ] button to switch to the adjust
mode.
2. Move the [a]/[d] lever to select “BLINK
LED”.
3. Turn the [ROTARY] knob to select “ON” or
“OFF”.
4. Press the [ADJ] button to return to the previ-
ous mode.
Common Operations
Setting the subwoofer
∗ The factory default setting is “ON”.
1. Press the [ADJ] button to switch to the adjust
mode.
2. Move the [a]/[d] lever to select “SUB-W”.
3. Turn the [ROTARY] knob to select “ON” or
“OFF”.
4. Press the [ADJ] button to return to the previ-
ous mode.
Setting the low pass filter
∗ The factory default setting is “THROUGH”.
1. Press the [ADJ] button to switch to the adjust
mode.
2. Move the [a]/[d] lever to select
“SUB-W LPF”.
3. Turn the [ROTARY] knob to select the set-
ting. Each time you turn the [ROTARY] knob,
the setting changes in the following order:
THROUGH ➜ 50Hz ➜ 80Hz ➜ 120Hz
4. Press the [ADJ] button to return to the previ-
ous mode.
Setting the amplifier bypass circuit
∗ The factory default setting is “OFF”.
1. Press the [ADJ] button to switch to the adjust
mode.
2. Move the [a]/[d] lever to select “AMP
CANCEL”.
3. Turn the [ROTARY] knob to select “ON” or
“OFF”.
● ON:
Uses with connected AMP.
● OFF:
Uses with inside AMP.
4. Press the [ADJ] button to return to the previ-
ous mode.