


TA1501C Amplier
13
www.clarksynthesis.com
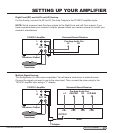
The following instructions are a quick overview of the steps necessary to install your new
amplier. For more detailed instructions, please refer to the sections in the manual that are
referenced below.
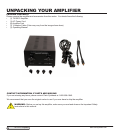
Remove the amplier from its package (for package contents, see “Unpacking Your 1.
Amplier” on page 6).
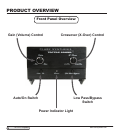
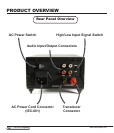
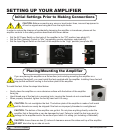
Insure you have set the amplier to the following settings: 2.
• AC Power Switch is set to “Off”
• Gain (Volume) Control is set to “Min”
• High/Low Input Signal Switch is set to “High”
For more detail on these settings, including pictures, see “Initial Settings Prior to
Making Connections” on page 14.
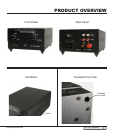
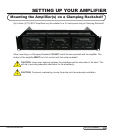
Install the amplier 3. feet if you are installing on a at surface. Do not install the feet if
you are installing in a Clamping Rackshelf (see “Placing/Mounting the Amplier” and
“Mounting the Amplier(s) on a Clamping Rackshelf” on pages 14-15).
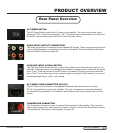
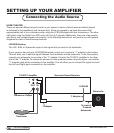
Connect the audio input source to the amplier. Insure you are connecting to both the 4.
Left and Right Input Connectors (see “Connecting the Audio Source” on page 16).
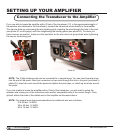
Connect the transducer to the amplier (see “Connecting the Transducer to the 5.
Amplier” on page 18).
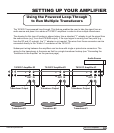
If you using multiple TA1501C ampliers to run multiple transducers, connect the loop-6.
through connections using RCA cables (see “Using the Powered Loop-Through to Run
Multiple Transducers” on page 19).
Plug the AC Power Cord into an electrical outlet.7.
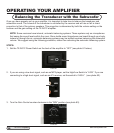
Once connected, turn your system on and 8. balance the sound (see “Balancing the
Transducer with the Subwoofer” on page 20).
Your system is now ready for use.9.
SETTING UP YOUR AMPLIFIER
Quick Setup Instructions