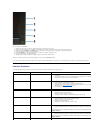
Product Specific Problems
Dell™Soundbar Problems
l Auto Adjust via OSD.
l Adjust brightness & contrast controls via OSD.
Geometric Distortion
Screen not centered correctly
l Reset the monitor to Factory Settings.
l Auto Adjust via OSD.
l Adjust brightness & contrast controls via OSD.
NOTE: When using 'DVI-D', the positioning adjustments are not available.
Horizontal/Vertical Lines
Screen has one or more lines
l Reset the monitor to Factory Settings.
l Perform Auto Adjust via OSD.
l Adjust Phase and Pixel Clock controls via OSD.
l Perform monitor self-
test feature check and determine if these lines are also in self
mode.
l Check for bent or broken pins in the video cable connector.
NOTE: When using 'DVI-
D', the Pixel Clock and Phase adjustments are not available.
Synchronization Problems
Screen is scrambled or appears torn
l Reset the monitor to Factory Settings.
l Perform Auto Adjust via OSD.
l Adjust Phase and Pixel Clock controls via OSD.
l Perform monitor self-
test feature check to determine if scrambled screen appears in self
test mode.
l Check for bent or broken pins in the video cable connector.
l Restart the computer in the safe mode.
Safety Related Issues
Visible signs of smoke or sparks
l Do not perform any troubleshooting steps.
l Contact Dell immediately.
Intermittent Problems
Monitor malfunctions on & off
l
Ensure that the video cable connecting the monitor to the computer is connected properly
and is secure.
l Reset the monitor to Factory Settings.
l Perform monitor self-
test feature check to determine if the intermittent problem occurs in
self-test mode.
Missing Color
Picture missing color
l Perform monitor self-test feature check.
l
Ensure that the video cable connecting the monitor to the computer is connected properly
and is secure.
l Check for bent or broken pins in the video cable connector.
Wrong Color
Picture color not good
l
Change the Color Setting Mode in the Color Settings OSD to Graphics or Video depending
to the application.
l
Try different Color Preset Settings in Color Settings OSD. Adjust R/G/B value in Color
Settings OSD if the Color Management is turned off.
l
Change the Input Color Format to PC RGB or YPbPr in the Advance Setting OSD.
Imageretentionfromastatic
imageleftonthemonitorfora
long period of time
Faint shadow from the static image
displayed appears on the screen
l
Use the Power Management feature to turn off the monitor at all times when not in use (for
more information, see Power Management Modes).
l Alternatively, use a dynamically changing screensaver.
Specific Symptoms
What You Experience
Possible Solutions
Screen image is too small
Image is centered on screen,
but does not fill entire viewing
area
l Reset the monitor to Factory Settings.
Cannot adjust the monitor with
the buttons on the front panel
OSD does not appear on the
screen
l Turn off the monitor, unplug the power cord, plug back, and then turn on the monitor.
The picture does not fill the
entire screen.
The picture cannot fill the
height or width of the screen
l Due to different video formats (aspect ratio) of DVDs, the monitor may display in full
screen.
l Run the built-in diagnostics.
NOTE: When choosing DVI-D mode, the Auto Adjustfunction is not available.
Common Symptoms
What You Experience
Possible Solutions
No sound for system where
the Soundbar draws power
from an AC adapter
No power to Soundbar - the
power indicator is off
l Turn the Power/Volume knob on the Soundbar clockwise to the middle position; check if
the power indicator (green LED) on the front of the Soundbar is illuminated.
l Confirm that the power cable from the Soundbar is plugged into the adapter.
No Sound
Soundbar has power - power
indicator is on
l Plug the audio line-in cable into the computer's audio out jack.
l Set all volume controls to their maximum and ensure that the mute option is not
enabled.
l Play some audio content on the computer (example, audio CD, or MP3).
l Turn the Power/Volume knob on the Soundbar clockwise to a higher volume setting.
l Clean and reseat the audio line-in plug.


