


®
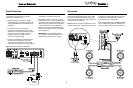
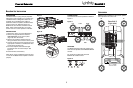
Make Power, Ground and Remote turn-on
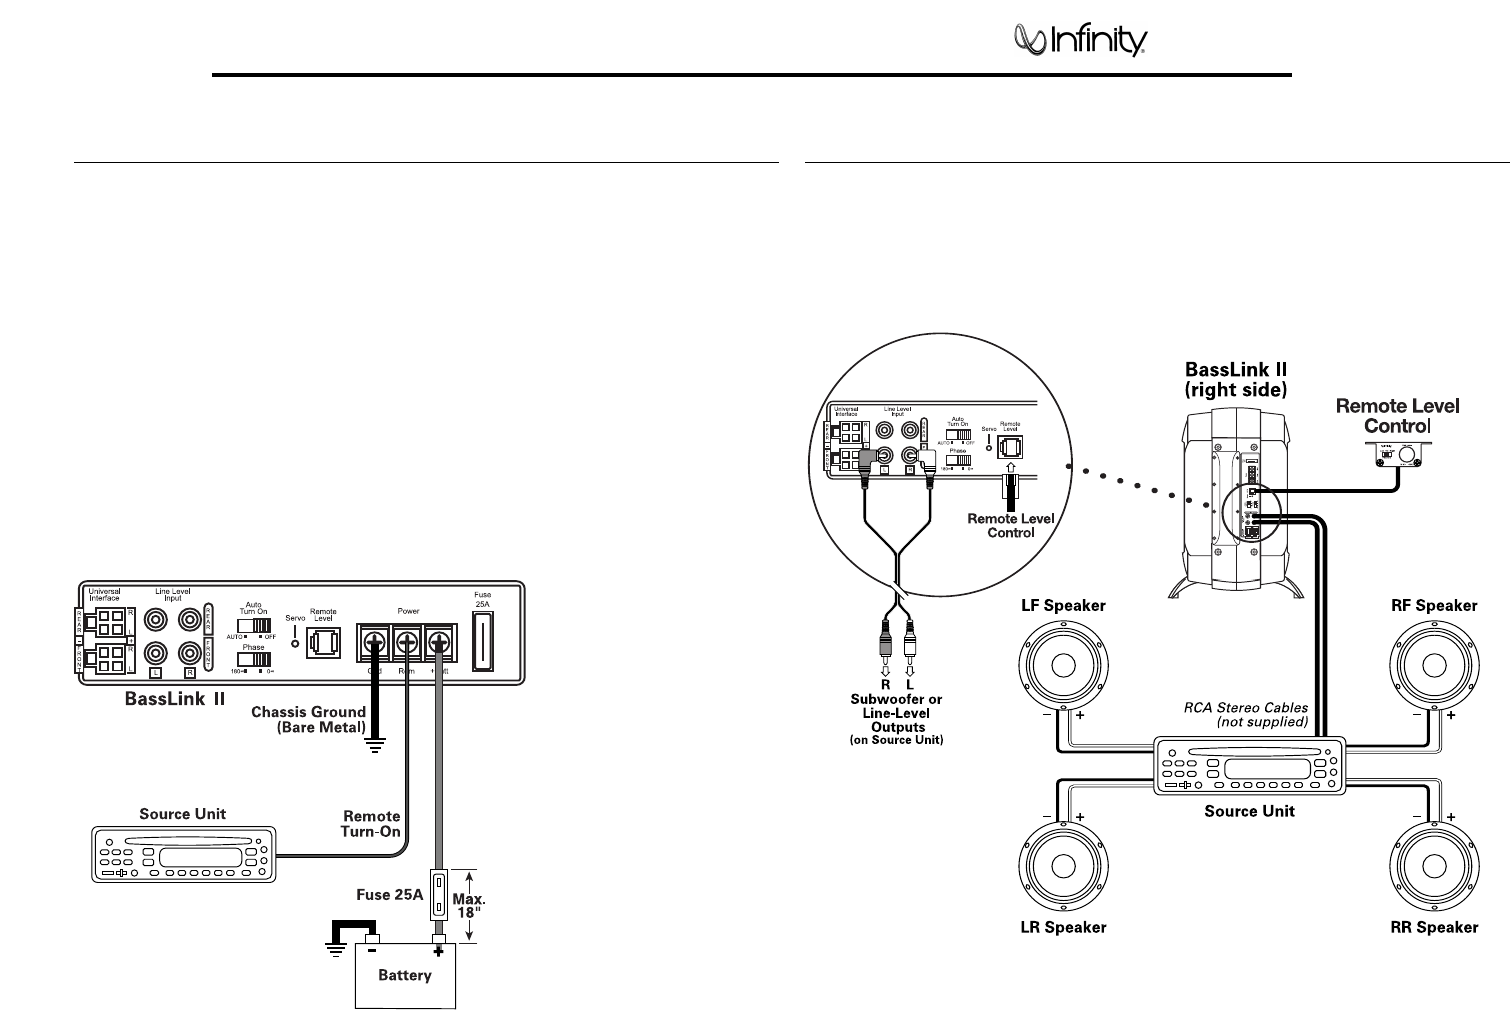
connections as shown in Figure 5. Observe
the following installation tips:
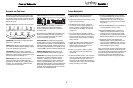
• Use #8 AWG wire for the +BATT (+12Vdc)
and GND (ground) connections. If needed, use
at least a #20 AWG wire for the REM (remote)
connection.
• If you pass the power or remote wire
through the vehicle’s firewall or other metal
obstruction, it must be insulated with a rubber
grommet. If a factory-installed grommet is
unavailable, be sure to install a rubber
grommet to protect the wires.
• Connect a short GND wire from BassLink II to
the nearest bare metal surface. For a good
connection, sand away paint from the metal
surface and use a screw with a (star) lock washer.
Figure 5. Power connections for BassLink II.
• Install a fuse holder with a 25A fuse within 18"
of the battery + terminal (see Figure 5).
• The REM connection requires +5 to +12 Vdc
for BassLink II to turn on remotely. Most head
units with preamp outputs provide this remote
voltage signal. For speaker-level applications,
a remote connection is not required, since
BassLink II’s AutoTurn On feature will sense
voltage on the speaker wires to automatically
turn on BassLink II.
IMPORTANT: To enable BassLink II’s Auto
Turn On feature, set AUTO TURN ON to the
AUTO position (see Figure 15 on page 6).
POWER CONNECTIONS
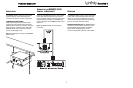
BassLink II is equipped with four line-level (RCA)
inputs and four speaker-level inputs. Any combina-
tion of line-level and speaker-level inputs may be
used to provide nonfading bass when connected to
a head unit with four outputs.
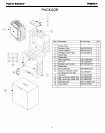
Figure 6. BassLink II audio connections for a head
unit with two line-level or subwoofer (RCA) outputs.
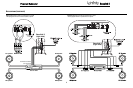
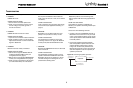
To help you plan your installation, we have
included three system applications in Figures 6
through 8. For more system ideas, see your
authorized Infinity car audio dealer.
Note: The applications show the REMOTE LEVEL
control, which installs under the dashboard for
easy in-car bass level adjustments (see page 7).
APPLICATIONS
Powered Subwoofer Basslink II
3