


CD6111
4
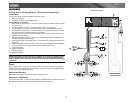
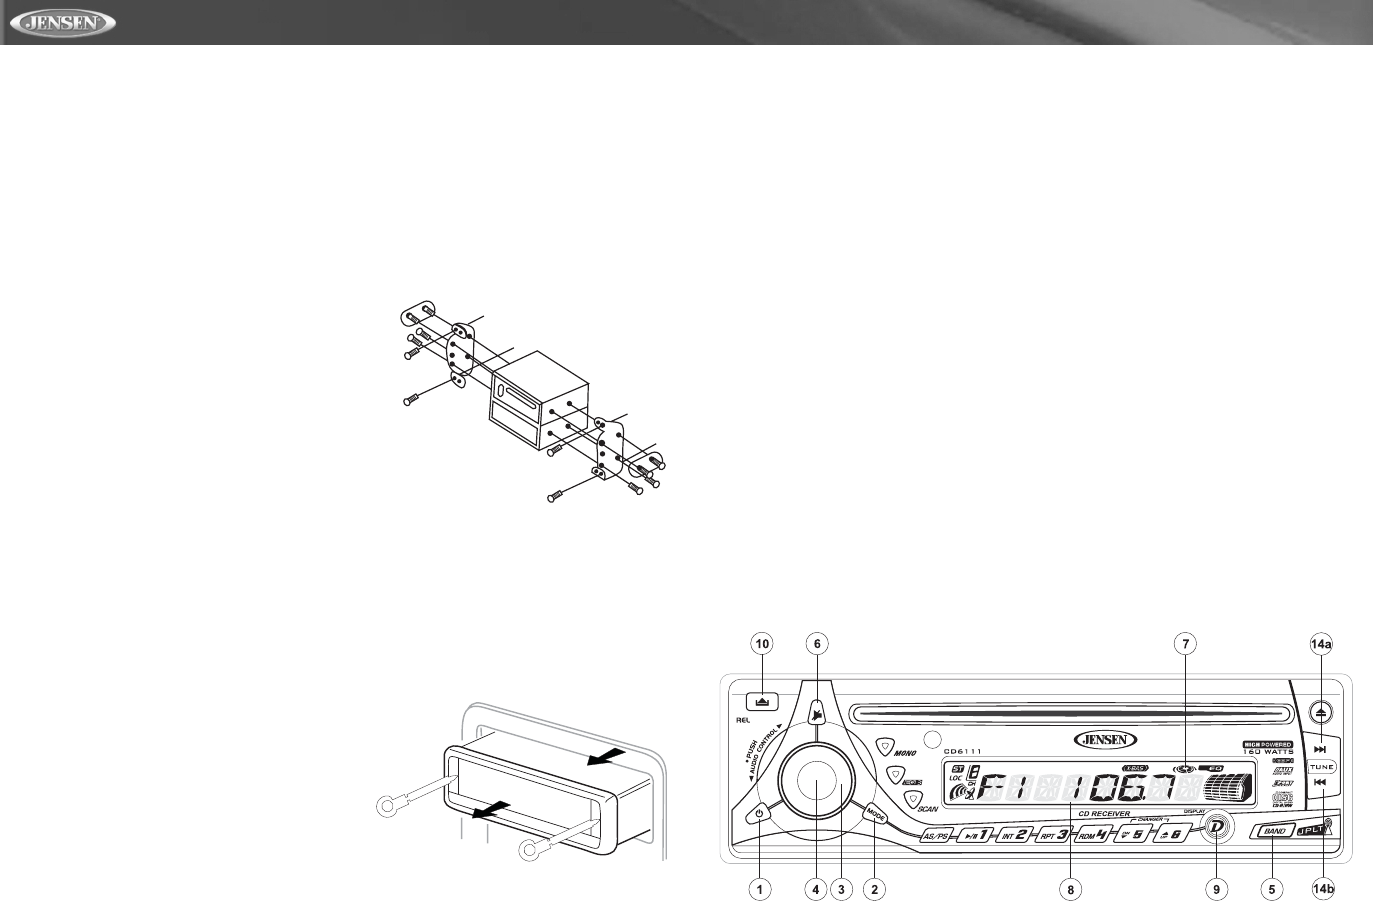
Kit Installation
If your vehicle requires the use of an installation kit to mount this radio, follow the instructions
included with the installation kit to attach the radio to the mounting plate supplied with the kit.
1. Wire and test the radio as outlined in the Universal Installation instructions.
2. Install the radio/mounting plate assembly to the sub-dashboard according to the
instructions in the installation kit.
3. Attach the support strap to the radio and dashboard as described in the Universal
Installation instructions.
4. Replace the dashboard trim panel.
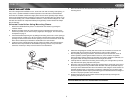
ISO Installation
This unit has threaded holes in the chassis side
panels which may be used with the original factory
mounting brackets of some vehicles to mount the
radio to the dashboard. Please consult with your
local car stereo shop for assistance on this type of
installation.
1. Remove the existing factory radio from the
dashboard or center console mounting. Save all
hardware and brackets as they will be used to
mount the new radio.
2. Carefully unsnap the plastic frame from the
front of the new radio chassis. Remove and discard the frame.
3. Remove the factory mounting brackets and hardware from the existing radio and attach
them to the new radio. Do not exceed M5 x 9 MM maximum screw size. Longer screws
may damage components inside the chassis.
4. Wire the new radio to the vehicle as outlined in the Universal Installation instructions.
5. Mount the new radio assembly to the dashboard or center console using the reverse
procedure of step 1.
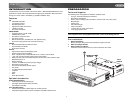
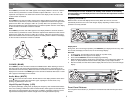
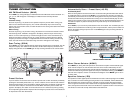
Remove Radio
To remove the radio after installation, remove the
trim ring by lifting in the center and pulling it off
from either side. Insert the removal keys straight
back until they lock, and then pull the radio out. If
removal keys are inserted at an angle, they will not
lock properly to release the unit.
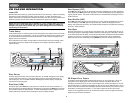
OPERATION
Power
Press the power button (1) or any other button on the face of the receiver to turn the unit on
when the ignition switch is on. Press the power button again to turn the receiver off. If the radio
was left on when the ignition was last turned off, the receiver will turn on automatically when
the ignition switch is again turned on. If the receiver was off when the ignition was last turned
off, the receiver must be turned on manually when restarting the vehicle.
Mode
Press MODE (2) to select a different mode of operation as indicated on the display panel.
Available modes include Tuner, CD, CD changer (CDC) and Auxiliary Input. During CD player
operation, pressing MODE will change to the tuner mode without ejecting the disc. The CD
icon (7) will remain in the display to indicate that a disc is still loaded in the unit. Unless a CD
changer is connected to the unit, the CD changer (CDC) mode cannot be accessed. To access
the Auxiliary Input mode, press the MODE button until "AUX" is indicated in the display.
Volume
To increase the volume, rotate the volume control (3) clockwise. To decrease the volume,
rotate the volume control counter clockwise. When volume is adjusted, the volume level is
shown on the display panel as a number ranging from “00” (lowest) to “100” (highest).
Select
Press PUSH (4) to step through the menu of audio functions. The first option is volume (VOL),
followed by bass (BAS), treble (TRB), balance (BAL), fader (FAD), and again by volume (VOL).
When adjusting audio functions, the unit will automatically exit select mode and return to the
normal display after five seconds or when another function is activated.
Select (continued)
Bass
Press PUSH (4) twice until “BAS” appears in the display. Within five seconds, rotate the
volume control (3) clockwise or counter clockwise to adjust the bass from “-10” to “+10”. “00”
represents a flat response. The bass level is shown on the display for five seconds or until
another function is activated.
REMOVAL KEYS