


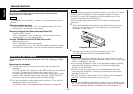

"Kex"/"ec4"/"dB" : Recalling the kenwood preset sound setting
Press the preset buttons (#1-6).
Settings:#1;Flat, #2;Rock, #3;Pops/Top40, #4;Jazz, #5;Easy,
#6;Scan of #1-5
• This mode is available only when the Sound coordinate system
is on. (page33)
• You can call the following settings with this function; bass
centre frequency, bass level, bass quality factor, bass
extension, treble centre frequency, and treble level setting.
Their setting values are different depending on the setting of
the mobile preset plan mode.
NOTE
Please refer to the following for the contents of the
adjustment modes.
Source tone memory
Each source (tape, CD, FM, AM, and disc changer) has its own
memory in which to store the bass, treble and N-F level settings.
The settings made for a particular source are then recalled
automatically whenever you use that source (e.g., FM mode uses
the tone settings made for FM, AM for AM, etc.).
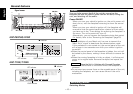
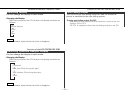
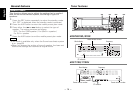
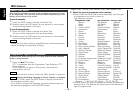
Adjust each mode
Press the 4/¢ button.
Look at the table to adjust the mode being displayed.
Press the AUD button to end the control mode.
4
3
NOTE
Adjust various parameters of sound quality.
Press the AUD button to enter the control mode.
Selecting mode
Press either the FM or AM button.
Each time the button is pressed, the adjustment mode will
change.
2
1
Audio Control Setting
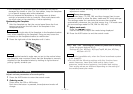
• The faceplate is a precision piece of equipment and can be
damaged by shocks or jolts. For that reason, keep the faceplate
in its special storage case whilst detached.
• Do not expose the faceplate or its storage case to direct
sunlight or excessive heat or humidity. Also avoid places with
too much dust or the possibility of water splashing.
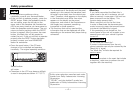
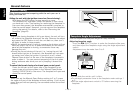
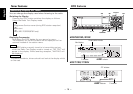
Reattaching the Faceplate:
Hold the faceplate so that the control panel faces the front
toward you and set the left side of the faceplate in the
faceplate bracket.
Do not set the right side of the faceplate in the faceplate bracket
first, when reattaching the faceplate. Doing so may cause the
connector on the faceplate bracket to malfunction.
Press the right side of the faceplate until it locks.
If the faceplate bracket's angle was not set to the vertical when
the faceplate was mounted, check that the faceplate is securely
attached to the faceplate bracket by holding its right side and
pulling it gently towards you.
NOTE
2
2CAUTION
1
— 11 —