


6
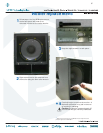
Woofer replacement continued:
6
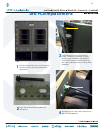
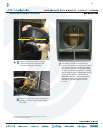
Remove cables from terminals simply by
pushing down on terminal and pulling
out cable.
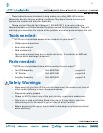
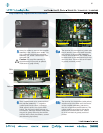
7
This is what it looks like with the front
panel and woofer both removed. Place
the new woofer (part #0012184) where
the old one was. Follow the same steps
as above, but backwards 6 to 1, making
sure to keep the led PCB assembly cable
in front of the woofer. Power up the
SWA1801z and the new woofer should
now be pumping out glorious lows.
Awesome, you just replaced an 18”
woofer!
Push
in
+
-
5
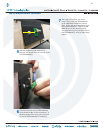
Positive (solid yellow) and negative
(yellow and black) cables are still
attached to woofer terminals.
*
*
This picture was taken during an SWA1501 woofer repair. The same
principle applies to the SWA1801z.