9
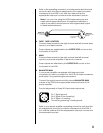
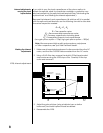
Be sure all associated equipment is disconnected from the AC mains.
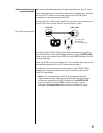
After making all signal connections and internal adjustments, connect
the ten-pin DC cable from the rear panel of the PLS-228 to the
connector on the rear panel of the Nº28.
Connect the AC cord to the male IEC connector on the rear panel of
the PLS-228, then connect the AC cord to the AC mains.
Power connection and
system activation
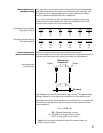
To PLS-228 To AC mains
1
3
2
1
2
3
1 = Line (hot)
2 = Neutral
3 = Earth ground
AC power cord polarity
The LED on the PLS-228 will light; after about five seconds, the LED on
the Nº28 will flash. After the LED begins flashing, turn the OUTPUT LEVEL
knob on the front panel of the Nº28 to its lowest (OFF) position (the LED
will stop flashing).
Allow the Nº28's circuitry to stabilize for 1 to 2 minutes, then connect all
associated equipment to the AC mains and activate it.
For optimal sonic performance and longevity, the Nº28/PLS-228 is
designed to remain powered at all times (a power-on/power-off
switch isn't provided).
Note: If AC mains power to the Nº28 is interrupted, the main
output will be muted. When power is restored, the main output
will remain muted and the LED will flash until the OUTPUT LEVEL
knob is turned to its lowest (OFF) position (the LED will stop
flashing). Allow the preamplifier circuitry to stabilize for 1 to 2
minutes; the OUTPUT LEVEL control will then function normally.


