


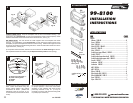
9
2
1
1
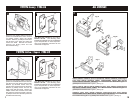
TOYOTA Celica (GT/GTS) 1986-89
TOYOTA Celica (ST) 1986-89
2
2
Disconnect the negative battery terminal to
prevent an accidental short circuit. Remove
(2) screws from the lower steering column
panel and remove the panel. Remove (2)
screws exposed on the dash trim bezel.
Open the glove box and remove (2) screws
exposed. Remove (2) screws from the
ashtray cavity and (2) screws from the
bracket. Remove (2) screws from each side
of the dash trim bezel and unclip the bezel.
Remove the screws securing the factory head
unit and disconnect the wiring.
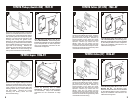
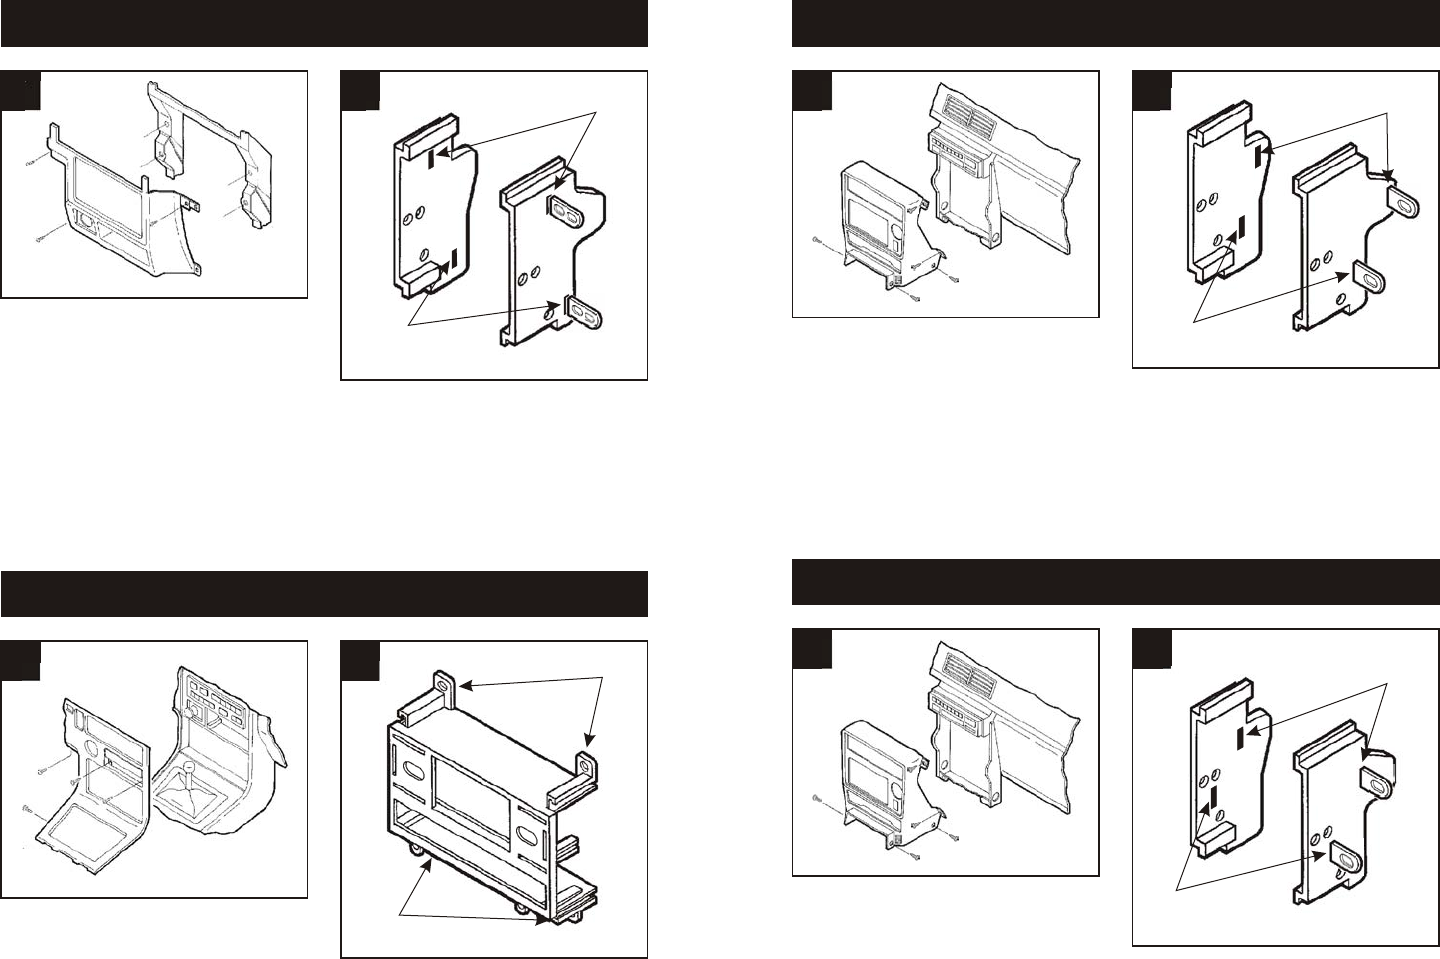
Slide Mounting Tabs #3 and #8 into slots
"B" on Bracket Set #2. The Mounting Tabs,
Brackets and Bracket slots can be identified
by the stamped letter on each component.
Skip to the Installation Instructions for ALL
VEHICLES on Page #10.
Slide Mounting Tabs #8 into slots "C" on
Bracket Set #2. The Mounting Tabs,
Brackets and Bracket slots can be identified
by the stamped letter on each component.
Skip to the Installation Instructions for ALL
VEHICLES on Page #10.
1
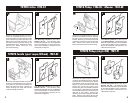
TOYOTA Pickup (double DIN) 1989-91
2
Slide Mounting Tabs #3 into slots "H" and
"D" on Bracket Set #2. The Mounting Tabs,
Brackets and Bracket slots can be identified
by the stamped letter on each component.
Skip to the Installation Instructions for ALL
VEHICLES on Page #10.
Disconnect the negative battery terminal to
prevent an accidental short circuit. Remove
(3) screws and (1) bolt securing the driver's
side speaker panel and remove the panel.
Remove (1) screw from the left side of the
housing and unsnap the ignition cover.
Remove the glove compartment assembly
by removing (1) 10mm bolt from the bottom
of the speaker panel and (3) screws from the
right side of the housing. Remove the
remaining (3) screws securing the radio trim
bezel. Remove the screws securing the
factory head unit and disconnect the wiring.
"B"
"C"
"C"
"B"
"D"
"H"
1
TOYOTA Supra 1986-92
2
Disconnect the negative battery terminal to
prevent an accidental short circuit. Remove
the ashtray and (2) screws from the ashtray
cavity. Remove (1) screw to the right of the
steering column and (1) screw to the left of
the gear shifter. Remove the screws
securing the factory head unit and
disconnect the wiring.
Locate the Mounting tabs on Radio
Housing #1. (Brackets are NOT required
for this vehicle). Skip to the Installation
Instructions for ALL VEHICLES on Page
#10.