En-32
Using the Timer—Continued
3
Use the [ ]/[ ] buttons to select a
playback device, then press the [ENTER]
button.
For a playback device, you can select from CD,
USB/iPad, DAB, FM, and LINE. If you select an
option other than DAB and FM, skip to step 5.
4
Use the [ ]/[ ]buttons to select the
desired preset number, then press the
[ENTER] button.
5
Use the [ ]/[ ] buttons to set the timer
frequency to everyday, every specified
day(s) of the week, or once. Then press
the [ENTER] button.
Everyday: The timer works every day. ➞Skip to
step 8.
Every: The timer works every specified day(s) of
the week. ➞Skip to step 6.
Once: The timer works one time only. ➞Skip to
step 7.
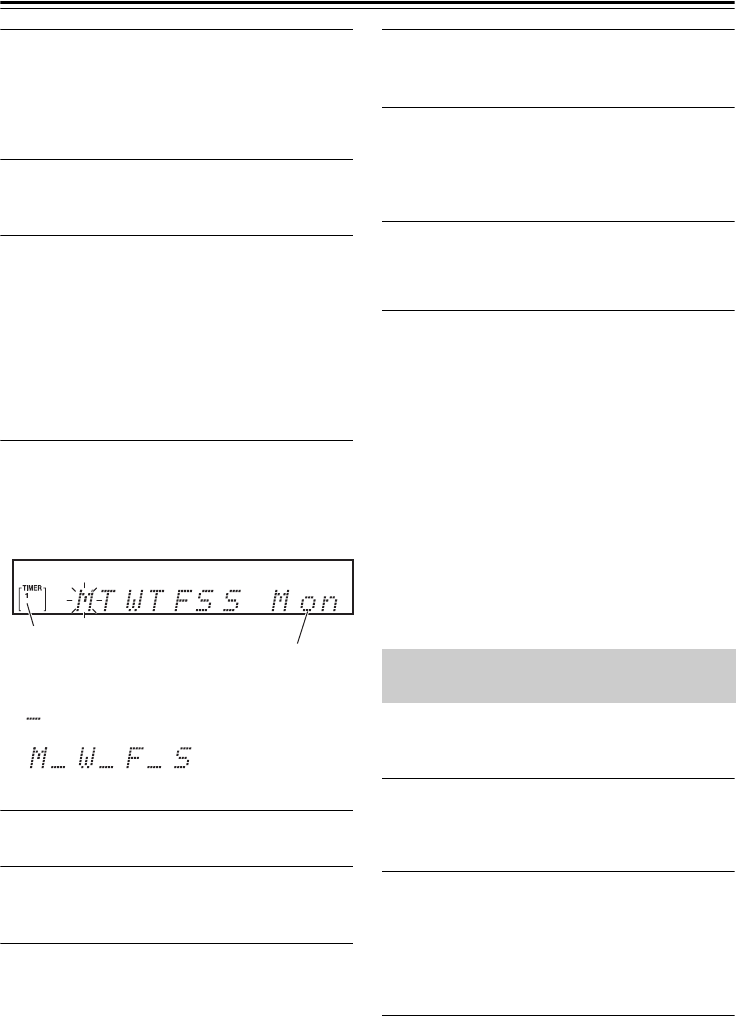
6
Press the []/[ ] buttons to move the
cursor to the next or previous day of the
week, press the [ ]/[ ] buttons to set that
day of the week to On or Off, then press
the [ENTER] button.
Skip to step 8.
7
Use the [ ]/[ ] buttons to select the day of
the week, then press the [ENTER] button.
8
Use the [ ]/[ ] buttons to set the hour for
the “On” (start) time, then press the
[ENTER] button.
9
Use the [ ]/[ ] buttons to set the minute
for the “On” (start) time, then press the
[ENTER] button.
When you change the “On” time, the “Off” time
is set to one hour later automatically.
10
In the same way as for the “On” time, use the
[
]/[ ] buttons and [ENTER] button to set
the hour and minute for the “Off” (end) time.
11
Press the [ ]/[ ] buttons to adjust the
timer playback volume level, then press
the [ENTER] button.
You cannot set the volume level to “0.” Instead, you
can select “Last” (the volume level used last time).
12
Set the CD receiver to standby mode.
If the CD receiver is on, the timer will not work.
Be sure to set the CD receiver to standby mode at
least two minutes prior to the timer “On” time.
Note:
• If two timer settings overlap, the second timer will not
work. Set the timers carefully so that the timer
duration (between “On” and “Off”) will not overlap.
• If the sleep timer is activated while the CD receiver is
playing due to one of the programmable timers, the
sleep timer setting will take precedence, and the CD
receiver will not stop at the “Off” time.
• If you have selected a CD, USB flash drive, or iPod
as the playback device, set the device ready for
playback, and place the CD receiver in standby mode.
• If you have selected LINE as the playback device,
LINE will be selected as the input source at the “On”
time, and the specified volume level will be set, but
nothing else will occur. If you want to play an
external device connected to the LINE IN jacks,
program a timer on the external device.
Once a timer has been programmed, you can turn it off
or on again, as desired. Also, if a timer is set to “On,”
you can view and modify the timer setting.
1
Press the [TIMER] button repeatedly to
select a timer number.
The timer is activated if the “On” is flashing on
the display.
2
Use the [ ]/[ ] buttons to select “On” or
“Off”, then press the [ENTER] button.
If you select “Off,” the programmed timer is
disabled (the setting itself is stored), and the CD
receiver returns to the previous display.
Select “On” to view and modify the timer setting
(if necessary) (see page 31).
When the clock is displayed, the currently-enabled
timer's number appears near the left end of the display.
Timer number
Day of the week of the current
cursor position
Example: The timer works on Monday, Wednesday,
Friday and Sunday.
: Off
Turning a Timer On (Enable) or Off
(Disable)


