


Setting up the display 7
Setting up the display
Mounting the display
You can install the display on a vertical surface with a suitable wall mounting bracket or on a
horizontal surface with a table stand. Please pay attention to the following notes during
installation:
• This display should be installed by at least two adult persons. Attempting to install this display by
only one person may result in danger and injuries.
• Refer the installation to qualified technicians. Improper installation may cause the display to fall
or malfunction.
Installing the display on a wall
Note:
• To maintain proper ventilation, keep at least 10 mm of clear space from the back cover
of the display to the wall.
• Please consult a professional technician for wall mount installations. The
manufacturer accepts no liability for installations not performed by a professional
technician.
1. Place a clean, dry and lint-free cloth on a flat, horizontal and object-free surface. Make sure
that the size of the cloth is larger than the display.
2. Gently lay the display on the cloth with the LCD screen facing down.
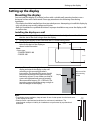
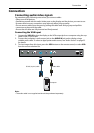
3. Identify the wall mounting screw
holes on the back of the display as
shown in the illustration.
Note:
• Screw type:
- PS4652/PS5552: M6
- PS6552: M8
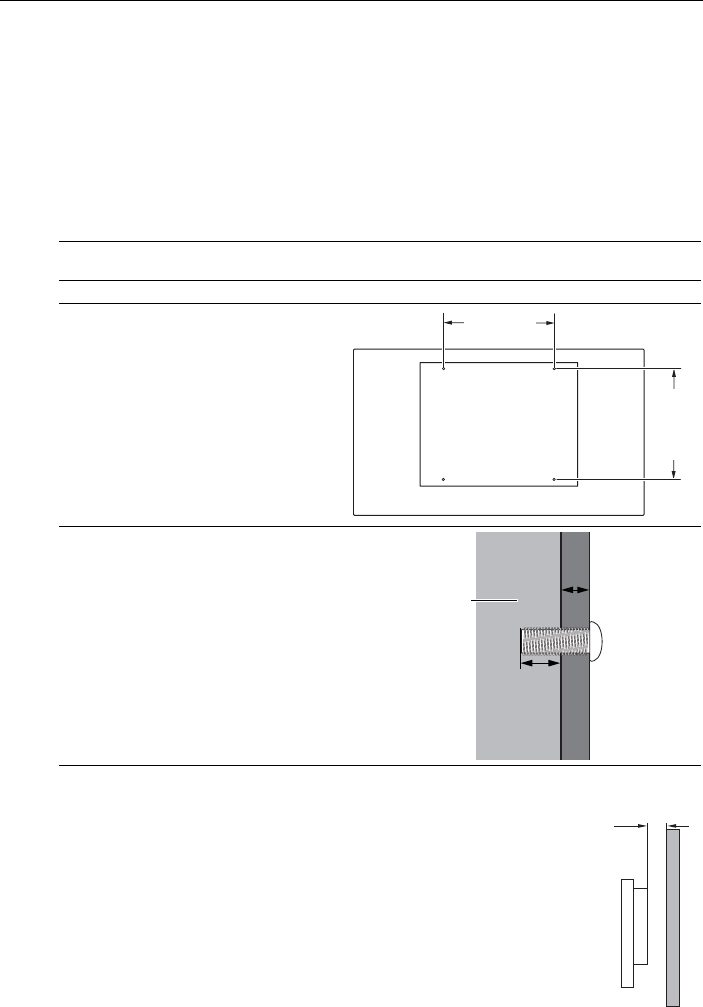
4. Install the wall mounting bracket on the
display and attach the display to the wall
according to the mounting bracket’s
instructions. The length of the screw should
exceed the thickness of the wall mounting
bracket by at least 10 mm. Make sure that all
screws are tightened and secured properly.
(Recommended torque: 470 - 635N•cm). The
mounting means should be strong enough to
bear the weight of the display.
400mm
400mm
Thickness of the
wall mounting
bracket
10 mm
(0.39")
Display
10mm
(0.39")