


Contact Polk Customer Service: 800-377-7655 polkcs@polkaudio.com
76
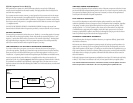
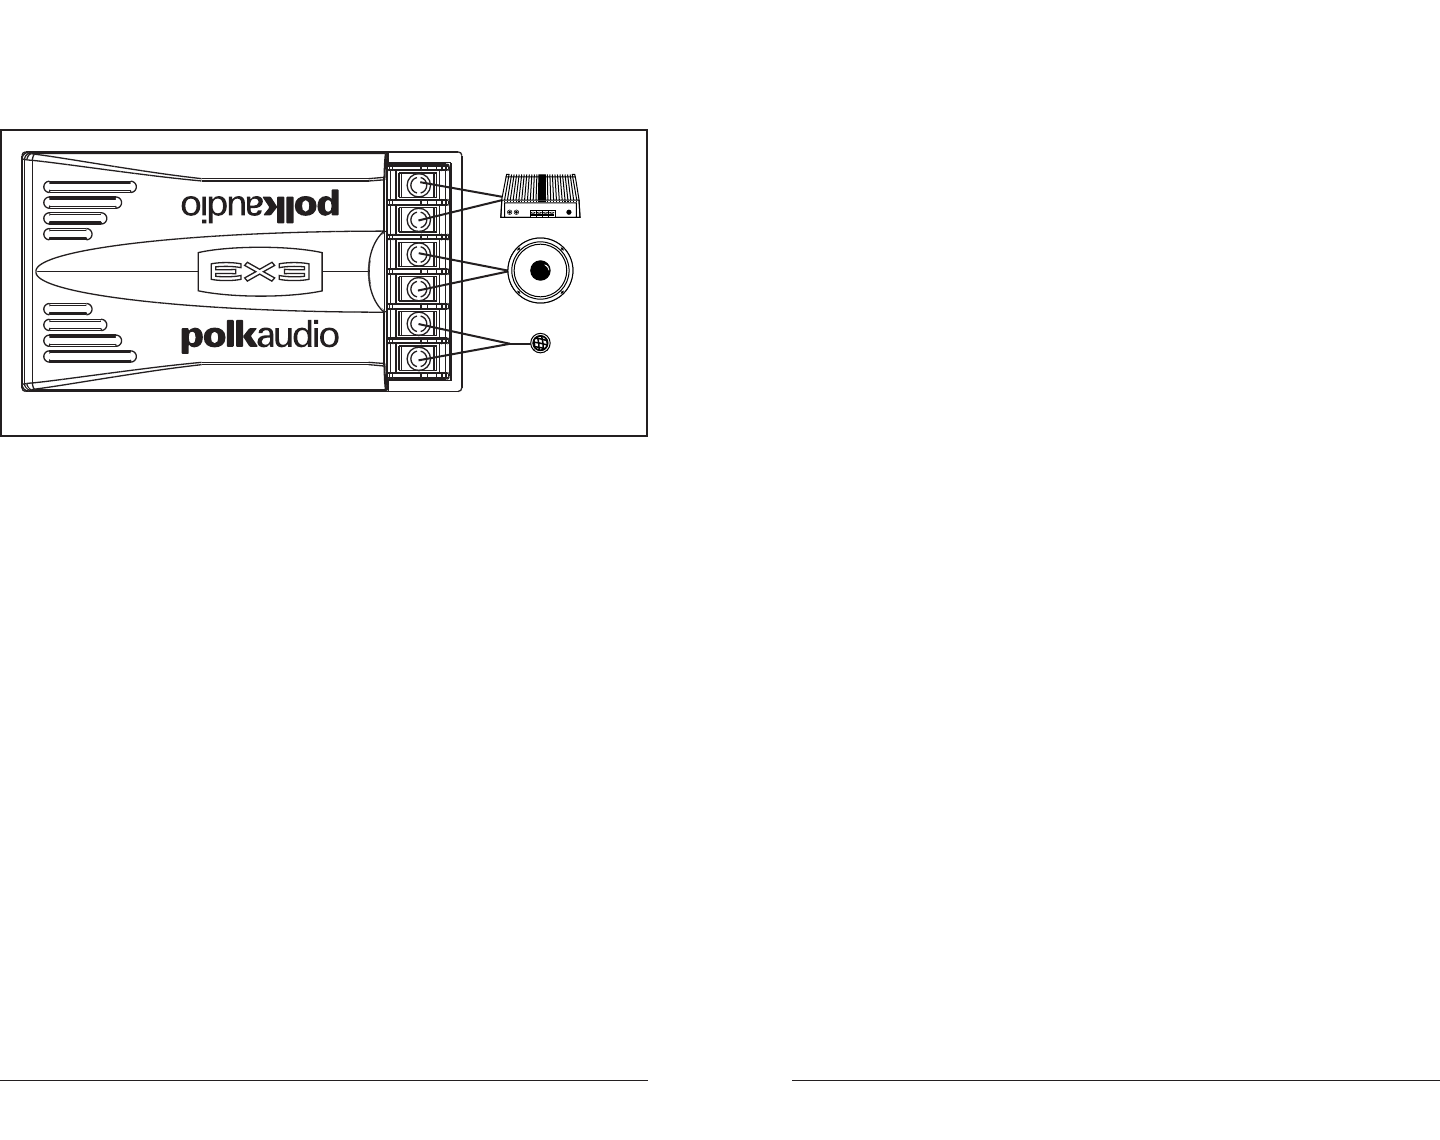
Your EX3 Series Crossovers have terminals that are clearly marked for wiring connections. These
connections are shown in [figure 3]. The wires provided with your EX system have one red conductor.
Use this wire as the positive (+) lead and connect it to the positive (+) terminals on your crossovers
and the positive (+) terminals of each of your speakers.
Installing your mid-woofers in a factory location
1.) Carefully remove the grille covering the factory speaker. In most cases it will be “press-fit” or
screwed to mounting tabs molded into the surrounding area. On some cars, grilles are held by
screws or spring clips. The screws will be obvious, the spring clips may not be. If you experience
any resistance you may need to consult your dealer or your car’s owner’s manual to determine
if there is any special way the manufacturer has secured the grille. If you don’t feel comfortable
prying at your car’s interior with a pry tool, and the grille resists your efforts, back off and think
again about a professional installation. The cost of a professional installation is usually less than
the cost of new door panels or dashboards. Some grilles are integral parts of their panels and are
not removable. In these cases you will need to remove the entire door panel to gain access to the
speaker location. This will usually require the removal of door handles, window winder mecha-
nisms and perhaps other parts such as door pulls and lock buttons. Pros do this stuff in their
sleep. Think about it.
2.) If you’re still reading, and you’ve removed your factory grille, remember to keep all screws,
mounting clips or lock washers that held the factory speaker in place and save them for reuse.
Lift the speaker out of the hole a short distance.
3.) Before unhooking the speaker wires, identify the positive speaker terminal (usually marked with
a red dot or [+], or it is the terminal that is larger or wider) and identify the negative speaker
terminal (usually marked [–], or having no marking, or whichever terminal is the smaller or
narrower of the two). Mark the wire connected to the positive terminal for later identification.
Use a permanent marker or piece of tape.
4.) Disconnect the factory speaker. After disconnecting the factory speaker, connect the wires to your
new Polk Audio speaker, hooking up the positive [+] wire to the wider of the two EX3 terminals
and the negative [–] to the narrower EX3 terminal.
5.) Mount your EX3 Loudspeaker using the mounting hardware you saved from Step 2.
6.) Remount the factory grille cover.
7.) Repeat Steps 1-6 for the other speaker(s).
Installing your mid-woofers in a “New Location”
Factory locations uncool? Pick a new location. Be sure to take into account both your vehicle’s design
and your sonic goals. Before you begin, read all of these steps. If you have any doubts about your ability
to execute any of these steps, save yourself a lot of grief and contact a professional installer. Your Polk
Audio dealer is a good place to find one.
1.) Using the door panel pry-tool, carefully remove any door panels, kick panels, molded parts or fabric
coverings to expose the surface that will need to be cut to install the new speaker.
2.) Check the dimensions around and behind the installation area for fit. This includes any moving
parts behind the speaker (move the windows up and down) or the sides of the speaker (open and
close doors).
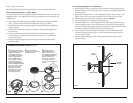
3.) Locate the template over the desired location. Draw the inside circle and mark at least two opposing
screw locations.
4.) Cut the circle with the appropriate tool. Drill pilot holes for the screw locations. File the edges
of any bare metal surfaces until smooth, then coat with primer to prevent rust.
5.) When primer is dry, slip mounting clips over the screw holes.
For more info and accessories, visit www.polkaudio.com
AMP
WOOFER
TWEETER
FIG. 3
+–+–+–