


3
1
2
3
53
182
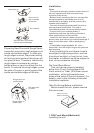
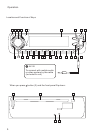
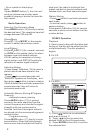
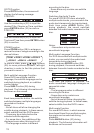
(Fig.1)
1. Dashboard
2. Hoder
After inserting the holder into the
dashboard, select the appropriate tab
according to the thickness of the
dashboard material and ben them
inwards to secure the holder in place.
3. Screw
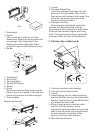
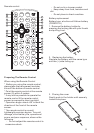
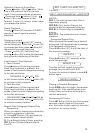
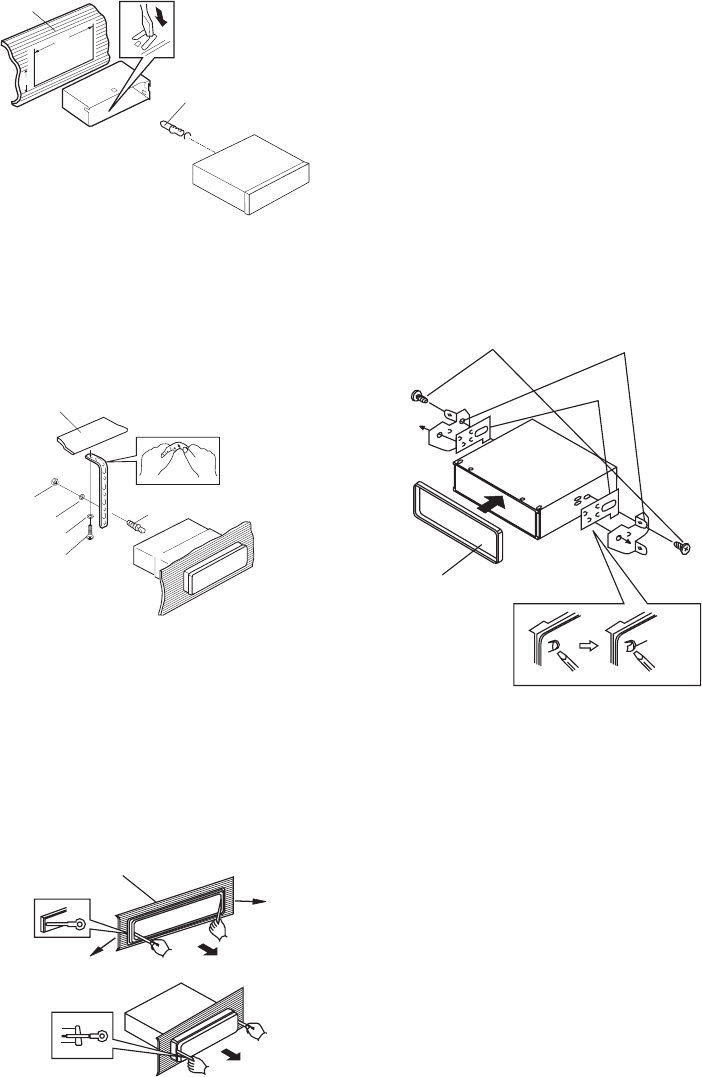
(Fig.2)
1
6
2
3
7
4
5
1. Dashboard
2. Nut (5mm)
3. Spring washer
4. Screw (5X25mm)
5. Screw
6. Strap
Be sure to use the strap to secure the
back of the unit in place. The strap can
be bent by hand to the desired angle.
7. Plain washer
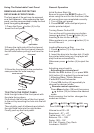
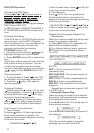
Removing the unit
2
1
3
1. Frame
2. Release Frame Key
Insert the release frame key into the
groove at the right side of the frame,
then prize out to remove the frame (You
can also use the key to remove the
frame from the left side.)
3. Release Unit Key
After releasing the frame, insert the
release unit keys supplied with the
accessory into the grooves at both sides
of the unit as shown in figure until they
click. Pulling the keys makes it possible
to remove the unit from the dashboard.
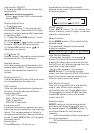
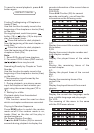
2. DIN Rear-Mount(Method B)
Ta b
1
6
2
3
4
5
1. Factory-installed radio bracket
2. Car radio mounting bracket
3. Screw
4. After aligning the car radio mounting
bracket with the factory-installed radio
bracket, tighten the screws (M5X4mm)
at 2 places on each side.
5. When fixing factory-installed radio
bracket with the screws, use a
standard-tipped screwdriver to pry the
tabs of the car radio mounting bracket
to make them fit into holes in the
factory-installed radio bracket.
6. Movable panel frame.