


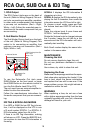

Radio Operation
1. Choose Radio Band
Press the BND•ID3 Button anytime to ac-
cess the radio function.
The unit comes with five bands - three FM
(FM1, FM2, and FM3) and two AM (AM1 and
AM2) Band selects. Each of the five bands
can store up to six preset stations, for a to-
tal of 30 preset memory stations.
NOTE: To change the receiving range from
USA to Europe, remove the faceplate and
move the switch marked “A-E” to the ap-
propriate region.
2. Radio Tune / Seek Function
In Radio Mode, press and hold the >>| or |<<
Button, the word MANUAL will be shown on
the LCD. Now you will be able to tune the
radio frequency by .10 with each press of
|<< or >>| button.
To Scan automatically for the next strongest
signal press and hold the */SCN button.
The receiver will start searching for the next
strongest signal. When the next strongest
signal is found the LCD will flash the fre-
quency ON and OFF. To remain tuned to a
frequency press the */SCN button again.
3. Mono/Stereo Reception Control
In FM radio mode, press the 0/ST button
on the front panel or on the remote control
to toggle between mono reception or stereo
reception. The display will show “MONO” or
“STEREO”.
Improvement of reception of distant sta-
tions can be done by selecting “MONO”
operation which may cut down some re-
ception noise.
4. Save Your Preset Stations
There are six numbered preset buttons
which can store and recall stations for each
band. While listening to a radio station,
press and hold one of the buttons num-
bered 1-6 until you hear a beep, the BEEP
function must be ON. That button is now
the pre-set button for that station.
5. Automatic Store/Preset Scan
A. Automatic Scan & Store
While listening to the FM Radio, press and
hold the F/PS Button for more than 3 sec-
onds. The receiver will automatically scan
and save stations to one of the FM Bands.
While listening to the AM Radio, press and
hold the F/PS Button for more than 3 sec-
onds. The receiver will automatically scan
and save stations to one of the AM Bands.
B. Reset Automatic Scan & Store
Press and hold the F/PS button for 3 sec-
onds and the receiver will scan the radio
stations in your area, then save them over
the current pre-sets.
C. Scan Saved Stations
Press the F/PS Button once to scan all sta-
tions saved. In the FM Mode, all 3 FM Bands
will be scanned. In the AM Mode both of the
AM Bands will be scanned.
RDS Operation
RDS stands for Radio Data System and is
used to send small amounts of digital in-
formation via conventional FM radio broad-
casts. The RDS system standardizes sev-
eral types of information transmitted such
as time, track, artist information, and sta-
tion identification.
RDS-EON Control
This unit is equipped with the latest tech-
nology of EON control (Enhanced Other
Networks) , this allows the radio to monitor
other radio stations for traffic broadcasts,
so when you are listening to Radio or CD,
and there is a travel announcemnet from a
nearby local station, the radio will tune to
the frequency of that local radio station.
Then it will receive the station, turn up the
volume, or interrupt the playback of the mu-
sic for the duration of the announcement.
At the end of the announcement the radio
will return to its previous state ready for the
next announcement.
14