4
E
Setting up the PC
Install
Caution
• This can only be done by a user with administrator authority.
• If an older version of the touch panel settings tool is installed, remove (uninstall) the old version before installing the touch
panel settings tool. (See page 8.)
• Do not touch the touch panel when connecting the USB cable.
If you touch the touch panel, it will lead to a malfunction. In this case, disconnect and then reconnect the USB cable.
1. Start your PC.
2. Exit all applications that are running.
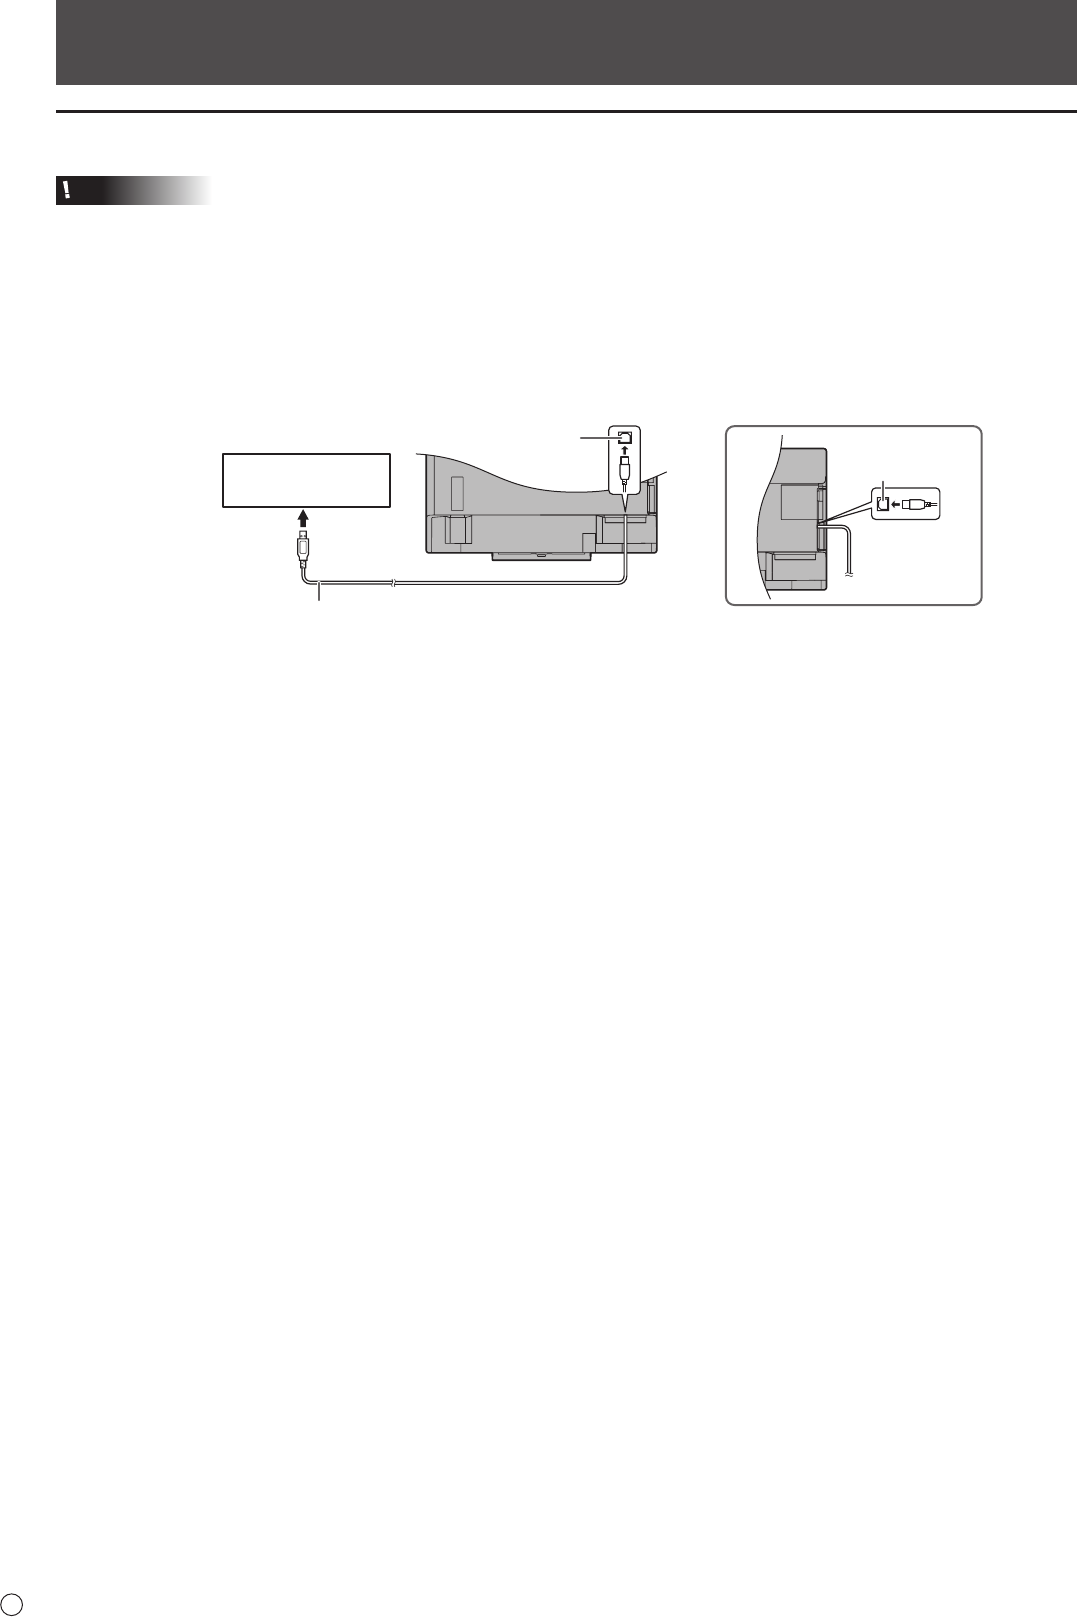
3. Connect the USB cable.
After it has been connected, the touch panel will be automatically recognized.
To the USB terminal
of the PC
USB cable
USB 1 port*
USB 2 port*
* To use a touch panel with a computer connected to the bottom, connect to the USB 1 port.
To use a touch panel with a computer connected to the side, connect to the USB 2 port.
(Factory setting. Can be changed in TOUCH INPUT SELECT in the SETUP menu.)
4. Insert the supplied CD-ROM into the CD-ROM drive of your PC.
5. Open the CD-ROM drive in “Computer”.
6. Double-click the “TouchPanel” folder, and then double-click the “Windows” folder.
7. Double-click “Setup.exe”.
When the “User Account Control” screen appears, click “Yes” (or “Allow”).
8. Select the language for installation, and click “Yes”.
Follow the on-screen instructions to install the driver.
• If the “Windows Security” screen appears, click “Install” (or “Install this driver software anyway”).
• If the “Software Installation” screen appears, click “Continue Anyway”.
• If the “SHARP Touch Panel Settings Tool Files in Use” screen appears, click “Continue”.
9.Whentheinstallationnishedscreenappears,click“Close”.
This completes the installation of the touch panel settings tool.
Each time the PC is started, the touch panel settings tool will start automatically to enable the touch panel to be used.
The rst time you use the touch panel, perform calibration (position adjustment). (See page 6.)


