


04/1/28 XL_DH350NH.fm
7
9
8
7
6
5
4
3
2
1
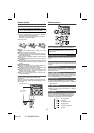
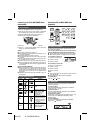
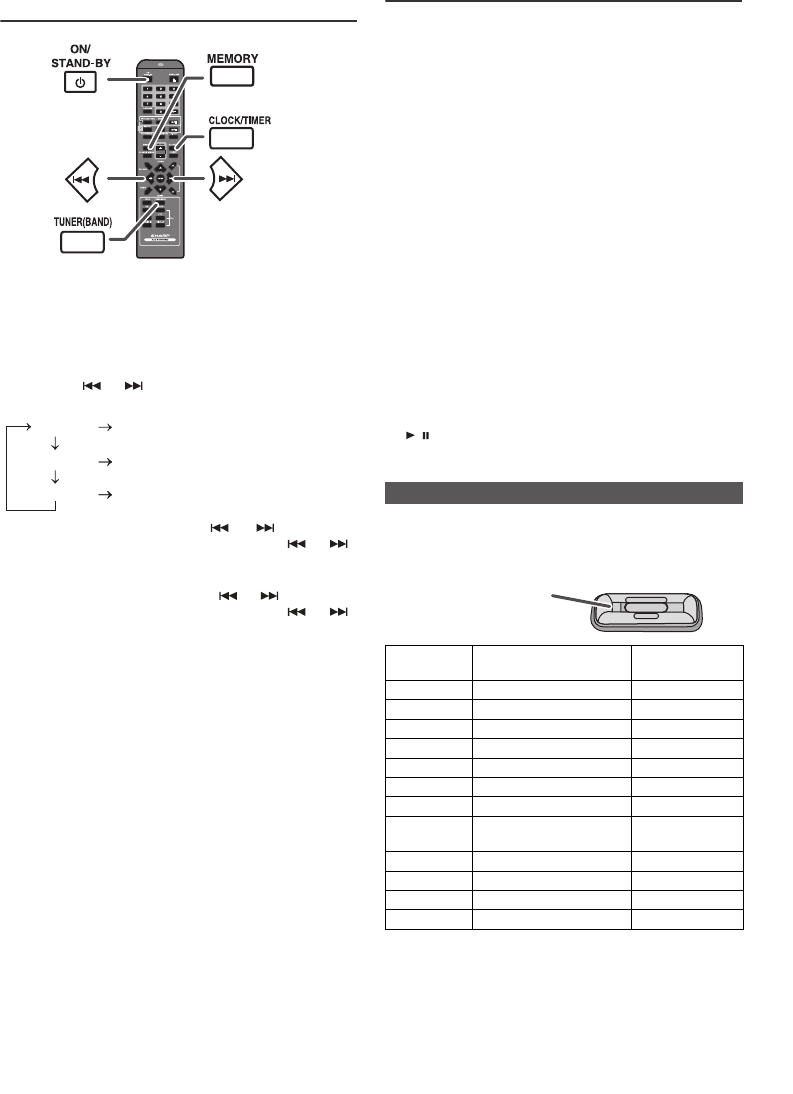
Setting the clock (Remote control
only)
In this example, the clock is set for the 24-hour (0:00)
display.
To confirm the time display:
Press the CLOCK/TIMER button. The time display will
appear for about 5 seconds.
Note:
The “CLOCK” will appear or time will be displayed when
the AC power supply is restored after a power failure or
unplugging the unit. If incorrect, readjust the clock as
follows.
To readjust the clock:
Perform “Setting the clock” from step 1. If the “CLOCK”
does not appear in step 2, step 3 (for selecting the 24-hour
or 12-hour display) will be skipped.
To change the 24-hour or 12-hour display:
Listening to the iPod
Supported iPod models:
●
iPod nano (software 1.2 above)
●
iPod mini (software 1.2 above)
●
iPod (5
th
generation) (software 1.3 above) (Dock
connector equipped Click Wheel model)
●
iPod (4
th
generation) (software 3.0.2 above) (Dock
connector equipped Click Wheel model)
●
iPod nano (2
nd
generation) (software 1.0.0 above)
●
iPod nano (3
rd
generation) (software 1.0.3 above)
●
iPod nano (4
th
generation) (software 1.0.3 above)
●
iPod classic (software 1.0.3 above)
●
iPod touch (software 1.1 above)
●
iPod touch (2
nd
generation) (software 2.1 above)
Caution:
Please update your iPod unit to the latest software version
from Apple’s homepage before using it.
Notes:
● Once the iPod is connected to the unit it will begin
charging.
● The iPod unit cannot be charged whilst the main unit is
in the stand-by mode or during USB mode.
Auto power on function:
When you press any of the following buttons, the unit turns
on.
● iPod button on the remote control: The unit turns on
and the iPod function is activated.
● / button on the main unit: The unit turns on and
playback of the last function will start (iPod, CD,
TUNER, USB, AUDIO IN).
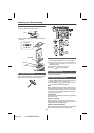
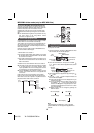
Choose the iPod adaptor that fits your iPod. Your iPod will
fit snuggly into the correct adaptor. If your iPod is not
mentioned below, an iPod adaptor may have been
included with your iPod unit.
Notes:
● iPod nano 2G, iPod nano 3G, iPod classic and iPod
touch are not compatible with the iPod adaptors listed
above. Please use the adaptor supplied with your iPod
unit.
● If you have an iPod that does not have an iPod 30 Pin
connector, you can use an audio cable to connect it to
the AUDIO IN socket.
● iPhone is not supported by this system.
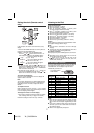
1 Press the ON/STAND-BY button to turn the power on.
2 Press the CLOCK/TIMER button.
3 Within 10 seconds, press the MEMORY button.
Press the or button to select 24-hour or 12-
hour display and then press the MEMORY button.
The 24-hour display will appear.
(0:00 - 23:59)
The 12-hour display will appear.
(AM 12:00 - PM 11:59)
The 12-hour display will appear.
(AM 0:00 - PM 11:59)
4 To adjust the hour, press the or button and
then press the MEMORY button. Press the or
button once to advance the time by 1 hour. Hold it
down to advance continuously.
5 To adjust the minutes, press the or button and
then press the MEMORY button. Press the or
button once to advance the time by 1 minute.
1 Clear all the programmed contents. [Refer to “Factory
reset, clearing all memory” on page 21 for details.]
2 Perform “Setting the clock” from step 1 onwards.
CD
USB
“0:00”
“AM 12:00”
“AM 0:00”
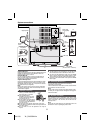
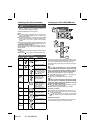
■ iPod adaptor connection
iPod
Adaptor No.
iPod Description Capacity
9 5G iPod (with video) 30GB
9 U2 iPod with video 30GB
9 iPod classic 80GB, 120GB
10 5G iPod with video 60GB & 80GB
10 iPod classic 160GB
A iPod mini 4GB & 6GB
A 4G iPod & U2 iPod 20GB
A iPod photo & colour U2
iPod
20GB & 30GB
A iPod with colour display 20GB
B 4G iPod 40GB
B iPod photo 40GB & 60GB
B iPod with colour display 60GB
9
The marking shows
which iPod fits