


4
MZ-E707
SECTION 2
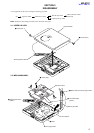
GENERAL
This section is extracted from
instruction manual.
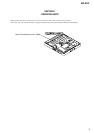
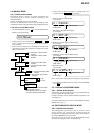
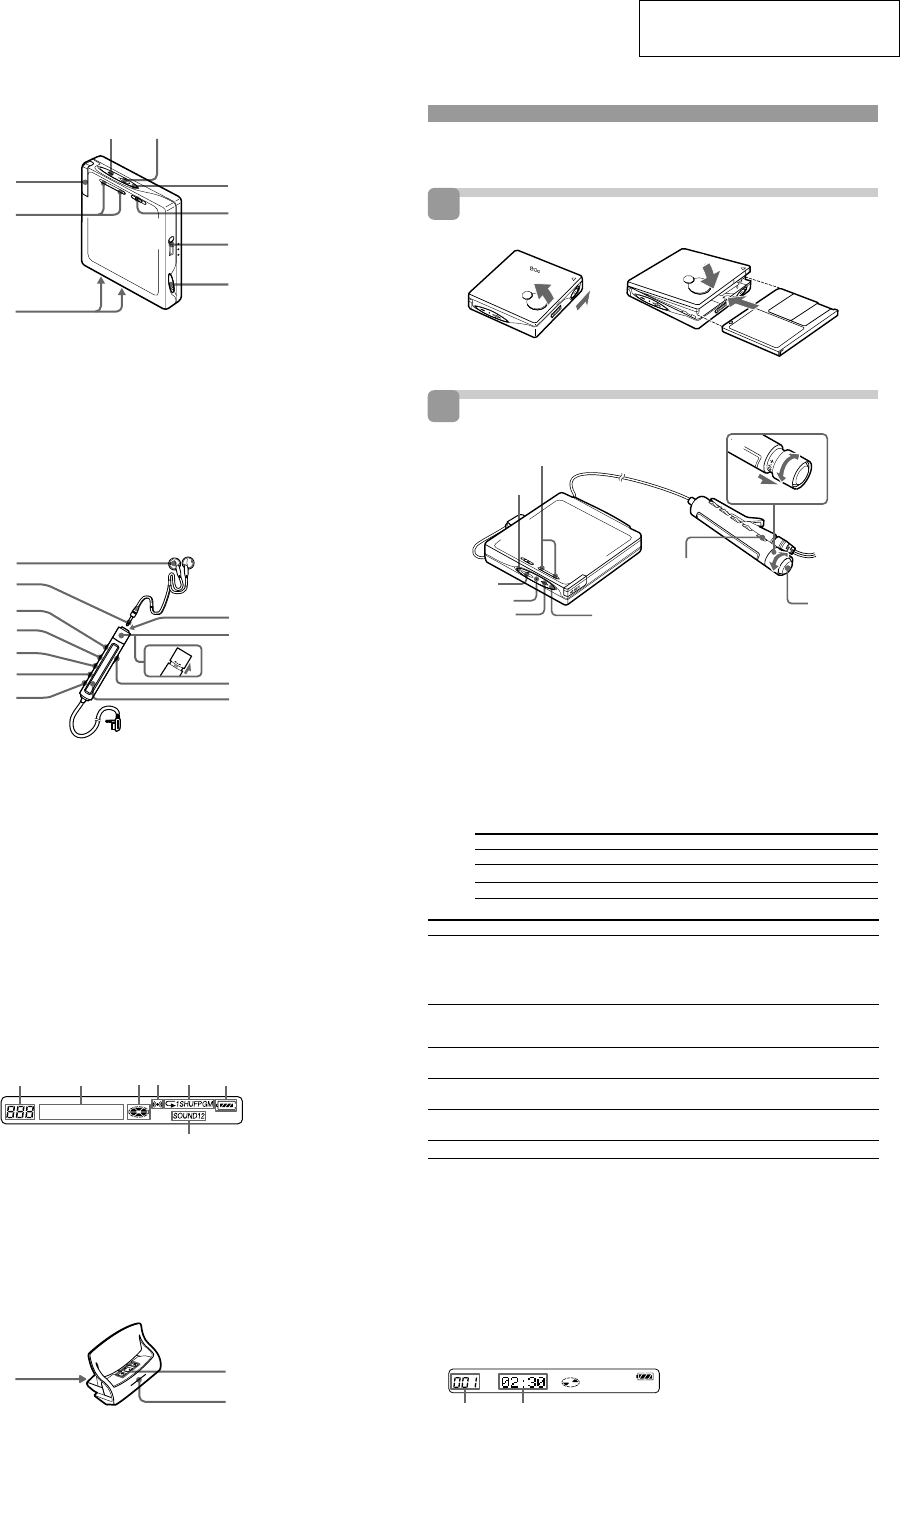
The Player
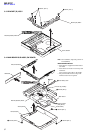
1
9
7
F
E
C
D
2
8
1 ./x/
> N
button
2 3 Color Info-LED
3 GROUP button
4 HOLD (Locking the control) switch
5 i (earphones) jack
6 OPEN switch
7 Terminals for charging stand/
dry battery case (at the bottom)
8 VOL +/– button
9 Battery compartment
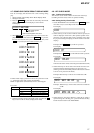
The earphones with a remote
control
J
+
–
H
I
K
D
A
L
F
B
E
G
C
1 Headphones/earphones
2 Stereo mini plug
3 X (pause) button
4 SOUND button
5 RPT/ENT (Repeat/Enter) button
6 PLAYMODE button
7 DISPLAY button
8 x (stop) button*
9 Control (./
N>
)
q; Control VOL +/–
Pull and turn to adjust the volume.
qa HOLD (Locking the control) switch
qs Display window
* The stop button also operates as the enter
button, depending on the function.
The display window of the remote
control
F
G
ABCDE
1 Track number display
2 Charactor information display
3 Disc indication
4 Alarm indication
5 Play mode indication
6 Battery level indication
7 SOUND indication
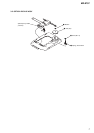
The battery charging stand
B
A
C
1 Terminals for charging
2 CHARGE lamp
3 DC IN (3V jack) (at the rear)
To
Find the beginning of
the current track or
the previous track
3)
Find the beginning
of the next track
4)
Go backwards
while playing
Go forward
while playing
Pause
Remove the MD
2)
You can turn off the beep sound. For more details, see “Turning off the beep sound.”
3)
If you turn the control towards
.
on the remote control (or press
.
on the player) during the
first track of the disc, the player goes to the beginning of the last track on the disc.
4)
If you turn the control towards N> on the remote control (or press > N on the player) during
the last track of the disc, the player goes to the beginning of the first track on the disc.
5)
If you open the lid, the playback will begin from the beginning of the first track (except when disc
information is stored to the personal disc memory or when group mode is on).
z
The MZ-E707 supports the newly developed DSP TYPE-R for ATRAC.
It thus allows you to enjoy TYPE-R high-quality sound from MDs recorded in SP stereo on TYPE-R-
equipped MD decks, etc.
Note
When removing the disc, make sure to press x first, and then slide OPEN.
Viewing the display window of the remote control
Track number Track name
6)
or elapsed time of the track
6)
Appears only with MDs that have been electronically labeled.
z
• The player can play the track recorded by 2 × or 4 × long playing mode (LP2 or LP4). Normal stereo
playback, LP2 stereo playback, LP4 stereo playback or monaural playback is automatically selected to
match the audio source.
• The display on the remote control will turn off shortly after you press x.
Do this (Beeps
2)
in the headphones)
Turn the control towards . on the remote control once
(three short beeps). (Or press . on the player once.)
Turn the control towards . on the remote control repeatedly
(continuous three short beeps). (Or press . on the player
repeatedly.)
Turn the control towards N> on the remote control (two
short beeps).
Press > N on the player once.
Turn and hold the control towards
.
on the remote control.
Hold down . on the player.
Turn and hold the control towards N> on the remote control.
Hold down > N on the player.
Press X on the remote control (continuous short beeps).
Press X on the remote control again to resume play.
Press x, and then slide OPEN.
5)
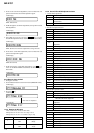
Playing an MD
Insert an MD.
1
2
3
Play an MD.
2
> N
.
VOLUME +/–
GROUP
x
x
X
1N>
VOL+
VOL–
.
1 Turn the control towards N> on the remote control (or press > N
on the player) to play the disc.
A short beep sounds in the headphones/earphones when using the remote control.
The LED flashes and then lights up.
2 Pull and turn VOL +/– on the remote control (or press VOLUME +/– on the
player) to adjust the volume.
The volume indicator appears in the display, allowing you to check the
volume level. After you adjust the volume, push back the control.
To stop play, press x.
Playback starts from the point you last stopped playing. To start playback from the
beginning of the disc, turn and hold the control towards N> on the remote control
(or hold down > N on the player) for 2 seconds or more.
1)
The LED indicates the current operating status by the lighting up in the following colors.
When the battery power is exhausted, the LED starts flashing. For more details, see
“When to replace or recharge the battery.”
LED color Operating status
Red Normal play (The LED lights up continuously)
Green Group mode* (The LED lights up continuously)
Orange Group skip mode* (The LED lights for about 5 seconds)
*For more details, see “Using the group function.”
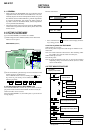
1
2
Insert an MD with the lable side facing up, pushing the
MD to the direction of the arrow in the illustration.
1 Slide OPEN to open the lid. 2 Insert an MD. 3 Close the lid.
3 Color Info-LED
1)