Setting the clip or playlist to autoplay and view clip info
NOTE: • The player must be correctly configured for the clip or playlist that you select
using the Setup > Video > Mode dialog box submenu, or else the player
does not load the selected clip or playlist.
• If you cannot get a clip to load, See “Setting the clip or playlist to
autoplay and view clip info“ to view the properties of the clip, which can
help reveal the problem.
• This page lets you set a clip file to autoplay only. To view and clear an
autoplay selection, use the Autoplay Setup Dialog Box.
• If you load a new clip with a different resolution and frame rate than the
currently loaded clip, it can take up to 4 seconds before it is ready to play.
The autoplay feature sets a specified clip or playlist to automatically start playing for
channel 1 or channel 2 whenever the media player powers up and has loaded its operating
system. Enable a clip or playlist to autoplay as follows:
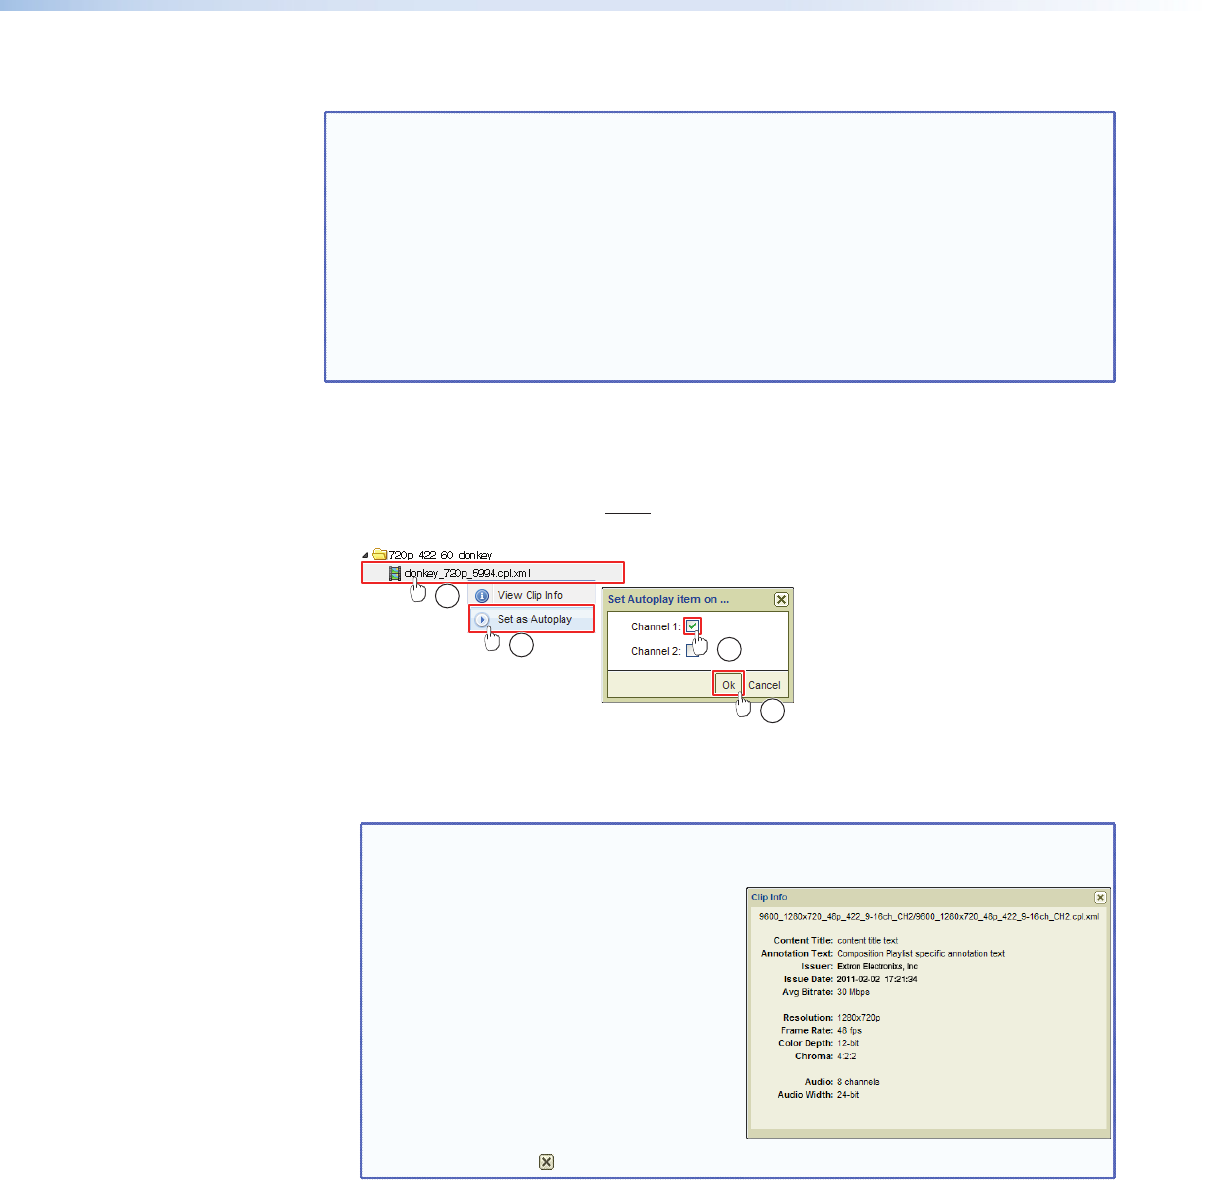
1. In the Media Browser panel, right-click the file that you want to autoplay (see
a
in
figure 39). A dialog box appears.
1
2
3
4
Figure 39. Loading a Clip or Playlist
2. Click Set as Autoplay (
b
). The Set Autoplay dialog box appears.
NOTE: Alternatively, you can click View Clip Info to open a dialog box that
shows details of the file, including:
• The file name
• The issuer (creator)
• The issue (creation) date
• The bit rate
• The resolution and frame rate
• The color depth
• The chroma subsampling rate
• The number of audio channels
• The audio width
Click the to close the View Clip Info dialog box.
3. Select either the Channel 1 or Channel 2 check box (
c
).
4. Click the Ok button (
d
).
JMP 9600 Media Player • HTML Operation 42


