79
Enjoying images on your computer
Connecting the camera to
your computer
a Turn on your computer.
b Insert the “Memory Stick Duo”
with the images you want to
copy into the camera.
• For further details on the “Memory Stick Duo,”
see page 19.
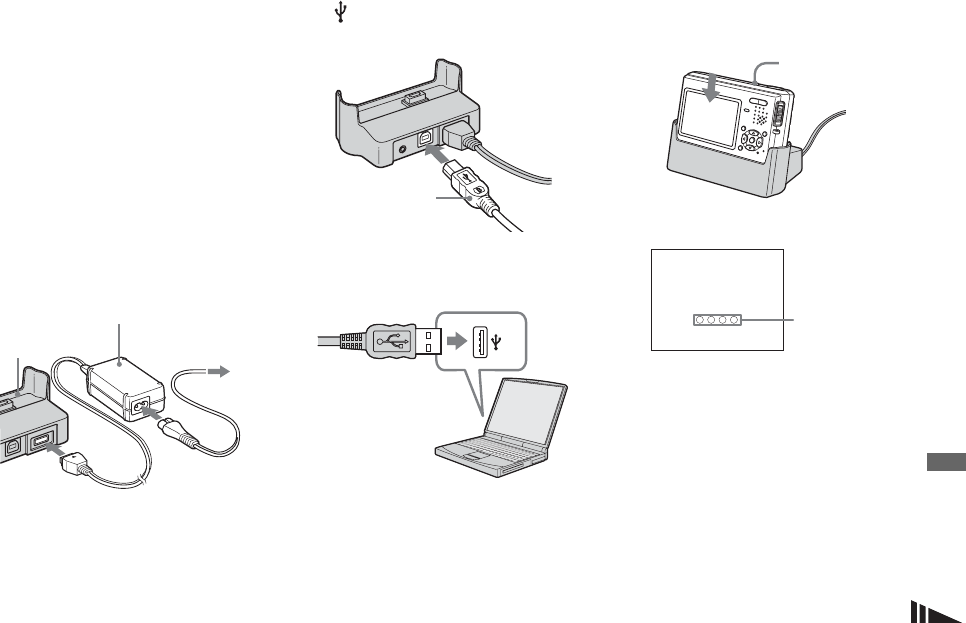
c Connect the USB cradle
(supplied) and the AC Adaptor
(supplied), and plug the
adaptor into a wall outlet (wall
socket).
• When you copy images to your computer using
the battery pack, copying may be failed or
cause data corruption by battery shutoff. We
recommend that you use the AC Adaptor.
d Connect the USB cable to the
(USB) jack of the USB
cradle.
e Connect the USB cable to your
computer.
• When you use a desktop computer, we
recommend that you connect the USB cable to
the USB connector on the rear panel.
• When using Windows XP, the AutoPlay wizard
automatically appears on the desktop. Proceed
to page 82.
f Connect the camera to the
USB cradle and turn on the
camera.
• Make sure the camera is securely connected to
the USB cradle.
“USB Mode Normal” appears on the
LCD screen of the camera. When a
USB connection is established for the
first time, your computer automatically
runs the used program to recognize the
camera. Wait for a while.
* During communication, the access
indicators turn red.
• If “USB Mode Normal” does not appear in step
6, confirm that [USB Connect] is set to
[Normal] on the Setup screen (page 107).
• Do not remove the camera from the USB
cradle during USB connection, as the
image data may be destroyed. To end
the USB connection, see the note P on
page 80.
1
2
AC Adaptor
To a wall outlet
(wall socket)
USB cradle
USB cable
POWER
USB Mode
Normal
Access
indicators*


