


9
Instruction Manual
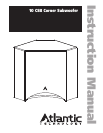
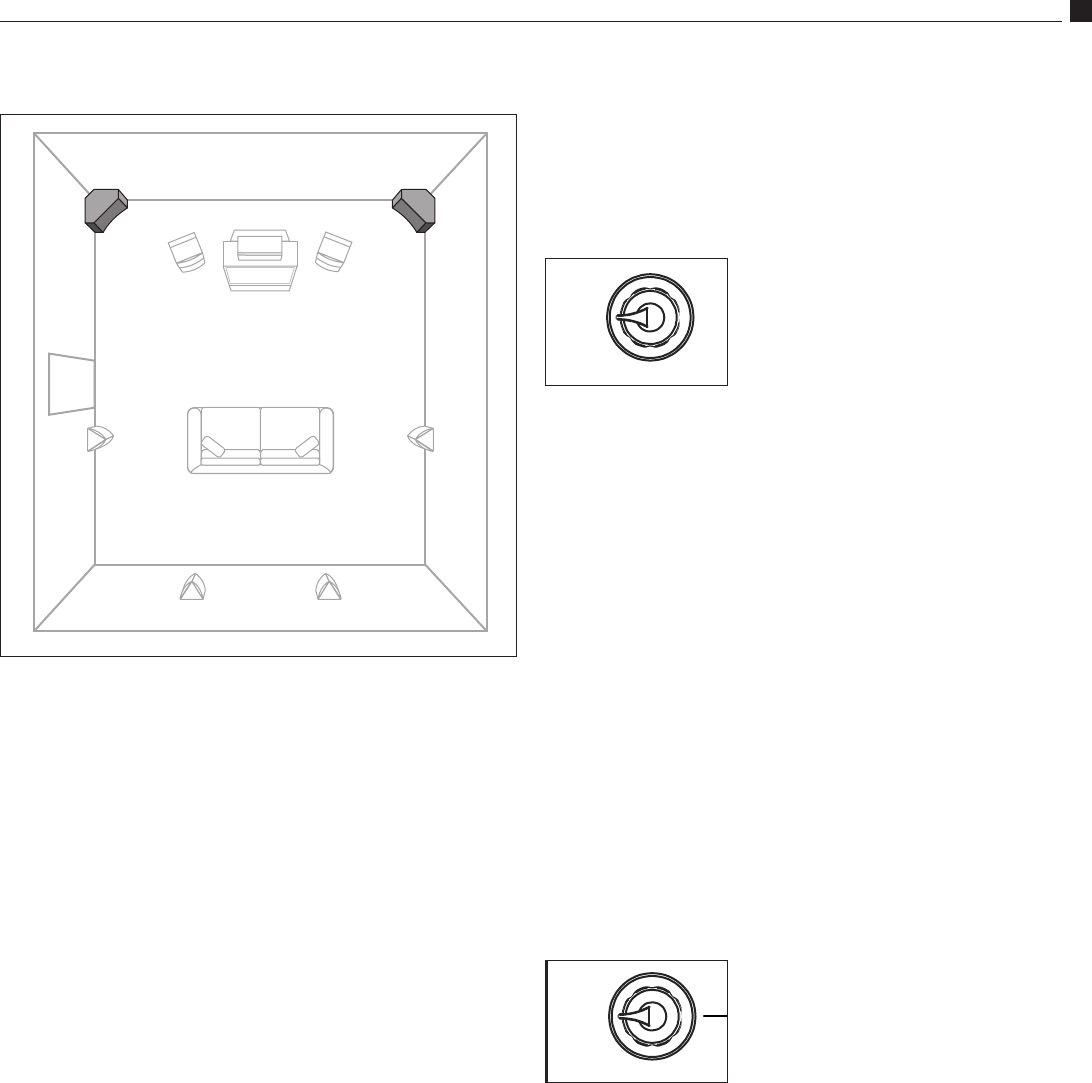
Placement
Place the subwoofer in the corner of the room flush up against the walls,
as shown. You will still obtain perfectly acceptable results even if there is a
2 or 3-inch distance between the subwoofer cabinet and the walls because
of decorative baseboard wall molding or other obstruction.
If using a single sub, either front corner is usable, however, try to avoid
placement next to an open doorway, as this may cause excessive loss of
bass energy. Also, try to avoid placement against a heater. The high tem
-
peratures may trigger the sub's protective circuitry resulting in tempo
-
rary loss of output. Extreme high temperatures may result in damage
to the sub.
System Initial Set Up
When setting up a complete home theater we strongly recommend that
you use a Sound Pressure Level meter. Radio Shack® has a good one
that is very affordably priced (approximately $40-50). To use this meter,
turn on your system, put the Processor/Receiver in the Test Mode and
set its main volume control to 0dB. Sit in the prime listening position, set
the SPL meter to the 70dB scale, Slow Response, and C Weighting. Now,
holding the meter pointed up and in front of you, let the system cycle
its test tone from speaker to speaker and set every speaker to the same
level, typically 75dB, using the individual level settings in the Processor/
Receiver. As tempting as it may be to set the subwoofer and/or surround
speakers higher than 75dB, listen again after calibration and see if you
can acclimate to these levels. Try watching several different movies and
keep in mind that the goal is to have a system that sounds like you’re
actually “in the movie.”
For the subwoofer, begin with the processor's calibration set to zero, and
use the level control on the rear panel of the sub to make this adjustment.
If you decide not to use an SPL meter try to set all the speaker levels the
same using the Test Tones. Of course, this will be more difficult without
the meter, especially for the subwoofer.
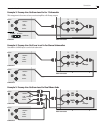
Subwoofer Tuning Without an SPL Meter
or Test Tones
Start by listening with the subwoofer Cross-
over control set at around 100Hz (mid-
point) or in the Bypass position if you’re
using a THX Certified processor or unit with
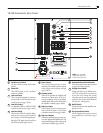
a built-in crossover. Set the phase control to
0º, and the Variable Level Control (Figure
6) to the minimum position. Play some music that you know has good
bass content, and turn the level control up until you just start to hear the
subwoofer working. Now, from your normal listening position, deter
-
mine whether the subwoofer is playing loudly enough and filling in the
bass frequencies of the music evenly. If adjustment is necessary, start
by changing the setting in the processor or with the level control if your
processor lacks a subwoofer level adjustment.
As you listen, adjust the phase control for image "solidity" during those
frequencies/musical notes which are shared with the satellites.
How Much is Enough?
Sometimes people prefer more bass impact for movies, but using this
setting for music can result in overpowering and unnatural bass repro
-
duction. You may wish to determine both a video level and an audio level
if you find yourself falling into this camp. Remember however, the most
common error people make when setting up their system is to play the
subwoofer (and surrounds) too loudly. Of course, the Home Theater
Police will not arrest you for this act. But should you desire the most
accurate overall reproduction, a well balanced sound from lowest bass to
highest treble is the best way to get it. Have fun. Experiment. Enjoy.
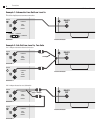
Using the Low Pass Frequency Crossover Control
The Phase Control and Low Pass Frequency
Control work together to define the behav
-
ior of the subwoofer in the frequency range
where the sub and satellites play simulta
-
neously.
The goal is to optimize the performance of the system by ensuring that
the subwoofer and satellites produce a cohesive and well integrated
sound “picture.”
Most surround sound receivers and processors offer a choice of several
crossover frequencies, typically between 80 Hz and 120 Hz. If yours does,
we recommend using the 100Hz setting when using small speakers such
as those in the System 1200 or 2200. Consult your electronics owner's
manual for more details.
Higher crossover frequencies pass more signals to the sub, but can sound
boomy and may be more easily localized to the subwoofer. Higher cross
-
over frequencies may be suitable, however, when using very small satel
-
lites that have no real low frequency performance. Settings lower than
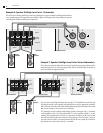
RIGHT
+
-
L/MONO
-
+
OUTPUT
HIGH
LEVEL
INPUT
STDBY
RIGHT
L/MONO
LOW
LEVEL
LOWPASS
BYPASS
AUTOOFF ON
NORMAL
1800
FREQ
PHASE
LEVEL
16050
MAXMIN
STATUS
220-240V
RISK OF ELECTRIC SHOCK
DO NOT OPEN
110-120V
POWER
CAUTION
WARNING
ON OFF
TO REDUCE THE RISK OF FIRE OR ELECTRIC SHOCK, DO NOT EXPOSE
THIS APPLICANCE TO RAIN OR MOISTURE. NO USER SERVICEABLE
PARTS INSIDE. REFER SERVICING TO QUALIFIED SERVICE PERSONNEL
WARNING: SHOCK HAZARD-DO NOT OPEN
AVIS:RISQUE DE CHOC ELECTRIQUE-NE PAS OUVRIR
FUSE 115,T2AL/250V
FUST 230V,T1.25AL/250V
110-120VAC~60Hz
220-240VAC~50Hz
180WATTS
RIGHT
+
-
L/MONO
-
+
OUTPUT
HIGH
LEVEL
INPUT
STDBY
RIGHT
L/MONO
LOW
LEVEL
LOWPASS
BYPASS
AUTOOFF ON
NORMAL
1800
FREQ
PHASE
LEVEL
16050
MAXMIN
STATUS
220-240V
RISK OF ELECTRIC SHOCK
DO NOT OPEN
110-120V
POWER
CAUTION
WARNING
ON OFF
TO REDUCE THE RISK OF FIRE OR ELECTRIC SHOCK, DO NOT EXPOSE
THIS APPLICANCE TO RAIN OR MOISTURE. NO USER SERVICEABLE
PARTS INSIDE. REFER SERVICING TO QUALIFIED SERVICE PERSONNEL
WARNING: SHOCK HAZARD-DO NOT OPEN
AVIS:RISQUE DE CHOC ELECTRIQUE-NE PAS OUVRIR
FUSE 115,T2AL/250V
FUST 230V,T1.25AL/250V
110-120VAC~60Hz
220-240VAC~50Hz
180WATTS
Placement