


30 VRX925VD
English
Owner’s manual
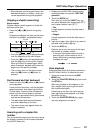
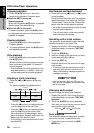
The relationship between DVD video category
codes and parental level are shown in the table
below. Use this table when setting the parental
level.
DVD Video Player Operations
WARNING
• Videos may be played back with particu-
larly loud sound. Increase the volume
gradually from the minimum after the
video images are displayed.
• For your safety, the driver should not
watch the video or operate the controls
while driving. Please note that watching
and operating the video while driving are
prohibited by law in some countries.
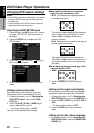
Watching/Listening to a disc
already inserted
1. Press the [FUNC] button to select the DVD
mode. Play starts automatically. If no disc is
loaded in the unit, “NO DISC” appears in the
display.
Notes:
• For your safety, the VRX925VD has a safety func-
tion which turns off the picture when the car is
moving, so only the audio can be heard. The pic-
ture can only be watched when the car is stopped
and the parking break is applied.
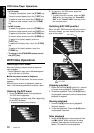
Pausing play
1. Press the [s] button to pause play.
“PAUSE” appears in the display.
2. To resume disc play, press the [s] button
again.
• The contents that the parental level re-
stricts varies with the country code.
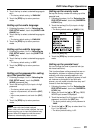
Setting up the output mode for
audio signals
∗ This function is not displayed on the menu when
the Multiple Channel Processor (DVH920, sold
separately) is CeNET connected.
1. Following the steps 1 to 3 in “Selecting the
DVD SETUP menu”, touch the [AUDIO
OUTPUT] key.
2. Touch the [ANALOG], [DIGITAL RAW] or
[DIGITAL PCM] key to select a desired mode
to set it.
∗ The factory default setting is “ANALOG”.
●ANALOG:
Outputs analog audio signals through RCA con-
nection.
●DIGITAL RAW:
Outputs 5.1ch digital signals through optical
connection. PCM audio signals are output
downsampling the signal from 96 kHz to the
lower sampling rate, 48 kHz.
●DIGITAL PCM:
Outputs 2ch digital signals through optical con-
nection. PCM audio signals are output
downsampling the signal from 96 kHz to the
lower sampling rate, 48 kHz.
3. Touch the [RTN] key to return previous
mode.
NC-17
(NO ONE 17 AND UNDER ADMITTED)
R
(RESTRICTED)
PG-13
(PARENTS STRONGLY CAUTIONED)
PG
(PARENTAL GUIDANCE SUGGESTED)
G
(GENERAL AUDIENCES)
LEVEL7
LEVEL6
LEVEL4
LEVEL3
LEVEL1
Basic Operations
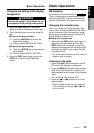
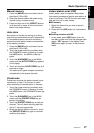
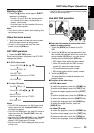
Loading a disc
Insert a disc into the centre of the insertion slot
with the label side facing up. The disc plays au-
tomatically after loading.
Notes:
• Never insert foreign objects into the disc insertion
slot.
• If the disc is not inserted easily, there may be an-
other disc in the mechanism or the unit may re-
quire service.
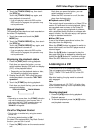
Loading 8 cm discs
∗ No adapter is required to play an 8 cm disc.
∗ Insert the 8 cm disc into the centre of the inser-
tion slot.
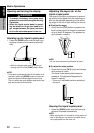
With the screen open, a driver may not see the
disc insertion slot. For your safety, insert a disc
with the screen closed.
CAUTION