


16 HX-D2
English
Selecting the sampling frequency
(SAMPLING)
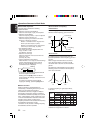
●About the sampling frequency
You can switch between 96 kHz and 48 kHz as
the sampling frequency.
When the sampling frequency is set to 96 kHz,
high band spread, depth of tones and
transparency of sound are improved.
∗ The factory default setting is "fs=96 kHz".
1. Press the [ADJ] button.
2. Press the [ ] or [ ] button to select
"SAMPLING".
3. Press the [ ] or [ ] button to select
"fs=96kHz" or "NORMAL" (fs=48kHz).
4. Press the [ADJ] button to return to the
previous mode.
Selecting the audio mode (MODE)
∗ The factory default setting is "STANDARD".
●Standard mode <STANDARD>/Multi mode
<MULTI>
This is used to make various sound adjustments
for playback. For details, see "About the
Standard mode and Multi mode" (page 18)
●Direct mode <DIRECT>
This is used to playback tones as they are
without adjusting the tones of this unit. The
configuration of the speaker system becomes
"front (2ch) + rear (2ch) + non-fader (2ch)."
1. Press the [ADJ] button.
2. Press the [ ] or [ ] button to select
"MODE".
3. Press the [ ] or [ ] button to select
"STANDARD", "DIRECT" or "MULTI".
4. Press the [ADJ] button to return to the
previous mode.
Setting the clock
This unit displays the time when the car engine
is running (ACC ON).
The clock is displayed in 12-hour format.
• When a navigation system is connected, the
clock cannot be adjusted as clock data is sent
from the navigation system.
1. Press the [ADJ] button. The previously
adjusted item "CLOCK", for example, is
displayed on the title display, and the mode
changes to the Adjust mode.
2. Press the [ ] or [ ] button to select
"CLOCK".
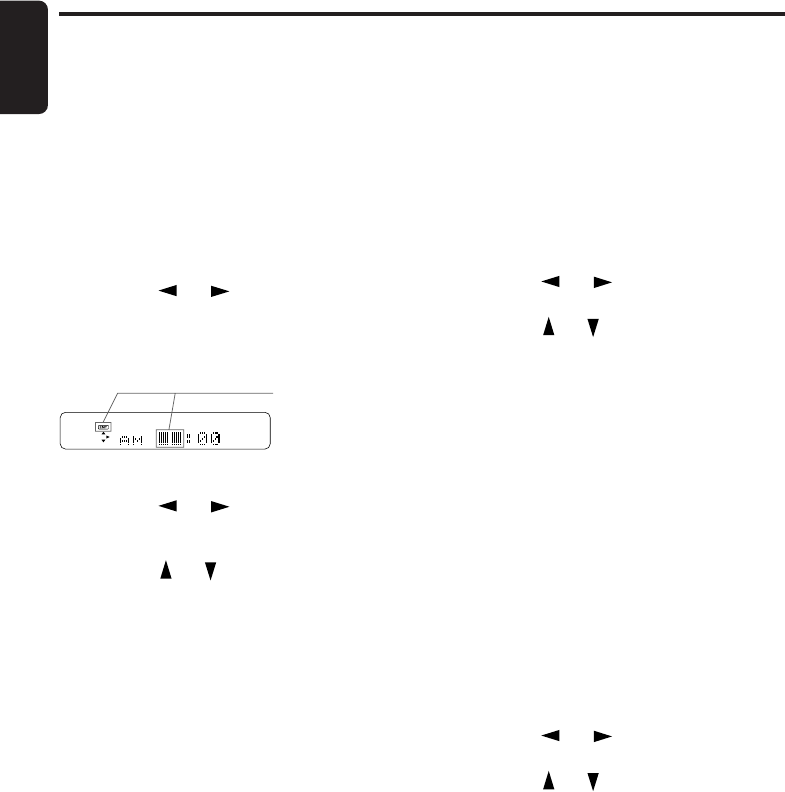
3. Press the [s] button. The time at
adjustment (e.g. "PM 2:20") is displayed, and
the mode changes to the Clock setup mode.
* The clock is not adjusted if you press any
other button while you are setting the clock.
4. Press the [ ] or [ ] button to select hours
or minutes. Items that are blinking can be
adjusted.
5. Press the [ ] or [ ] button to set the setting
for the item.
6. Press the [s] button.
You will hear a short high-pitched sound, and
the clock will be set.
Note:
• You cannot set the clock when it is displayed with
the power turned OFF.
• Set the clock again if you remove the battery for
inspection or repairs.
7. Press the [ADJ] button to return to the
previous mode.
Operations Common to Each Mode
Blinking