


11
© 2002 Directed Electronics, Inc.
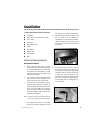
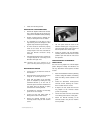
4. Install the mounting bracket.
ROUTING THE CABLES AND WIRES
1. Remove the negative terminal from the bat-
tery or remove the fuses for any circuits nec-
essary for this installation before proceeding.
2. Remove any body panels or brackets nec-
essary for routing the wires and cables.
3. It is important to run the wires in such a
way that they cannot be damaged or chafe
against sharp metal during reassembly.
4. All wires should be loomed and properly
fused at the source. Be sure to leave
enough length in the wires and cables to
reach the OHC100 connectors during
mounting.
5. Extend the dome light wires if necessary to
a length adequate for connecting to the
OHC100's dome light wires.
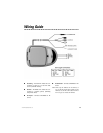
NOTE: Information about wiring connections can be
found in the Wiring Guide section of this manual.
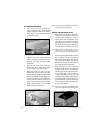
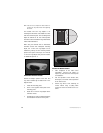
MOUNTING THE OHC100
1. Cut the trim ring to match the contour of
the headliner.
2. Attach the video console to the trim panel
using the 11--2.6 mm tape screws.
3. Check that the depths of the mounting
posts are adequate by holding the fully
assembled OHC100 up to the roof. It
should be spaced so that the headliner will
not distort when the OHC100 is tightly
screwed to the mounting bracket.
4. If adjustment is necessary, the mounting
posts can be cut to length.
5. Connect all wires and cables. Refer to
Wiring Guide section of this manual.
6. Attach the OHC100 assembly to the
mounting bracket using the four machine
screws.
7. The trim panel should be flush to the
headliner without gaps. If any gaps occur,
adjust the length of the spacers and/or cut
the trim panel to the correct shape.
8. Install the monitor into the detachable
mounting bracket and fold into the closed
position. Open and close the unit to test
the operation.
VEHICLE-SPECIFIC AFTERMARKET
INSTALLATION
The mini trim ring adapter has a raised adapter
portion designed to adapt the OHC100 to fit
into any aftermarket vehicle-specific overhead
console.
1. Follow the Installation Procedures (Mounting
Location, Cutting the Headliner, and Routing
Cables and Wires) section outlined in this
guide.
2. Install the aftermarket vehicle-specific
overhead console following the instruc-
tions included with the console.
3. If depth is an issue, attach the mini trim
ring adapter to the overhead console
(screws not provided).
4. Connect the cables and wires as described
in the Wiring Guide section of this guide.
5. Attach the OHC100 assembly to the
overhead console using the four machine
screws provided.