


9
© 2002 Directed Electronics, Inc.
TOOLS AND MATERIALS NEEDED
■
Screwdriver
■
Power drill with drill bits and screw tip
■
Awl or scribe
■
Razor knife
■
Digital Multi-meter
■
Marker
■
Tape Measure
■
Masking Tape
■
Fabric Cleaner
■
Wire
INSTALLATION PROCEDURE
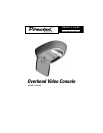
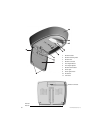
MOUNTING LOCATION
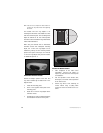
1. Discuss with the vehicle owner a location
in the vehicle that will allow viewing from
the rear passenger seats but not be visible
to the driver. The best location is usually
slightly to the rear of the front seats in the
area of the dome light.
2. Ensure that the chosen mounting location
will not hinder vehicle operation or the
driver’s view to the rear of the vehicle.
3. Access the rear of the headliner (remove
the dome light assembly if necessary) to
locate any obstructions. At this time check
for and move any hidden wires, brackets,
hoses or vehicle electronic components
above the headliner that could be dam-
aged during installation.
NOTE: At this time, locate any roof support brackets that
can be used for supporting the mounting bracket.
4. The headliner area chosen for mounting
should be the flattest possible to reduce
the amount of cutting required to fit the
trim panel to the contour of the headliner.
5. After choosing the optimum location, hold
the trim panel up to the headliner to
approximate the final mounting location,
mark the headliner at the center point of
the trim panel from the front to the rear of
the vehicle.
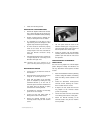
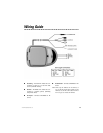
6. Measure from either side of the vehicle to
the previously marked center point to find
the center point from left to right of the
vehicle and mark it. This will be the point
at which the cutout template will be
positioned for cutting the headliner. Make
sure it is in a location that will allow the
four mounting posts to solidly attach to
the vehicle roof.
Installation