


1110
DEMO ON/OFF
Demo mode is activated when the unit is first connected to
the vehicle, but is de-avtivated when the Power Button is
pressed. It can, however, be activated again by pressing the
Power Button. To stop this feature, set Demo Mode to off.
COL0UR
This unit is equipped with a 32K+ RGB variable colour
display. By rotating the Encoder Volume Control, you
can select the system colour from the following options:
COLOUR SCAN (default setting); WHITE; GREEN 1; GREEN
2; GREEN 3; AMBER; PINK 1; PINK 2; PURPLE 1; PURPLE
2; BLUE 1; BLUE 2; USER; ORANGE
USER (USER SELECTED COLOUR):
This allows you to select your choice of display colour from
over 32,000 combinations (32K+). When you select USER
in the colour menu, press the Encoder Volume Control to
then rotate to select the intensity or Red, Green & Blue
(from between 0 and 32) to make your own custom colour.
To switch between R (Red), G (Green) and B (Blue) setting
modes, push the TUNE UP button
Press ESC/RGB button once you have completed
your selection.
RADIO OPERATION
TUNE INTO A RADIO STATION
1. Press the SOURCE button repeatedly until [RADIO] is
displayed on the LCD screen.
2. Select your preferred listening Band (FM or AM) by pressing
BAND . There are 3 FM Bands [FM1] [FM2] [FM3] and 2 AM
Bands [AM1] [AM2]. These multiple Bands allow you to store up to
18 FM stations & 12 AM stations in memory (see below).
3. To search for a radio station, press either the TUNE UP or
DOWN buttons to search for the next station higher than
the current station frequency or lower than the current frequency.
4. To Manually tune to a radio station, press and hold either the
TUNE UP or DOWN button until the tuner frequency on
the LCD display starts flashing. You can then release the TUNE
UP or DOWN button, and press it again repeatedly until you select
your desired frequency. After 5 seconds, the display will stop
flashing and the unit will be tuned in to that station.
HOW TO STORE YOUR FAVOURITE STATIONS
1. Select you preferred Band. Generally you would use FM1 or AM1
to save you favourite stations (6 stations per band). If you need to
store more stations, you can use FM2/3 or AM2 for AM stations.
2. Tune in to your preferred station as per the steps above
3. Press and hold one of the Preset Station Buttons (1-6) for 2
seconds to store the station. The preset number and [SAVED] will
be dislayed on the LCD screen.
TUNE TO A SAVED or PRE-SET STATION
1. Select the relevant BAND
2. Press the Preset Station Number corresponding to your
required Pre-Set station.
RDS OPERATION
The RDS (Radio Data System) function operates only in areas
with FM stations broadcasting RDS signals. If you tune to an RDS
station, an RDS icon and information about the presenter, station
or program is displayed.
This unit supports the following RDS features:
(PTY) SELECT PROGRAM TYPE
Before tuning to RDS stations, you can select program type and let
the unit search only for programs of the selected category.
Press the MENU button to enter the System Menu, press
ENTER again to confirm and select PTY type & search for that
style station. Please see a list of PTY Types & descriptions on P14:
(AF) SELECT ALTERNATE FREQUENCIES
If the radio signal from the current station is poor, you can turn
on the AF (Alternate Frequency) function to let the unit search
automatically for another station with a stronger signal but with
the same program identification as the current station.
(TA) RECEIVE TRAFFIC ANNOUNCEMENTS
If you do not want to miss a traffic announcement during music
playback, you can turn on the TA (Traffic Announcement) function.
TA ON: When there is a traffic announcement; the unit switches
to the tuner mode (regardless of the current mode) and begins to
broadcast the announcement on traffic conditions. When the traffic
announcement is over, the unit will return to the previous mode.
TA OFF Traffic announcement does not cut in.
(REG) REGION FOR AF TUNING
REG ON: Only stations in the current region will be tuned to
automatically.
REG OFF: All stations can be tuned to automatically
(CT) CLOCK TIME
Turn CT on to set the clock time using RDS data. Turn CT off to set
the clock time manually.
iPod/iPhone OPERATION
This unit is equipped with iPod/iPhone control which
allows you to directly control and charge iPod/iPhones
using the units controls – with display of iPod/iPhone track
information appearing on the unit’s LCD display.
Please read below for more detailed operation.
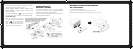
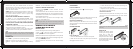
CONNECTING AN iPod OR iPhone
Insert the Apple Sync cable to the Front USB socket as
shown and the unit will start playing the iPod/iPhone
automatically
BASIC SEARCH – PLAYLIST/ARTIST/ALBUM/SONG on
iPod/iPhone
Press BAND to browse the iPod/iPhone menu.
Then rotate the Encoder Volume Control clockwise to and
press ENTER to choose one of the following selections,
then follow the steps below:
PLAYLIST Rotate the Encoder Volume control to select
your desired Playlist and press ENTER to start play.
ARTIST Rotate the Encoder Volume Control to select your
Apple sync cable
(not supplied)
2. Press the Preset Station Number corresponding
to your required Pre-Set station.
98
access the 32k+ variable colour setting mode. See Page 10
for more information
11. BAND/SEARCH
a) In Tuner mode, press this button to cycle through Bands:
FM1, FM2, FM3, AM1 (MW1) or AM2 (MW2).
b) In Media playback mode, press to access the folder / file
search mode.
c) In iPod/iPhone playback mode, press this button to
access the iPod/iPhone search functions.
12. MENU
Press to access the system menu. See Page 9 for menu
options.
13. TUNE UP/DOWN, FILE & TRACK UP/DOWN & FAST
FORWARD/BACK
a) TUNE UP/DOWN. In tuner mode, press this button to
Auto Seek to the next station or press and hold this button
to manually tune in to your desired station.
b) FILE & TRACK UP/DOWN. In CD or USB/SD media
playback mode, press these buttons to skip a chapter,
track or file.
c) FAST FORWARD/BACK. In USB/SD media playback
mode, press and hold momentarily to fast forward/rewind.
14. SOURCE BUTTON
Press the Source Button to cycle through the following
sources if available: Radio: CD: USB: SD: AUX
AUDIO FUNCTIONS
All Audio functions are easily accessable on the CA-ML600.
AUDIO MENU. Press the ENCODER VOLUME CONTROL
to access the Audio Menu mode. Then press ENTER or
TUNE UP to select the Audio Function to be adjusted,
then rotate the ENCODER VOLUME CONTROL to select
the desired setting. You can always return to the previous
Audio Function by pressing the TUNE DOWN button.
REMINDER
In the AUDIO MENU, or in any menu, you can quickly exit the menu
by pressing the ESC/RGB button
EBX ON/OFF: Turn ON or OFF the EBX (Encounter Bass
Xtender) Bass Boost.
BAS Adjust the Bass level between -7 to +7.
TRE Adjust the Treble level between -7 to +7.
BAL (Balance) Adjust the balance between the right and left
speakers from 12R (full right) to 12L (full left).
FAD (Fader) Adjust the fader between the front and rear
speakers from 12R (full rear) to 12L (full front).
(SUBWOOFER)
SW ON/OFF Turn On or Off the Subwoofer RCA output.
SW LPF Subwoofer low pass crossover: 80/120/160Hz
SWAM ON/OFF In AM mode, turn ON or OFF the Sub output.
NOTE
If the Subwoofer RCA output is set to “OFF”, then the SW LPF &
SWAM functions will not be displayed.
EQUALISER OPERATION
When you activate the Equaliser, the Pre-Set Equaliser settings
override your existing Bass, Midrange & Treble Settings.
Press the Equaliser button repeatedly to cycle through
the following pre-sets: FLAT->POP->USER->DANCE-
>ROCK->CLASSIC->JAZZ->VOCAL
To return to the Bass & Treble settings that were in use before
the EQ was selected, please select the USER setting.
SYSTEM MENU
Press (MENU) to access the System Menu and press
again to select the item be adjusted, then rotate Encoder
Volume Knob to select a value / option. To exit this menu at
any time, press the ESC/RGB button
STORE (Auto store)
While in Tuner mode, press the ENCODER VOLUME CONTROL
to activate Auto Store. The six strongest stations of the selected
band will be saved in the preset channels automatically
RDS ON/OFF
While in Tuner mode, this selection turns On or Off RDS.
RDS Functions are explained in more detail on Page 8. If
RDS is set to OFF, then the RDS Functions indicated below
with an * will not appear in the System Menu
PTY* (Program Type)
Press the ENCODER VOLUME CONTROL to enter program
type, then rotate the ENCODER VOLUME CONTROL to
select the category.
AF* ON/OFF
Turn On or Off the Alternate Frequencies function.
TA* ON/OFF
Turn On or Off the Traffic Announcement function.
REG* ON/OFF
Turn On or Off the Set Region for Alternate Frequencies function
CT* ON/OFF
Turn On or Off the CT function.
LOC* ON/OFF
(Local/Distance). Use this setting to Auto Seek to strong
local stations (Local) or all stations regardless of their
strength (Distance).
AREA
Select your country/region for the tuner:
OCEANIA (Australia/New Zealand); USA; EUROPE;
RUSSIA & press ESC/RGB to save.
CLK (Clock)
To set the clock, rotate the Encoder Volume Control to set
the hours (Note “A” or “P” will be displayed in the top-right
hand of the LCD display indicating AM or PM if the Clock
is in 12H mode – see below). Press the Encloder Volume
control to select “minutes” then rotate the control to set.
CLK 12H/24H (Clock Format)
Select the time format 12H or 24H
BEEP ON/OFF
Select On or Off to activate button confirmation beep tones.
repeatedly until [RADIO] is
: