


English
|
39
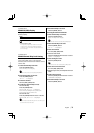
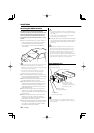
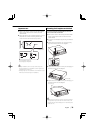
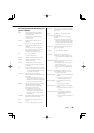
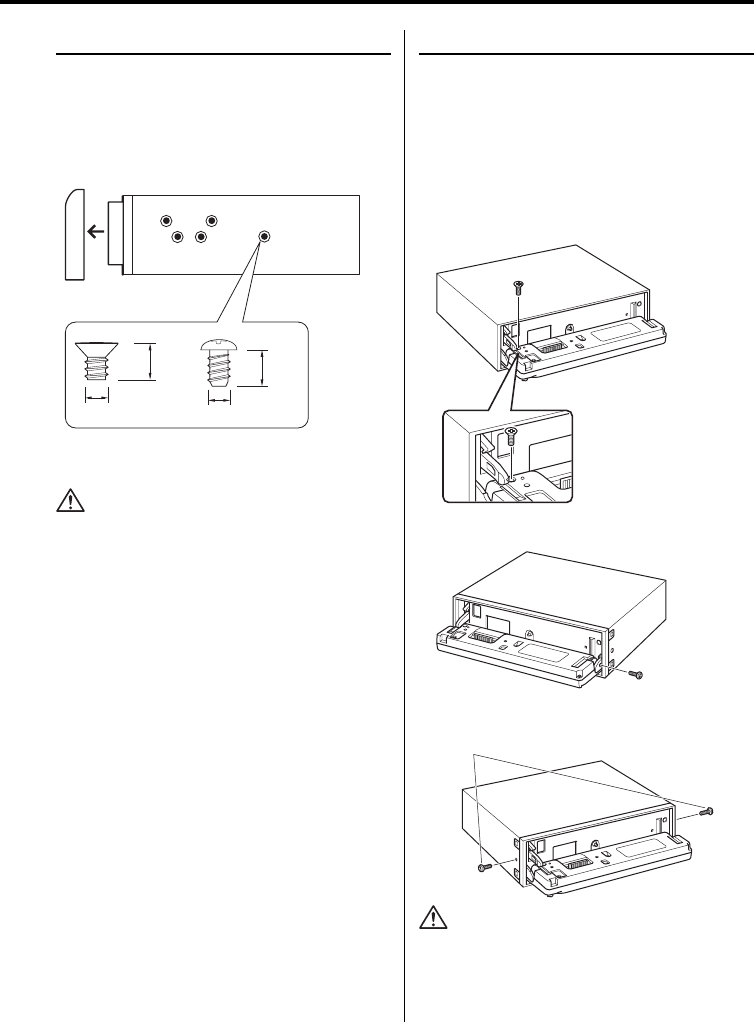
Screwing the Faceplate on the Unit
If you want to fasten the faceplate to the main
unit so that it does not fall off.
1 Refer to the section <Removing the hard rubber
frame> (page 40) and then remove the hard
rubber frame.
2 Drop open the faceplate by pressing the Release
button.
3 Tighten the screws (ø2.6 × 12 mm) (Accessory
5) in the holes shown on the diagram.
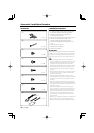
Accessory5
4 Tighten the screws (ø2 × 4 mm) (Accessory 6) in
the holes shown on the diagram.
Accessory6
5 Tighten the screws (ø2 × 6 mm) (Accessory 7) in
the holes shown on the diagram.
Accessory7
• Never insert the screws in any other screw hole than the
one specified. If you screw them in another hole, it will
contact and may cause damage to the mechanical parts
inside the unit.
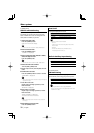
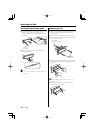
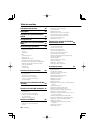
Japanese cars
1
Refer to the section <Removing the hard rubber
frame> (page 40) and then remove the hard
rubber frame.
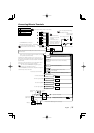
2 Align the holes in the unit (two locations on each
side) with the vehicle mounting bracket and
secure the unit with the accessory screws.
• During installation, do not use any screws except for
those provided. The use of different screws might result
in damage to the main unit.
• Damage may occur if a screwdriver or similar tool is used
with excessive force during the installations.
8 mm
MAX.
ø5mm
ø5mm
8mm
MAX.
T
N
T
N
T/N
T: Toyota cars
N: Nissan cars
Accessory3...for Nissan car
Accessory4 ...for Toyota car
3
4