15
How to Assign Preset Stations and Custom Names
10. Rotate the PRESET Knob clockwise again until
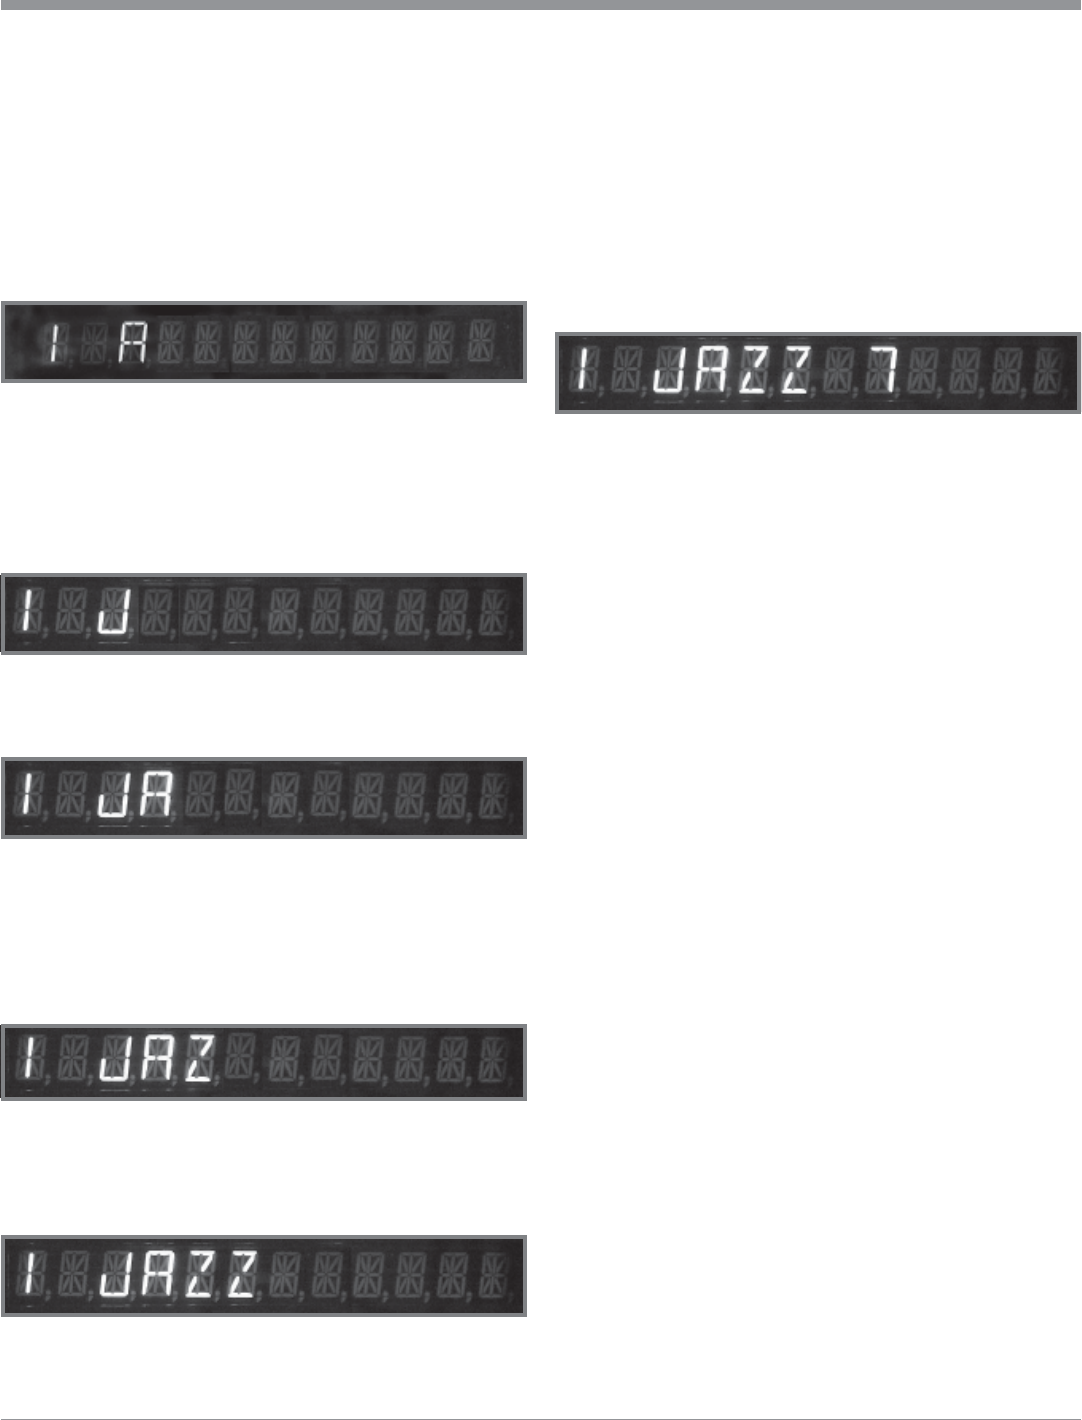
the “A” appears to the right of the “JAZZ”.
11. Rotate the TUNING Knob clockwise to scroll
through the alphabet until no character appears.
12. Rotate the PRESET Knob clockwise again until
the “A” appears to the right of the “JAZZ ”.
13. Rotate the TUNING Knob clockwise to scroll
through the alphabet and numbers until the “7”
digit appears. Refer to figure 12.
14. Press and release the front panel ENTER push-but-
ton a second time to store the newly assigned Pre-
set Name into memory; the LED above the EN-
TER push-button will turn Off and the assigned
Preset Name will appear on the Front Panel Dis-
play.
Note: If a Preset has been Custom Named, it is
possible to restore the default Station
Frequency Display if desired. Press the ENTER
Push-button once, then press and hold the
DISPLAY Push-button for 3 seconds.
push-button. The LED above the ENTER push-button
will light.
2. Select Station Preset Number 1, by rotating the PRE-
SET Knob clockwise or counterclockwise.
3. Push the DISPLAY Push-button and the Front Panel
Display of the Station Frequency (default) will be re-
placed by “1”, a blank space, and then a flashing “A”.
Refer to figure 7.
Note: The number 1 is the assigned Preset Number
followed by the first of eight possible characters of
the new Assigned Preset Name.
4. Rotate the TUNING Knob clockwise to scroll through
the alphabet until the character “J” appears. Refer to
figure 8.
5. Rotate the PRESET Knob clockwise until the “A” ap-
pears to the right of the “J”. Refer to figure 9.
6. Rotate the PRESET Knob clockwise again until the
“A” appears to the right of the “JA”.
7. Rotate the TUNING Knob clockwise to scroll through
the alphabet until the character “Z” appears. Refer to
figure 10.
8. Rotate the PRESET Knob clockwise again until the
“A” appears to the right of the “JAZ”.
9. Repeat step 7 and refer to figure 11.
Figure 7
Figure 8
Figure 9
Figure 11
Figure 12
Figure 10


